
Small mistakes sometimes, when we code, can cause different stylesheet or Css rules to coincide, or want to happen at the same time, thereby making it impossible for the browser to understand. This consequently gives unexpected output on the webpage – The reason why you are sure sometimes when you code, but unfortunately, your code output looks different from what you expect. And as a result, at some point, it is difficult to tell whether or not the fault is from you, your editor, or even the browser. In the course of writing code as a developer, dealing with these errors and unexpected behaviors in your code can be frustrating; and finding and correcting them can get more frustrating if they keep getting in the way of your work.
Css Specificity is an important concept which when followed properly, determines which style is applied to Html elements when multiple styles clash. To avoid, or reduce the above-said error challenges when writing code, it is important to understand how Specificity works.
The Role of Specificity in Resolving Css Conflicts
Css stylings before now, was done with basic selectors, such as element name (e.g. h2, div), and simple properties. It advanced later when more types of selectors, like, but not limited to Class (.className), and ID (#Id) selector were introduced. Together with these new selectors and their combination sometimes, styling became more complex and developers once-in-awhile faced challenges related to conflict of having Css rules clashing. The clash, when it happens, cause styles to element on the web page to be ineffective. To solve this issue, Css Specificity was introduced, and improved from time-to-time. Now with the understanding of the concept, developers can control and predict which styles would apply to elements based on selector’s specificity.
For beginners there are vital terms to know, to help understand this article. The terms below are used to illustrate Specificity. It is important to note them for better understanding of its concepts.
There are three methods of styling in Css: Internal, External, and Inline styling.
Internal styles: These are defined within a <style> tag placed in the <head> section of your HTML document. These styles apply to all elements within the same document.
<html>
<head>
<style>
h1 {
color: red;
font-size: 30px;
}
p {
font-family: Arial, sans-serif;
}
</style>
</head>
<body>
<h1>Internal Style Example</h1>
<p>This paragraph uses internal styles.</p>
</body>
</html>
Inline styles: are applied directly to an HTML element using the style attribute within the opening tag. This method is suitable for unique styles needed only for a single element. It’s generally not recommended for extensive styling due to code readability concerns.
<h1 style=“color: red; font-size: 30px;”>Inline Style Example (Inline)</h1>
<p style=“font-family: Arial, sans-serif;”>This paragraph uses inline styles.</p>
</body>
External styles: This method is the most recommended approach for larger websites or projects where you want to maintain consistent styles across multiple pages. It promotes code reusability and easier maintenance. The styles are defined in a separate CSS file (.css extension) linked to an HTML document using a tag in the <head> section. This CSS file can then style multiple HTML pages.
<head>
<link rel=”stylesheet” href=”style.css”>
</head>
Style.css:
color: red;
font-size: 30px;
}
p {
font-family: Arial, sans-serif;
}
What is a Selector?
A Selector tells which element in an HTML document is targeted based on their name, class, attribute, type, i.d, and more; making it possible for these elements to be styled and given different functionalities in different files, like Css and Js files. Commonly used types of Selector are:
Type Selector (Element Selector): This selector targets HTML elements based on element type or tag name. E.g. p targets all paragraph elements, <p>…</p> ; and a targets all anchor elements, <a>…</a> in the HTML documents, below. They are examples of type selector:
p {
color: blue;
text-transform: uppercase;
}
/* “a” type selector targets and styles all anchor elements */
a {
color: green;
text-decoration: none;
}
Universal Selector: Denoted with *. Unlike Type(Element) selector, Universal selector(*) selects all elements in the HTML document, and can style them in stylesheets. With the Universal Selector, all elements in an Html code can be targeted and styled, all at once.
Css:
*{
color: blue;
text-transform: lowercase;
}
Attribute Selector: This selector target elements based on their attributes and attribute values. They are enclosed within square brackets []. For example:
<html lang=“en”>
<head>
<meta charset=“UTF-8”>
<title>Attribute Selectors</title>
<style>
/* Style input elements with type “Email” */
input[type=“Email”] {
color: red;
text-transform: uppercase;
}
/* Style input elements with type “text” */
input[type=“text”] {
color: blue;
text-transform: capitalize;
}
/* Style links ending with “.com” */
a[href$=“.com”] {
text-transform: lowercase;
text-decoration: none; /* Remove underline */
}
/* Style links ending with “.org” */
a[href$=“.org”] {
text-transform: capitalize;
}
/* Style paragraphs with title containing “miles” */
p[title*=“miles”] {
color: red;
}
</style>
</head>
<body>
<h2>Input Examples</h2>
<input type=“Email” placeholder=“Enter your Email here..”>
<input type=“text” placeholder=“Write something here”>
<input type=“Email” placeholder=“Enter another Email here..”>
<input type=“text” placeholder=“Write here, again”>
<h2>Link Examples</h2>
<a href=“https://abcdef.com”>Lonely at the top!</a>
<a href=“https://abcdef.org”>It’s beautiful at the top!</a>
<h2>Paragraph Examples</h2>
<p title=“The journey of a thousand miles”>First paragraph</p>
<p title=“How far is it?”>Second paragraph</p>
<p title=“miles away”>Third paragraph</p>
</body>
</html>
The above examples show that CSS provides various operators that allow for matching of attribute values. Other operators and their usefulness are summarized, thus:
Equals (=): Matches elements with an exact attribute value (as shown above).
Not Equals (!=): Selects elements where the attribute value does not match the specified value.
Contains (~): Targets elements whose attribute value contains the specified word (anywhere within the value).
Starts With (^): Selects elements where the attribute value starts with the specified value.
Class Selector: This selector selects one or more element by referencing their class name. The class selector is a dot, ‘.’, followed by a class name. That is: .classname.
I.D Selector: An ID selector in CSS is used to target a specific element on a web page by referencing its unique identifier, the id attribute. Unlike class selectors, which can be applied to multiple elements, an ID attribute should be assigned only once within an HTML document. The selector is an #, followed by the i.d name; thus: #i.d name
<h2 class=“headings”>Heading 2</h2>
<h2 class=“headings”>Heading 3</h2>
</html>
Css:
color: red;
text-transform: uppercase;
}
.headings{
color: blue;
text-transform: lower;
}
Other types of selectors are summarized in the code below:
<html lang=“en”>
<head>
<meta charset=“UTF-8”>
<title>Css Styling</title>
<style>
/* Pseudo-element Selector – Targets placeholder of the input */
input::placeholder {
color: red;
}
/* Pseudo-class Selector – Affects the input border when clicked */
input:focus {
border: 1px solid red;
}
/* Pseudo-element Selector – Styles the first-line of the paragraph */
p::first-line {
color: green;
}
/* Group Selector – Targets all anchor elements and h2 */
a, h2 {
color: blue;
}
</style>
</head>
<body>
<input type=“email” placeholder=“Type your Email here..”>
<p>This is the first line of this paragraph. As styled in the stylesheet, only text in the first-line will be affected. Other text outside this first-line will not be affected.</p>
<a href=“#”>This is a link</a>
<a href=“#”>This is a link-2</a>
<h2>heading</h2>
</body>
</html>
Property: Property tells which visual aspect of the element or the selector that can be changed. It is everything on the Css stylesheet that can be given a value, and whose value can be altered.
p{
color: blue;
text-transform: lowercase;
font-size: 12px;
}
Other examples of property are: transition, height, background-color, border, border-radius, font-family, padding, margin, e.t.c.
Value: This is a piece of data that is assigned in a bid to style a Css property. Above, blue, lowercase, and 12px, assigned respectively to the properties, color, text-transform, and font-size, are examples of value.
Declarations:
A declaration combines a property with its corresponding value. It is written as property: value;, with a colon separating the property and value. Optional whitespace can be used around the colon and semicolon (;) for better readability.
Rule: Rule is a complete set of one or more declarations in Css stylesheets, that tells how an HTML element or group of elements should be styled. It consists of two parts: The Selector, and a declaration block({…}). In short, it is a combination of a selector and the declaration, or declarations in the declaration block.
Properties, Values, Declarations, and Rules are summarized below:
// A Css rule:
Selector {
Property1 : value1; // Declaration 1
Property2 : value2; //Declaration 2
}
In CSS, there are three sources for styles applied to an element on a webpage:
Browser (User Agent) Styles: These are the default styles applied by the web browser itself. These styles take effect when no author or user styles are defined for an element.
User Styles: These are styles defined by the user of the website, allowing them to customize their browsing experience. This can be done through browser extensions or user style sheets.
Author Styles: These are the styles defined by the website creator. They can be included in the HTML document itself using the <style> tag, or linked to an external .css file. Author styles are what give a website its unique look.
What is Specificity?
In simper term, Specificity is a ranking method that ranks based on hierarchy – the more weighted rules owning a selector with higher priority, or weight are considered instead of the lower ones, when compared by the browser. All of the above explained types of Css Selectors have different level of specificity, or rank. Below show shows the different types, starting from the one with the highest specificity, to the least:
ID Selectors (High specificity)
Class Selector, attribute selector, and Pseudo-class selector (All have same specificity – Medium specificity, less than ID Selector)
Type or element selector, and Pseudo-element Selector (Low specificity)
Universal Selector (Has no effect on specificity)
There are different rules of Css Specificity to follow in order to avoid unexpected outputs in cases where Css coincide.
Understanding Specificity Through Cascade
Specificity is one of the key instructions of Cascade that must be followed, to avoid unexpected output when styling an Html element. It is therefore improper to explain its concept, without at first discussing its relationship with Cascade, which is fundamental and important to understanding how styles are applied in Css.
Suppose your Html and Css code are as follow, where multiple Css rules are applied to an Html element at the same time. The first rule wants to give it a color, red, and the other rule wants blue. Both at the same time, on same element!
color: red;
}
p { /* Rule 2: Color: Blue */
color: blue;
}
The idea of the Cascade is like a waterfall, where styles flow down, with one affecting the one below. Styles are applied in a specific order, with later styles overriding earlier ones. This hierarchy helps ensure that styles are applied as intended. The term “Cascade” in CSS refers to the process by which the browser decides which styles to apply when there are conflicting rules. The Cascade follows these general principles:
Importance: Styles marked with !important take precedence over other styles.
Origin: Styles can come from the user agent (browser default), user styles, or author styles (those defined in the CSS by the web developer). Author styles generally take precedence over user agent styles unless the user has marked their styles as !important.
Specificity: More specific or weighted selectors take precedence over less specific ones.
Order: When selectors have the same specificity, the last one in the CSS file takes precedence.
In the code snippet above, we see two CSS rules targeting the <p> element, causing a conflict. By following Cascade principles, below is how this conflict is resolved:
In CSS, styles are assigned a weight based on their selector weight (specificity).
Rule 1: Selects all <p> elements (low specificity).
Rule 2: Also selects all <p> elements (low specificity).
Since both rules have the same specificity (low), the cascade moves on to the next principle. When styles have equal specificity, the order they appear in the CSS file matters. When selectors have the same specificity, the last one in the CSS file wins. Here, Rule 2 comes later in the stylesheet. Therefore, the final color applied to the paragraph will be blue, as defined in the second rule due to its later position in the cascade.
A Selector seen in the last position is not always considered first before others in Cascade. All Selectors involved in the conflict are first ranked, by comparing their respective weight level (specificity) before considering their order. That is, Specificity is checked first, before Order. For example:
color: red;
}
p { /* Rule 2: Color: Blue */
color: blue;
}
*{ /* Rule 3: Color: Yellow */
color: yellow;
}
From the above we see that, even if the Universal selector * appears last in the order, it will have no effect. The other higher selectors will be compared instead. Again, Rule 2 wins, because the Universal selector with no specificity effect is ignored, and its(Rule 2) rule having same specificity as Rule 1, is found in the later position when compared.
The specificity of class selector is higher than pseudo-element and type or element selector, but less than ID selector’s. Thus, Id selectors will always win all other selectors when compared in conflicting situations, regardless of their position.
color: green;
}
p { /* Rule 2: Color: Red */
color: red;
}
p { /* Rule 3: Color: Blue */
color: blue;
}
color: purple;
}
.code{ /* Rule 2: Color: Green */
color: green;
}
p { /* Rule 3: Color: Red */
color: red;
}
p { /* Rule 4: Color: Blue */
color: blue;
}
The strength of an Inline style
When all of these selectors, including the Id selector, which is the selector with the highest specificity, targets the same element that is already styled using Css inline method of styling elements, the inline style wins. This means it has the highest specificity.
The weight of both the inline style and all the different types of selector are summarized below:
Inline Styles (highest): Styles defined directly within an HTML element using the style attribute have the highest specificity.
ID Selector (very high): Styles targeting an element by its unique ID have very high specificity.
Class Selector, Attribute Selector, Pseudo-Class (medium): Styles using classes, element types, attributes, or pseudo-classes have medium specificity.
Element Selector, Pseudo-element Selector (low): Styles using element or tag name, and Pseudo-elements have the lowest specificity.
Having a higher Specificity alone is not enough to win, or be displayed on the screen. In Cascade, the !important declaration can be used to force a style to be applied regardless of its order, origin, and specificity. This means, with this declaration it is possible to win even an element that has inline styling, which normally have the highest specificity.
color: orange;
}
.code{ /* Rule 2: Color: Yellow */
color: yellow;
}
p { /* Rule 3: Color: Red */
color: red !important;
}
p { /* Rule 4: Color: Blue */
color: blue;
}
In the above code snippet, not minding its Specificity or Position, Rule 3 wins, because its rule has the !importantdeclaration in it. When removed and placed in another rule, that rule will win. Nonetheless, this should be used less often as it can make styles harder to maintain.
Resolving conflicts between the three different sources of styles applied to an element on a webpage
Again, there are three sources of styles: inline styles, internal styles, and external styles. When these sources define the same CSS property for an element, the specificity and location of the styles determine which one wins.
Case 1:
For example, let us consider a situation where all three sources apply the same property (color) to an element:
<html lang=“en”>
<head>
<meta charset=“UTF-8”>
<meta name=“viewport” content=“width=device-width, initial-scale=1.0”>
<title>Css Specificity</title>
<link rel=“stylesheet” href=“styles.css”>
<style>
.crown {
color: blue;
}
</style>
</head>
<body>
<div class=“crown” style=“color: red;”>Which color?</div>
</body>
</html>
In this Html code snippet above, the external style sheet (styles.css) contain:
color: green;
}
The internal style in the <style> block within the <head> section is:
.crown {
color: blue;
}
</style>
The inline style directly applied to the div element is:
When these styles are applied to the <div class=”crown”>, the order:
External styles: Lowest specificity among the three, because it is the source of styling here that appears at the top.
Internal styles: Higher specificity than external styles, because it appears after here, but lower than inline styles.
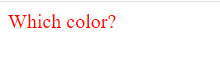
Inline styles: Highest specificity, because it style appears last. Thus, the div element’s color will be red because the inline style overrides both the internal and external styles.
Case 2:
If for example the above Html code is not styled using inline style, which appears last and won in that case, and instead the competition is between the external and internal style thus:
<html lang=“en”>
<head>
<meta charset=“UTF-8”>
<meta name=“viewport” content=“width=device-width, initial-scale=1.0”>
<title>Css Specificity</title>
<!–External source appears first–>
<link rel=“stylesheet” href=“styles.css”>
<!–Internal source of style appears last–>
<style>
.crown {
color: blue;
}
</style>
</head>
<body>
<div class=“crown”>Which color?</div>
</body>
</html>
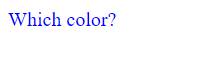
Because the external source appears at the top, first, and internal source of style appears last, following the Cascade order principle, the internal source which appears last wins.
Let see between the external and internal source of styling, what happens when the external source appears last, which typically is not the case:
<html lang=“en”>
<head>
<meta charset=“UTF-8”>
<meta name=“viewport” content=“width=device-width, initial-scale=1.0”>
<title>CSS Specificity</title>
<!–Internal source of style appears first–>
<style>
.crown {
color: blue;
}
</style>
<!–External source of style appears last–>
<link rel=“stylesheet” href=“styles.css”>
</head>
<body>
<div class=“crown” style=“color: red;”>Which color?</div>
</body>
</html>
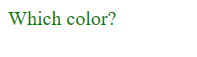
When the browser processes the CSS, it applies the internal styles first (color: blue from the <style> tag). It then applies the external styles (color: green from styles.css). Because the external stylesheet is loaded after the internal stylesheet, and both have the same specificity, the external style would override the internal style due to being loaded later (last one wins in case of the same specificity).
Resolving conflicts between the three different origin of the styles applied to an element on a webpage
Now, after knowing almost all of the above listed Cascade principles, including Specificity, what happens when there is a clash between the three origin of styles on a webpage?
In the context of CSS (Cascading Style Sheets) and the concept of specificity, when there is a clash between author styles and user styles, user styles win. In the cascade order, we have:
User styles with !important (highest)
Author styles with !important
Author styles
User styles
User agent styles (browser defaults).
These rules mean user styles with !important will always override author styles, even if the author styles also have !important. Without the !important declaration, author styles will usually override user styles unless the user styles have higher specificity.
Therefore, if there is a conflict between an author’s style sheet and a user’s style sheet, the user’s style sheet will win if it uses !important. Without !important, author styles generally take precedence unless the user styles have higher specificity:
Author’s CSS:
color: blue;
}
User’s CSS:
color: green !important;
}
In the code snippet above, the paragraph text will be green because the user’s style is marked as !important. If non of these styles use !important, the author’s style usually wins unless the user style has higher specificity:
Author’s CSS:
color: blue;
}
User’s CSS:
color: green;
}
In this case, if the paragraph is inside a div, the paragraph text will be green because the user style has higher specificity.
How to calculate Css Specificity
CSS specificity is calculated based on four categories, which can be seen as a four-part number: (a, b, c, d). These categories correspond to different types of selectors:
a – Inline styles (e.g., style=”color: blue;”)
b – ID selectors (e.g., #header)
c – Class selectors, Attributes selectors, and Pseudo-classes (e.g., .class, [type=”text”], :hover)
d – Type selectors (e.g., div, p) and pseudo-elements (e.g., ::before, ::after)
Steps to Calculate Specificity
Inline Styles: Add 1 to the a component for each inline style (1,0,0,0 points). Inline styles have the highest specificity and will always win.
ID Selectors: Add 1 to the b component for each ID selector (0,1,0,0 points)
Class Selectors, Attribute Selectors, and Pseudo-Classes: Add 1 to the c component for each class selector, attribute selector, and pseudo-class (0,0,1,0 points)
Type Selectors and Pseudo-Elements: Add 1 to the d component for each type selector and pseudo-element (0,0,0,1 point)
Numerical Interpretation of points
1,0,0,0 (1000): This represents a specificity where there is one inline style and no other types of selectors.
0,1,0,0 (0100 or 100): This represents a specificity where there is one ID selector.
0,0,1,0 (0010 or 10): This represents a specificity with one class selector, attribute selector, or pseudo-class.
0,0,0,1 (0001 or 1): This represents a specificity with one type selector or pseudo-element.
When comparing these values, you can think of them as if they were large numbers:
(1,0,0,0) is like “1000”
(0,1,0,0) is like “100”
(0,0,1,0) is like “10”
(0,0,0,1) is like “1”
Using this analogy, you can see that “1000” (Specificity of inline style) is greater than “100” (Specificity of Id selector), which is greater than “10” (Specificity of Class, Pseudo-class, and Attribute Selector), and greater than “1” (Specificity of Type or Element Selector, and Pseudo-element Selector).
Example Calculations
Let’s calculate the specificity for various selectors:
Example 1: #header
ID selector (#header) contributes to the b component.
Specificity: (0, 1, 0, 0)
Example 2: .nav .item:hover
Two class selectors (.nav and .item) contribute to the c component.
One pseudo-class (:hover) also contributes to the c component.
Specificity: (0, 0, 3, 0)
Example 3: div p
Two type selectors (div and p) contribute to the d component.
Specificity: (0, 0, 0, 2)
Example 4: ul#list .item::before
One type selector (ul) contributes to the d component.
One ID selector (#list) contributes to the b component.
One class selector (.item) contributes to the c component.
One pseudo-element (::before) contributes to the d component.
Specificity: (0, 1, 1, 2)
Example 5: style=”color: blue;”
Inline style contributes to the a component.
Specificity: (1, 0, 0, 0)
Below is an example that demonstrates CSS specificity using a button inside a div with an ID of crown. We will target the button using different selectors and style each with a different text color. This will show how specificity and the cascade determine the final style applied to the button.
<html lang=“en”>
<head>
<meta charset=“UTF-8”>
<meta name=“viewport” content=“width=device-width, initial-scale=1.0”>
<title>CSS Specificity Example</title>
<link rel=“stylesheet” href=“styles.css”>
</head>
<body>
<div id=“crown”>
<button>Click Me</button>
</div>
</body>
</html>
button {
color: blue; /* Low specificity: 0,0,0,1 */
}
/* Targeting the button with the ID and element selector */
#crown button {
color: green; /* Higher specificity: 0,1,0,1 */
}
/* Targeting the button with the body, ID, and element selector */
body #crown button {
color: red; /* Even higher specificity: 0,1,0,2 */
}
Element Selector (button)
color: blue;
}
Specificity: 0,0,0,1
This rule has the lowest specificity and will be overridden by more specific rules.
ID and Element Selector (#crown button)
Specificity: 0,1,0,1
This rule has higher specificity than the element selector and will override it.
Body, ID, and Element Selector (body #crown button)
color: red;
}
Specificity: 0,1,0,2
This rule has even higher specificity and will override the previous two rules.
From the above code, the final text color of the button will be red because the selector body #crown button has the highest specificity among the CSS rules provided.
If an inline style is added directly to the button element, like so:
<div id=“crown”>
<button style=“color: orange;”>Click Me</button>
</div>
The text color will be orange, as inline styles have the highest specificity.
Conclusion
Understanding CSS specificity is important for effectively managing the styles of a web project. By grasping how different selectors interact and override each other, developers can write more predictable and maintainable CSS. Specificity rules, combined with the cascade, ensure that the most appropriate styles are applied as intended by the developer.


