

Written by Ukeje Goodness✏️
There are many web frameworks available for developers to choose from — including more than ten popular web frameworks in the Rust ecosystem. Each Rust framework is opinionated, following the principles and practices of several developers to optimize and ensure they follow great web development methods.
In 2022, Luca Palmieri set out to build the Pavex Rust framework with the aim of achieving great ergonomics, high performance, great usability, and speed on top of the popular Hyper framework. Today, Pavex is in beta and ready to use with these features all coming into play, plus more features like better error messages.
What is Pavex?
Pavex is a new and upcoming Rust framework designed to expand the horizon for Rust web development. It aims to do so by offering a more abstract, ergonomic, and performant development experience.
The Pavex web framework for Rust ensures compile-time safety and better error messaging, reducing the learning curve associated with handling compile-time errors and framework overhead. Its architecture is focused on minimizing user-facing content to provide a clean API and developer-friendly approach.
Getting started with Pavex
Since Pavex is Rust-based, you’ll need the Rust toolchain — specifically, you’ll need Rustup to install and manage Rust and Cargo as its build system and package manager.
You’ll also need to have cargo-px and a cargo subcommand. You can install cargo-px with the directives from its documentation page.
You’d need to have all these tools available in your PATH, so ensure you do that while installing. You can run this command to verify your installation.
cargo —version && \
cargo px —version
Next, you need to install Rust’s nightly toolchain. You can add it to your toolchain with this command:
After installing nightly, add the rust-docs-json component to the build:
Finally, you need to install and activate the Pavex CLI tool. Execute this command to install Pavex:
# powershell
irm <https://pavex.dev/releases/download/latest/pavex_cli-installer.ps1> | iex
You can execute this command to verify the installation:
Pavex is in beta, so you need to activate Pavex with an activation key:
You can retrieve an activation from the Pavex Discord server’s #activation channel after you’ve joined the beta on Pavex.dev.
Enter the activation key, and then you can proceed to create a new Pavex project with this command:
Open the new Pavex project in your code environment of choice. You should see a folder structure similar to this: You can proceed to execute a demo Pavex project with this command:
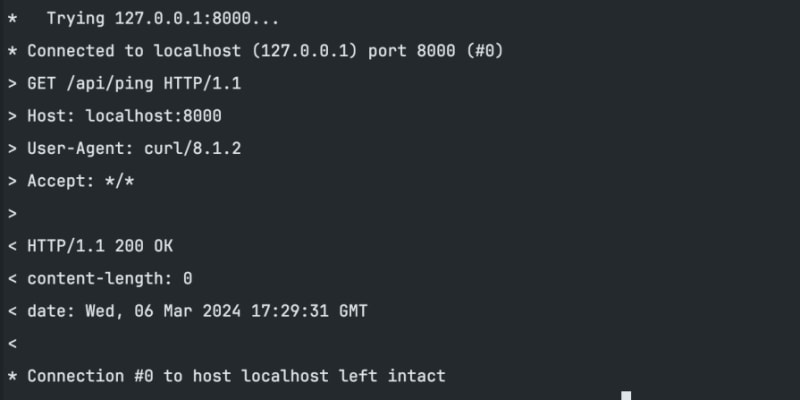
On executing the command, you should get this as output as the server runs on the default port 8080: You can send a cURL request to the ping the server like so:
Here’s the output you should expect: You need to understand how a Pavex project works to build with the framework. At the core of every Pavex project is the Blueprint type. You’ll use the Blueprint type to define routes, middleware, error handlers and other functions.
Check the pavex_tutorial/src/blueprint.rs file for the Blueprint of your pavex_tutorial project. Here’s what you should expect to see:
let mut bp = Blueprint::new();
ApiKit::new().register(&mut bp);
add_telemetry_middleware(&mut bp);
bp
}
The blueprint function contains all the routes, constructors and error handlers. Pavex requires the blueprint function to run.
Creating your first Pavex route
Routing with Pavex is simple and intuitive compared to many other Rust web frameworks. You’ll register routes, middleware, etc, in the register function after writing the handler functions like this:
pub mod status;
pub mod hello;
use pavex::blueprint::{router::GET, Blueprint};
use pavex::f;
pub fn register(bp: &mut Blueprint) {
bp.route(GET, “/api/ping”, f!(self::status::ping));
bp.route(GET, “/api/hello/:name”, f!(self::hello::hello));
}
Above, we registered the GET request handler function named hello with the /api/hello/:name route. Then, here’s how you can extract and use path parameters with Pavex:
use pavex::request::path::PathParams;
use pavex::response::Response;
#[PathParams]
pub struct HelloParameters {
pub name: String,
}
pub fn hello(params: PathParams<HelloParameters>) -> Response {
let HelloParameters { name } = params.0;
Response::ok()
.set_typed_body(format!(“Hello, {name}!”))
}
You can use a struct to model the objects you’re expecting from a request. The HelloParameters struct is the struct for the name parameter from the request. The hello function retrieves the path parameter and writes a string with the path parameter to the client as a response.
Handling request data with Pavex
Handling request data of all sorts with Pavex is also very intuitive. You can use the serde and serde_json crates with Pavex for JSON operations. Pavex also provides a JsonBody function for parsing the body of an incoming request as JSON.
Here’s the full list of imports you’ll need to handle request JSON request data:
use pavex::request::body::JsonBody;
use pavex::response::Response;
use serde::{Serialize, Deserialize};
use serde_json::to_string;
Next, here’s a User struct for the JSON operation. The #[derive(Serialize, Deserialize)] macro adds serialization and deserialization functionality via the serde crate:
pub struct User {
pub id: u32,
pub name: String,
pub email: String,
}
Then, here’s how you can deserialize a JSON payload into the User struct:
let user = body.0; // Deserialization happens here
let saved_user = User { id: 1, ..user };
// other actions
}
The create_user function is a request handler that handles POST requests for creating a new user. It accepts JSON-encoded data from the request body and deserializes it to retrieve the data in a struct-like manner. Pavex’s JsonBody<T> extractor deserializes the JSON from the request body.
Here’s how you can register the create_user handler function in the register function:
bp.route(POST, “/api/users”, f!(self::json::create_user));
}
The create_user function’s functionality is now accessible via the /api/users route, and you can make requests to it.
Responding to requests
You can respond to client requests using Pavex’s Response object. Here’s how you can implement a GET request handler function:
pub fn get_user() -> Response {
let user = User {
id: 1,
name: “Jane Doe”.to_string(),
email: “jane.doe@example.com”.to_string(),
};
// Serialize the user struct to a JSON string
match to_string(&user) {
Ok(json) => json,
Err(_) => return Response::new(StatusCode::INTERNAL_SERVER_ERROR),
};
let mut response = Response::new(StatusCode::OK);
response.headers_mut().insert(“Content-Type”, HeaderValue::from_static(“application/json”));
response.body();
response
}
The get_user function creates a User struct instance, serializes the struct to a JSON string and handles associated errors. Then, it sets the response content type to application/json and writes the serialized struct as a response to the client.
Using middlewares with Pavex
Pavex middleware simplify adding pre- and post-processing steps to your handler functions. Here’s an example of how you can use middleware in your Pavex projects:
use pavex::middleware::Next;
use pavex::response::Response;
use std::future::IntoFuture;
pub async fn logging_middleware<C>(next: Next<C>) -> Response
where
C: IntoFuture<Output=Response>,
{
println!(“Before handling the request”);
let response = next.await;
println!(“After handling the request”);
response
}
The logging_middleware function uses the Next objects to help with proceeding with the request flow. The function logs a message before and after execution of the next handler function in the chain.
Here’s an example of how you can register the middleware in the register function:
pub mod status;
pub mod hello;
pub mod json;
pub mod middleware;
use pavex::blueprint::{router::GET, Blueprint};
use pavex::blueprint::router::POST;
use pavex::f;
pub fn register(bp: &mut Blueprint) {
bp.wrap(f!(self::middleware::logging_middleware));
bp.route(GET, “/api/ping”, f!(self::status::ping));
bp.route(GET, “/api/hello/:name”, f!(self::hello::hello));
bp.route(POST, “/api/users”, f!(self::json::create_user));
bp.route(GET, “/api/users/:id”, f!(self::json::get_user));
}
The wrap function register a wrapping middleware. The logging_middleware function now wraps the handler functions you’ve specified.
Comparing Pavex to existing Rust frameworks
Although it’s new, we’ve seen that Pavex provides most of the features you’ll need in a Rust web framework, including async/await support, middleware, concurrency, and much more.
Pavex is an exciting framework with better documentation, error handling, and semantics than other popular existing web frameworks for Rust. It’s designed for building small- to enterprise-grade applications without trade-offs.
Here’s how Pavex currently compares to the Actix Web, Rocket, Axum, and warp Rust web frameworks:
Features
Pavex
Actix
Rocket
Axum
warp
Async/await support
✅
✅
✅
✅
✅
Middleware
Extensive support with built-in middleware and support for custom middleware
Extensive, with support for custom middleware
Built-in support for various middleware functionalities
Utilizes the tower ecosystem for middleware
Uses filters for middleware-like functionality
WebSockets support
❌
Comprehensive support
Supported with specific syntax and features
Supported, and integrated with async programming model
Supported, designed for asynchronous communication
Concurrency & Performance
Built on Tokio, optimized for async execution
High performance, designed for concurrency
Performance-focused, with specific features for concurrency
Built on Tokio, optimized for async execution
Leverages async execution for performance
Cookie and session management
Not yet
Full-featured support
Comprehensive handling capabilities
Through extractors and middleware
Via filters and custom implementations
Community and ecosystem
Few beta testers at the moment
Large, with extensive resources
Well-established, with comprehensive documentation
Growing benefits from Tokio ecosystem
Active part of the Tokio ecosystem
Choosing a Rust web framework should be based on your project’s specifications and needs. You can use this comparison table as a guide to choose a framework after evaluating the project’s specifications.
Conclusion
Pavex is still very new (in closed beta), and before the project is open to the public, you can expect that more features will roll out. However, keep in mind that it’s not meant to be an open source framework — Palmieri intends to add a usage price to the project, although the pricing plan is not yet finalized.
In this article, we learned about the Pavex framework and how you can use it for Rust web development. Pavex is an exciting project for many Rust devs, especially in terms of the fact that it improves on the functionality of many existing frameworks. It has great development experience — you should try it out when it’s live.
LogRocket: Full visibility into web frontends for Rust apps
Debugging Rust applications can be difficult, especially when users experience issues that are hard to reproduce. If you’re interested in monitoring and tracking the performance of your Rust apps, automatically surfacing errors, and tracking slow network requests and load time, try LogRocket.
LogRocket is like a DVR for web and mobile apps, recording literally everything that happens on your Rust application. Instead of guessing why problems happen, you can aggregate and report on what state your application was in when an issue occurred. LogRocket also monitors your app’s performance, reporting metrics like client CPU load, client memory usage, and more.
Modernize how you debug your Rust apps — start monitoring for free.
