

TL;DR
I have gathered React libraries you should know about to build many different types of projects and become a react wiz🧙♂️.
Each one of these is unique and has their own use case.
Don’t forget to star them 🌟
Let’s get to it!
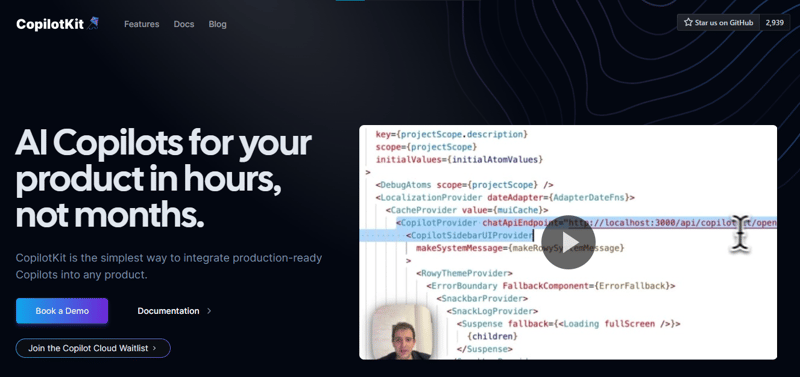
1. CopilotKit – Framework for In-App AI: Chatbots, Agents & Textareas
Integrating AI features in React is tough, that’s where Copilot comes into the picture. A simple and fast solution to integrate production-ready Copilots into any product!
You can integrate key AI features into React apps using two React components. They also provide built-in (fully-customizable) Copilot-native UX components like <CopilotKit />, <CopilotPopup />, <CopilotSidebar />, <CopilotTextarea />.
Get started with the following npm command.
Copilot Portal is one of the components provided with CopilotKit which is an in-app AI chatbot that can see the current app state and take action inside your app. It communicates with the app frontend and backend, as well as 3rd party services via plugins.
This is how you can integrate a Chatbot.
A CopilotKit must wrap all components which interact with CopilotKit. It’s recommended you also get started with CopilotSidebar (you can swap to a different UI provider later).
import { CopilotKit } from “@copilotkit/react-core“;
import { CopilotSidebar } from “@copilotkit/react-ui“;
import “@copilotkit/react-ui/styles.css“;
export default function RootLayout({children}) {
return (
<CopilotKit url=“/path_to_copilotkit_endpoint/see_below“>
<CopilotSidebar>
{children}
</CopilotSidebar>
</CopilotKit>
);
}
You can set up Copilot Backend endpoints using this quickstart quide.
After this, you can let Copilot take action. You can read on how to provide external context. You can do so using useMakeCopilotReadable and useMakeCopilotDocumentReadable react hooks.
import { useMakeCopilotActionable } from ‘@copilotkit/react-core‘;
// Let the copilot take action on behalf of the user.
useMakeCopilotActionable(
{
name: “setEmployeesAsSelected“, // no spaces allowed in the function name
description: ““Set the given employees as ‘selected’“,“
argumentAnnotations: [
{
name: “employeeIds“,
type: “array“, items: { type: “string“ }
description: ““The IDs of employees to set as selected“,“
required: true
}
],
implementation: async (employeeIds) => setEmployeesAsSelected(employeeIds),
},
[]
);
You can read the docs and check the demo video.
You can integrate Vercel AI SDK, OpenAI APIs, Langchain, and other LLM providers with ease. You can follow this guide to integrate a chatbot into your application.
The basic idea is to build AI Chatbots in minutes that can be useful for LLM-based applications.
The use cases are huge, and as developers, we should definitely try to use CopilotKit in our next project.
2. xyflow – to build node-based UIs with React.
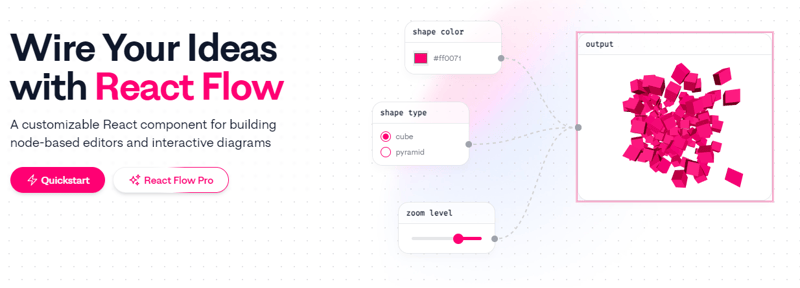
XYFlow is a powerful open source library for building node-based UIs with React or Svelte. It is a monorepo and provides React Flow & Svelte Flow. Let’s see more on what we can do with React flow.
You can watch this video to understand React Flow in 60 seconds.
Some of the features are available in pro mode, but the ones in the free tier are more than enough to make a very interactive flow. React flow is written in TypeScript and tested with Cypress.
Get started with the following npm command.
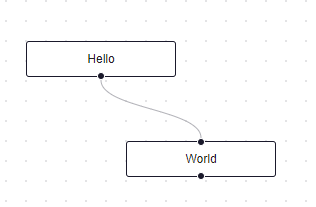
Here’s how you can create two nodes, Hello & World, connected by an edge. The nodes have predefined initial positions to prevent overlap, and we’re also applying styling to ensure sufficient space for rendering the graph.
import ‘reactflow/dist/style.css‘;
const edges = [{ id: ‘1-2‘, source: ‘1‘, target: ‘2‘ }];
const nodes = [
{
id: ‘1‘,
data: { label: ‘Hello‘ },
position: { x: 0, y: 0 },
type: ‘input‘,
},
{
id: ‘2‘,
data: { label: ‘World‘ },
position: { x: 100, y: 100 },
},
];
function Flow() {
return (
<div style={{ height: ‘100%‘ }}>
<ReactFlow nodes={nodes} edges={edges}>
<Background />
<Controls />
</ReactFlow>
</div>
);
}
export default Flow;
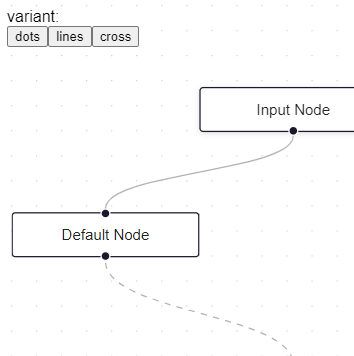
This is how it looks. You can also add a label, change the type, and make it interactive.
You can see the full list of options in the API reference of React Flow along with components, hooks, and utils.
The best part is you can also add custom nodes. Within your custom nodes, you can render everything you want. You can define multiple source and target handles and render form inputs or charts. You can check out this codesandbox for an example.
You can read the docs and see example React Flow apps for Create React App, Next.js and Remix.
React Flow comes with several additional plugin components which can help you to make more advanced apps with the Background, Minimap, Controls, Panel, NodeToolbar, and NodeResizer components.
For instance, you may have noticed dots in the background on many websites, enhancing the aesthetics. To implement this pattern, you can simply use the Background component in React Flow.
<Background color=”#ccc” variant={‘dots’} /> // this will be under React Flow component. Just an example.
In case, you’re looking for a quick article, I recommend checking React Flow – A Library for Rendering Interactive Graphs by Webkid. React Flow is developed & Maintained by Webkid.
It has 19k+ Stars on GitHub and is on the v11.10.4 showcasing they are constantly improving and has 400k+ weekly downloads on the npm package. One of the best projects that you can use with ease.
3. Zod + React Hook Form – A deadly combo for validation.
The first question would be: why am I including Zod and React Hook form in the same option? Well, read it to find out.
Zod aims to be developer-friendly by minimizing duplicate type declarations. With Zod, you declare a validator once, and Zod will automatically infer the static TypeScript type. It’s easy to compose simpler types into complex data structures.
Get started with the following npm command.
This is how you can customize some common error messages when creating a string schema.
required_error: “Name is required“,
invalid_type_error: “Name must be a string“,
});
// validations
z.string().min(5, { message: “Must be 5 or more characters long“ });
z.string().max(5, { message: “Must be 5 or fewer characters long“ });
z.string().length(5, { message: “Must be exactly 5 characters long“ });
z.string().email({ message: “Invalid email address“ });
z.string().url({ message: “Invalid url“ });
z.string().emoji({ message: “Contains non-emoji characters“ });
z.string().uuid({ message: “Invalid UUID“ });
z.string().includes(“tuna“, { message: “Must include tuna“ });
z.string().startsWith(“https://“, { message: “Must provide secure URL“ });
z.string().endsWith(“.com“, { message: “Only .com domains allowed“ });
z.string().datetime({ message: “Invalid datetime string! Must be UTC.“ });
z.string().ip({ message: “Invalid IP address“ });
Please read the docs to know more about Zod.
It Works in Node.js and all modern browsers.
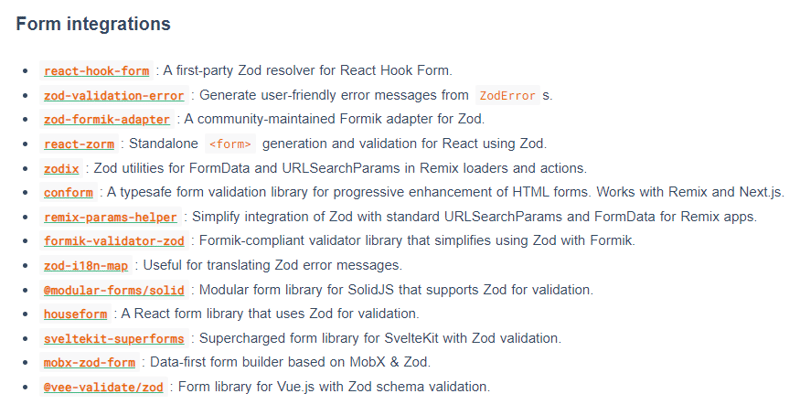
Now, comes the second part.
There are lots of form integrations available.
While Zod can validate objects, it will not affect your client and backend without customized logic.
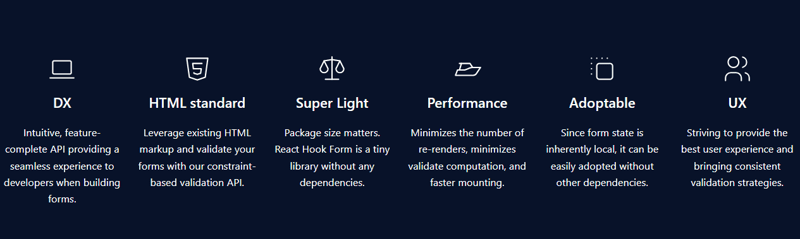
React-hook-form is an excellent project for client validation. For instance, it can show input errors.
Get started with the following npm command.
This is how you can use the React Hook Form.
type Inputs = {
example: string
exampleRequired: string
}
export default function App() {
const {
register,
handleSubmit,
watch,
formState: { errors },
} = useForm<Inputs>()
const onSubmit: SubmitHandler<Inputs> = (data) => console.log(data)
console.log(watch(“example“)) // watch input value by passing the name of it
return (
/* “handleSubmit” will validate your inputs before invoking “onSubmit” */
<form onSubmit={handleSubmit(onSubmit)}>
{/* register your input into the hook by invoking the “register” function */}
<input defaultValue=“test“ {…register(“example“)} />
{/* include validation with required or other standard HTML validation rules */}
<input {…register(“exampleRequired“, { required: true })} />
{/* errors will return when field validation fails */}
{errors.exampleRequired && <span>This field is required</span>}
<input type=“submit“ />
</form>
)
}
You can even isolate re-renders which improves overall performance.
You can read the docs.
Combining both is a good combo. Try it!
I discovered it through Shadcn, which uses it as the default for their form component. I’ve used it in a few projects myself, and it’s been great. It offers a lot of flexibility, which is really helpful.
Star Zod ⭐️
Star React Hook Form ⭐️
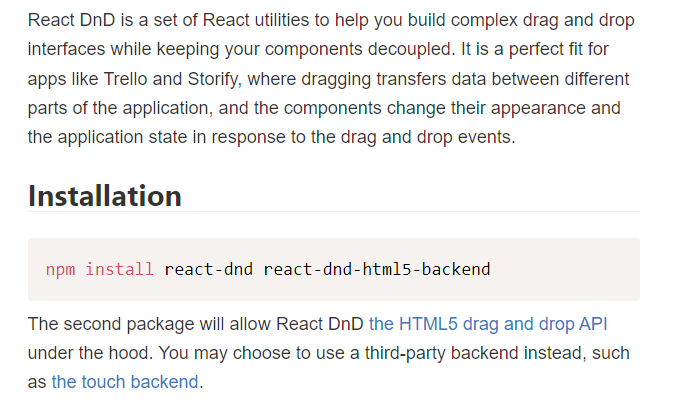
4. React DND – Drag & Drop for React.
I haven’t fully implemented the Drag and Drop feature yet, and I often find myself confused about which option to choose. Another option I’ve come across is interactjs.io, which seems very useful based on the documentation I’ve read. It’s pretty easy due to the detailed examples that they have provided.
But I’m only covering React DND for now.
Get started with the following npm command.
Unless you’re writing a custom one, you probably want to use the HTML5 backend that ships with React DnD.
This is how you can install react-dnd-html5-backend. Read docs.
This is the starting point.
import { DndProvider } from ‘react-dnd‘
export default class YourApp {
render() {
return (
<DndProvider backend={HTML5Backend}>
/* Your Drag-and-Drop Application */
</DndProvider>
)
}
}
This is how you can implement a drag-and-drop for a card very easily.
import React from ‘react‘
import { useDrag } from ‘react-dnd‘
import { ItemTypes } from ‘./Constants‘
export default function Card({ isDragging, text }) {
const [{ opacity }, dragRef] = useDrag(
() => ({
type: ItemTypes.CARD,
item: { text },
collect: (monitor) => ({
opacity: monitor.isDragging() ? 0.5 : 1
})
}),
[]
)
return (
<div ref={dragRef} style={{ opacity }}>
{text}
</div>
)
}
Please note that the HTML5 backend does not support the touch events. So it will not work on tablet and mobile devices. You can use the react-dnd-touch-backend for touch devices. Read docs.
import { DndProvider } from ‘react-dnd‘
class YourApp {
<DndProvider backend={TouchBackend} options={opts}>
{/* Your application */}
</DndProvider>
}
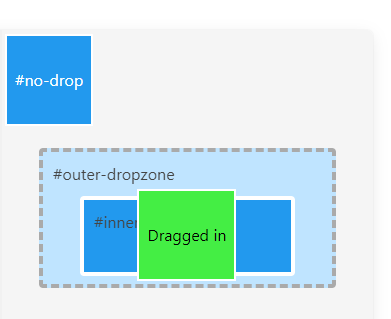
This codesandbox dictates how we can properly use React DND.
You can see the examples of React DND.
They even have a clean feature where you can inspect what’s happening internally with Redux.
You can enable Redux DevTools by adding a debugModeprop to your provider, with the value of true.
It offers a good variety of component options, which I’ll need to test out for myself. Overall, it seems pretty good, especially if you’re just starting.
React DND is licensed under MIT and has over 20k Stars on GitHub, making it incredibly credible.
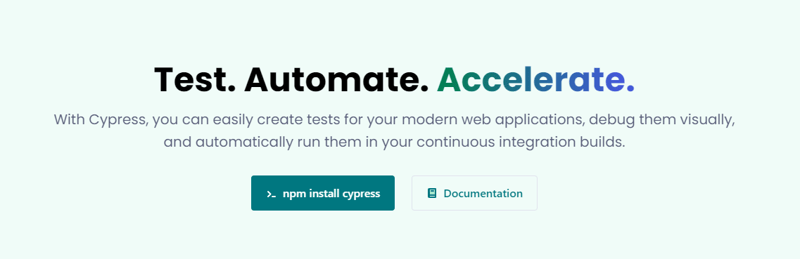
5. Cypress – Fast testing for things running in the browser.
Recent years have proved the importance of testing, and options like Jest & Cypress make it incredibly simple.
But we’re only going to cover Cypress as it is handy on its own.
Just an image can prove that Cypress is worth the effort.
Get started with the following npm command.
If you’re not using Node or a package manager in your project or you want to try Cypress out quickly, you can always download Cypress directly from their CDN.
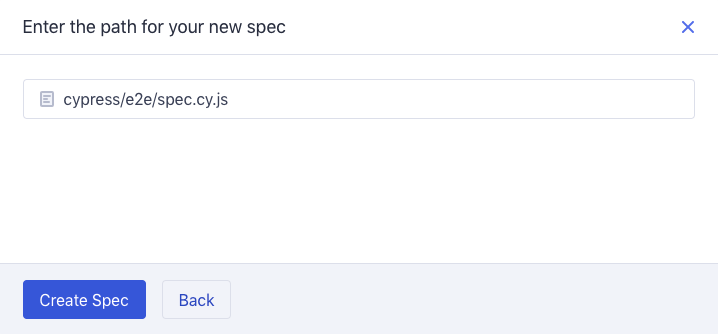
Once you install and open it. You will have to create a spec file with .cy.js.
Now, you can write and test your application (sample code).
it(‘Does not do much!’, () => {
expect(true).to.equal(true)
})
})
Cypress offers a variety of options like cy.visit() or cy.contains(). Since I haven’t used Cypress extensively, you’ll need to explore it further on their documentation.
If it seems scary, then head over to this freeCodeCamp tutorial explaining Cypress for beginners. Freecodecamp videos are truly goldmine 😀
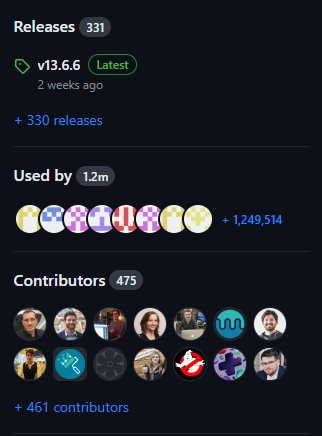
Cypress has more than 45k stars on GitHub, and with its current v13 release, it’s constantly improving.
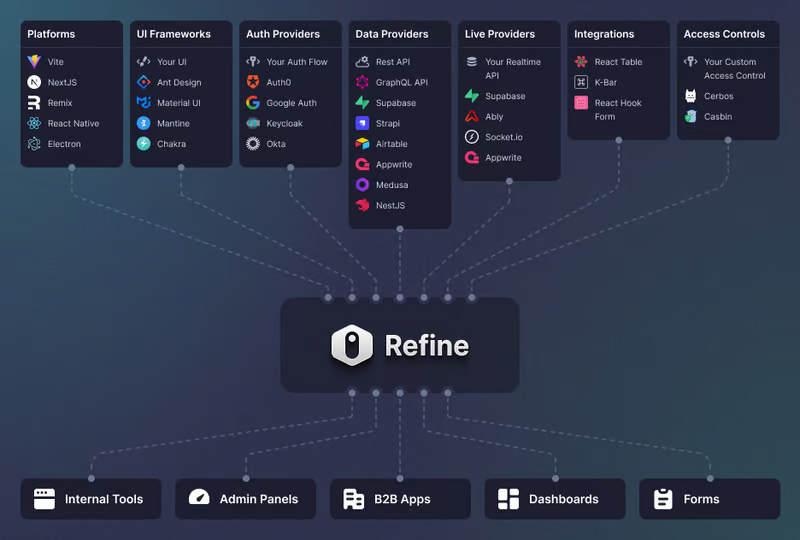
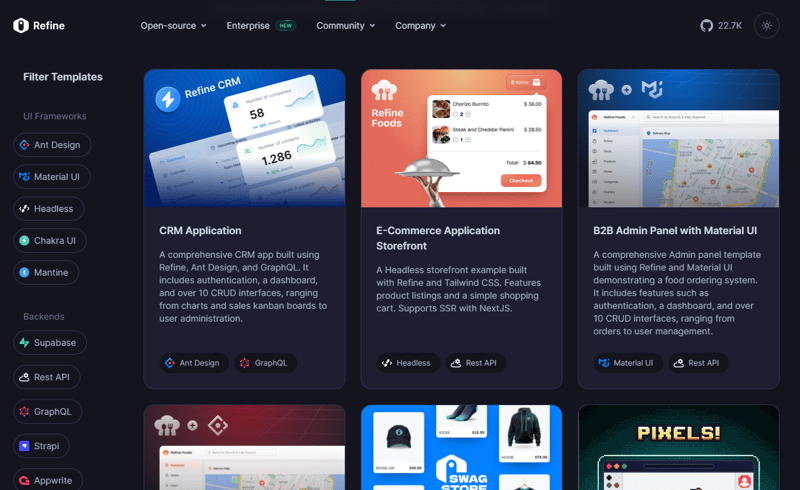
6. Refine – open source Retool for Enterprise.
Refine is a meta React framework that enables the rapid development of a wide range of web applications.
From internal tools to admin panels, B2B apps, and dashboards, it serves as a comprehensive solution for building any type of CRUD application such as DevOps dashboards, e-commerce platforms, or CRM solutions.
You can set it with a single CLI command in under a minute.
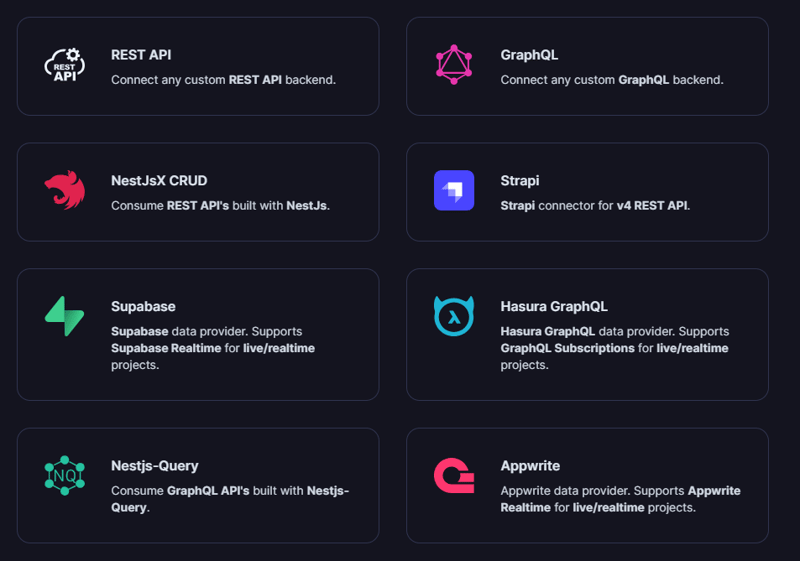
It has connectors for 15+ backend services including Hasura, Appwrite, and more.
You can see the list of integrations which is available.
But the best part is that Refine is headless by design, thereby offering unlimited styling and customization options.
Due to the architecture, you can use popular CSS frameworks like TailwindCSS or create your styles from scratch.
This is the best part because we don’t want to end up in constraints with styling for compatibility with particular libraries since everyone has their style and uses different UIs.
Get started with the following npm command.
This is how easy it is to add a login using Refine.
const { login } = useLogin();
An overview of the structure of your codebase with Refine.
<Refine
dataProvider={dataProvider}
resources={[
{
name: “blog_posts“,
list: “/blog-posts“,
show: “/blog-posts/show/:id“,
create: “/blog-posts/create“,
edit: “/blog-posts/edit/:id“,
},
]}
>
/* … */
</Refine>
);
You can read the docs.
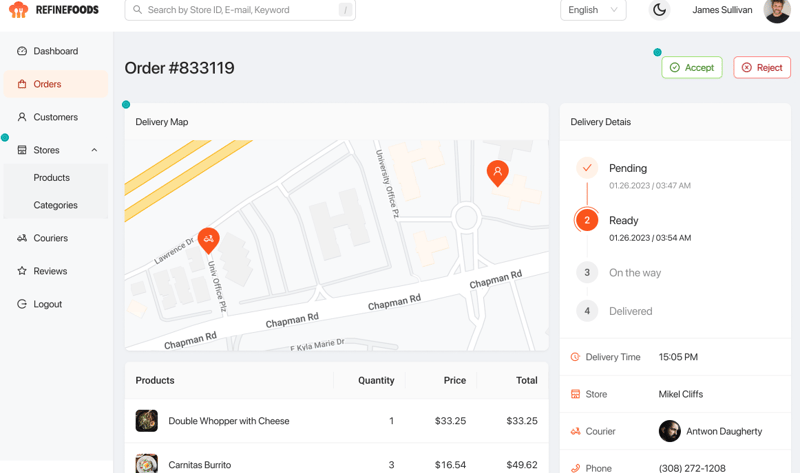
Some example applications that you can see which is built with Refine:
Refine powered different use-cases scenarios.
They even provide templates which is why so many users love Refine.
You can see the templates.
They have around 22k+ stars on GitHub.
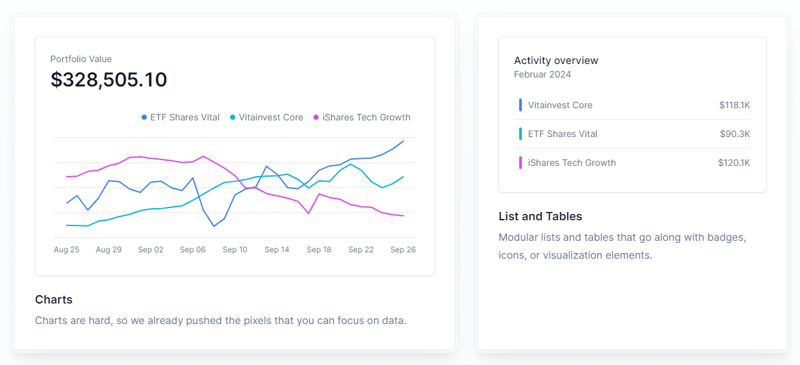
7. Tremor – React components to build charts and dashboards.
Tremor provides 20+ open source React components to build charts and dashboards built on top of Tailwind CSS to make visualizing data simple again.
Get started with the following npm command.
This is how you can use Tremor to build things quickly.
export default function Example() {
return (
<Card className=“mx-auto max-w-md“>
<h4 className=“text-tremor-default text-tremor-content dark:text-dark-tremor-content“>
Sales
</h4>
<p className=“text-tremor-metric font-semibold text-tremor-content-strong dark:text-dark-tremor-content-strong“>
$71,465
</p>
<p className=“mt-4 flex items-center justify-between text-tremor-default text-tremor-content dark:text-dark-tremor-content“>
<span>32% of annual target</span>
<span>$225,000</span>
</p>
<ProgressBar value={32} className=“mt-2“ />
</Card>
);
}
This is what will be generated based on that.
You can read the docs. Between, they use remix icons under the hood.
From the variety of components that I’ve seen, it’s a good starting point. Trust me!
Tremor also provides a clean UI kit. How cool is that!
Tremor has 14k+ Stars on GitHub and has more than 280 releases which means it’s continuously improving.
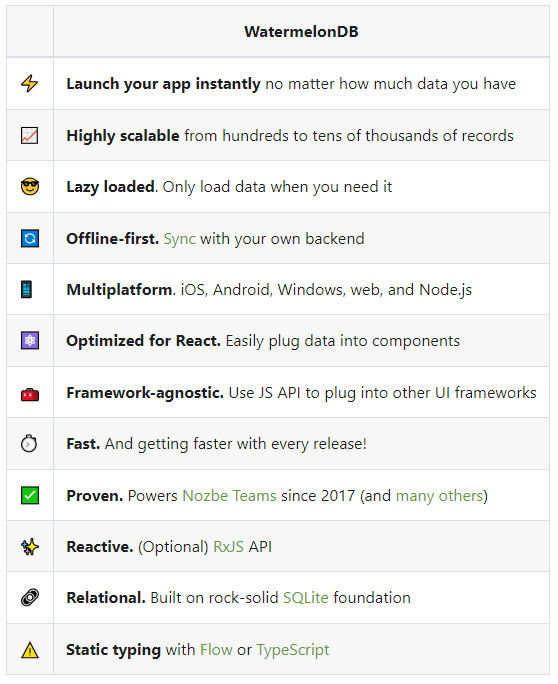
8. Watermelon DB – Reactive & asynchronous database for React & React Native.
I’m not sure why there are so many options for the database; it’s even tough to count them all. But if we’re using React, Watermelon DB is a good choice. They’re still on the v0.28 release even after 4k+ commits, which is a pretty big deal.
Rocket.chat uses Watermelon DB, which gives them a huge credibility.
Get started with the following npm command.
The first thing you need to do is create the model and later migrations (read docs).
export default appSchema({
version: 1,
tables: [
// We’ll add to tableSchemas here
]
})
As per docs, when using WatermelonDB, you’re dealing with Models and Collections. However, underneath Watermelon sits an underlying database (SQLite or LokiJS) which speaks a different language: tables and columns. Together, those are called a database schema.
You can read the docs and more on CRUD operations.
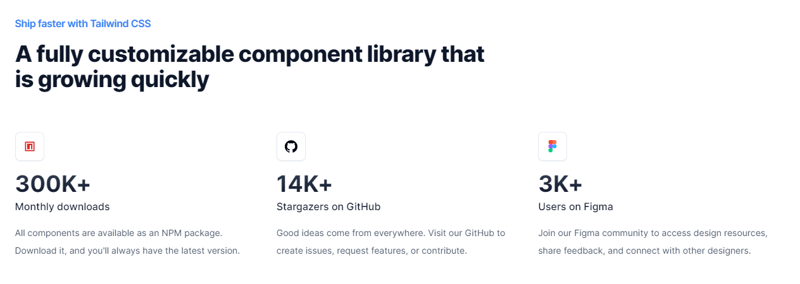
9. Evergreen UI – React UI framework by Segment.
A list without a UI framework is nearly impossible. There are a lot of popular options like Material, Ant Design, Next UI, and many more.
But we’re covering Evergreen which is very good on its own.
Get started with the following npm command.
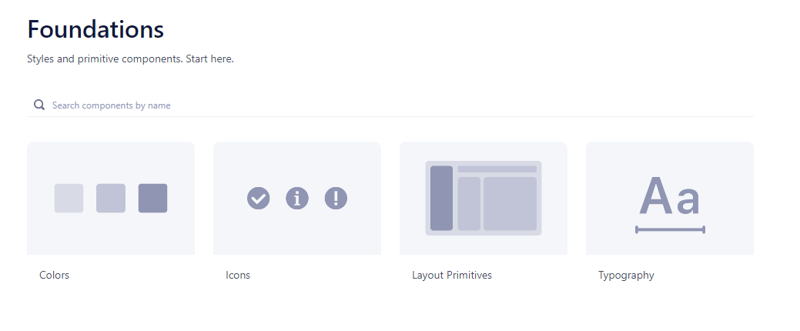
The foundations of any user interface are shown along with the options in detail on the Evergreen Segment website.
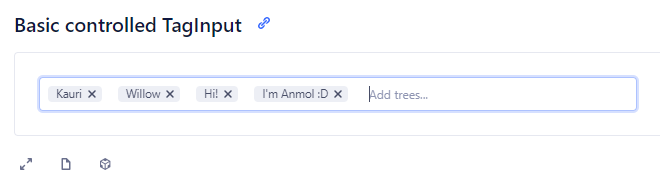
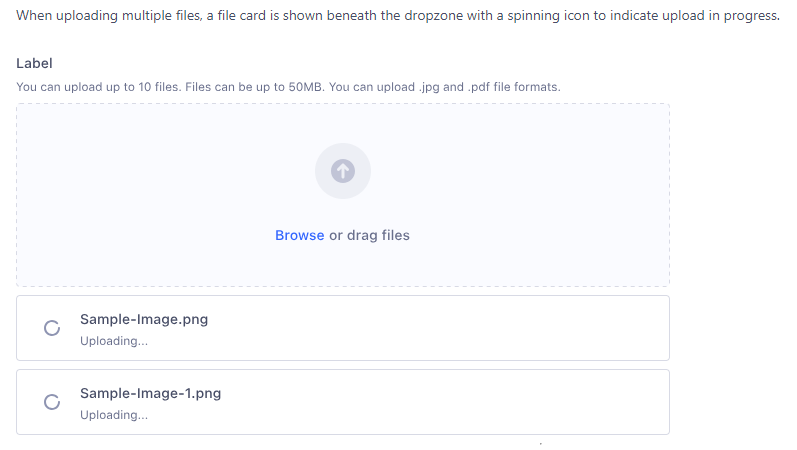
It provides a lot of components, and some are very good such as Tag Input or File uploader.
You can see all the components that are provided with Evergreen UI.
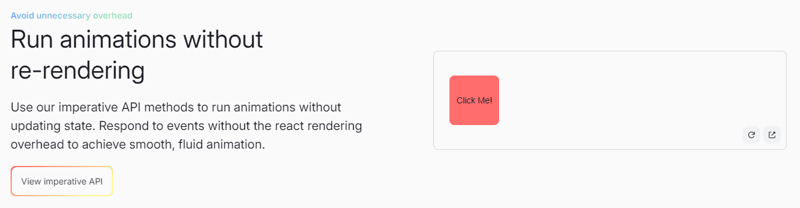
10. React Spring – fluid animations to elevate UI & interactions.
If you like react-motion but feel like your transitions aren’t smooth, it’s because it’s exclusively using React rendering.
If you like Popmotion but feel like you are limited by what you can do, it’s because it entirely skips React rendering.
react-spring gives both options, try it!
Get started with the following npm command.
This is how you can import a higher-order component to wrap things up for animations.
// use it.
export default function MyComponent() {
return (
<animated.div
style={{
width: 80,
height: 80,
background: ‘#ff6d6d‘,
borderRadius: 8,
}}
/>
)
}
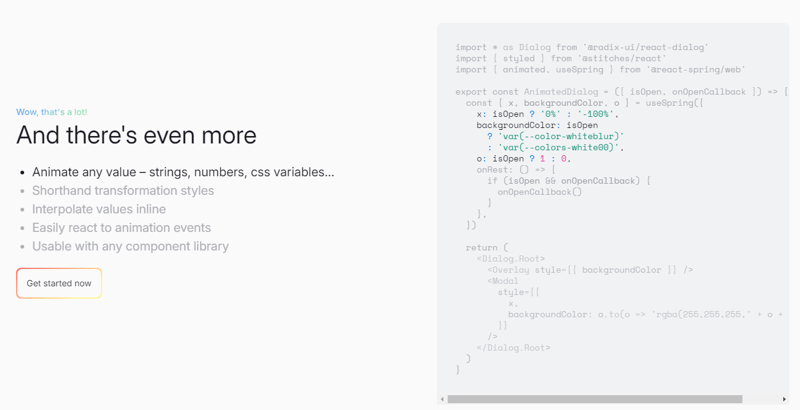
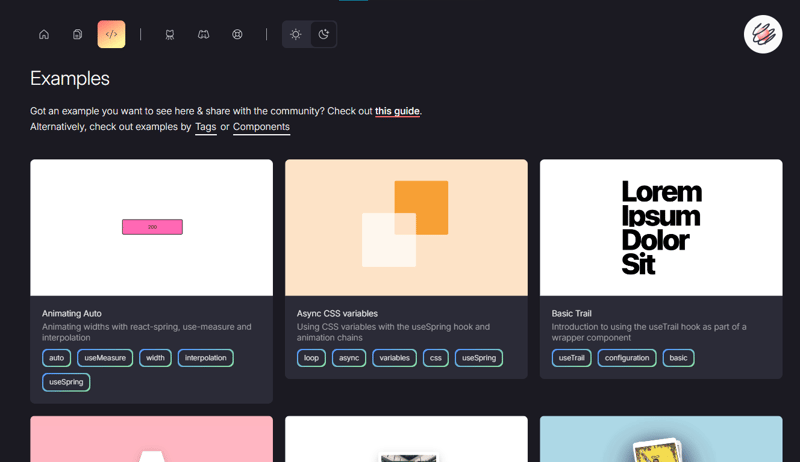
I decided to try React Spring because of the below codesandbox. It’s amazing how many things can we do with React Spring.
You can read the docs.
They also provide a lot of examples that you can learn from.
It provides an insane amount of options, such as useScroll, which allows you to create scroll-linked animations.
For instance, this codesandbox tells the usage of useScroll.
React Spring has around 27k+ Stars on GitHub.
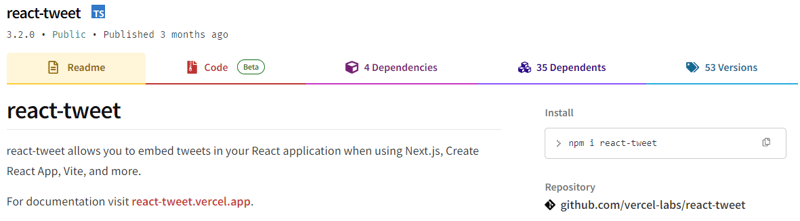
11. React Tweet – Embed tweets in your React app.
React Tweet allows you to embed tweets in your React application when using Next.js, Create React App, Vite, and more.
This library does not require using the Twitter API. Tweets can be rendered statically, preventing the need to include an iframe and additional client-side JavaScript.
It is an open source project by Vercel.
Get started with the following npm command.
To display tweets, we need to request data from Twitter’s API. It’s challenging to get rate-limited by this API, but it’s possible if you rely solely on our provided endpoint for SWR (react-tweet.vercel.app/api/tweet/:id) because the server’s IP address makes many requests to Twitter’s API. This also applies to RSC, where the API endpoint isn’t necessary, but the server still sends requests from the same IP address.
To avoid API limit, you can cache tweets using a database like Redis or Vercel KV. For instance, you can use Vercel KV.
import { TweetSkeleton, EmbeddedTweet, TweetNotFound } from ‘react-tweet‘
import { fetchTweet, Tweet } from ‘react-tweet/api‘
import { kv } from ‘@vercel/kv‘
async function getTweet(
id: string,
fetchOptions?: RequestInit
): Promise<Tweet | undefined> {
try {
const { data, tombstone, notFound } = await fetchTweet(id, fetchOptions)
if (data) {
await kv.set(`tweet:${id}`, data)
return data
} else if (tombstone || notFound) {
// remove the tweet from the cache if it has been made private by the author (tombstone)
// or if it no longer exists.
await kv.del(`tweet:${id}`)
}
} catch (error) {
console.error(‘fetching the tweet failed with:‘, error)
}
const cachedTweet = await kv.get<Tweet>(`tweet:${id}`)
return cachedTweet ?? undefined
}
const TweetPage = async ({ id }: { id: string }) => {
try {
const tweet = await getTweet(id)
return tweet ? <EmbeddedTweet tweet={tweet} /> : <TweetNotFound />
} catch (error) {
console.error(error)
return <TweetNotFound error={error} />
}
}
const Page = ({ params }: { params: { tweet: string } }) => (
<Suspense fallback={<TweetSkeleton />}>
<TweetPage id={params.tweet} />
</Suspense>
)
export default Page
You can directly use it in a very simple way.
<Tweet id=“1629307668568633344“ />
</div>
You can also make your own custom theme using several options if you don’t prefer using the Twitter theme.
For instance, you can build your own tweet component but without the reply button like so:
import {
type TwitterComponents,
TweetContainer,
TweetHeader,
TweetInReplyTo,
TweetBody,
TweetMedia,
TweetInfo,
TweetActions,
QuotedTweet,
enrichTweet,
} from ‘react-tweet‘
type Props = {
tweet: Tweet
components?: TwitterComponents
}
export const MyTweet = ({ tweet: t, components }: Props) => {
const tweet = enrichTweet(t)
return (
<TweetContainer>
<TweetHeader tweet={tweet} components={components} />
{tweet.in_reply_to_status_id_str && <TweetInReplyTo tweet={tweet} />}
<TweetBody tweet={tweet} />
{tweet.mediaDetails?.length ? (
<TweetMedia tweet={tweet} components={components} />
) : null}
{tweet.quoted_tweet && <QuotedTweet tweet={tweet.quoted_tweet} />}
<TweetInfo tweet={tweet} />
<TweetActions tweet={tweet} />
{/* We’re not including the `TweetReplies` component that adds the reply button */}
</TweetContainer>
)
}
You can read the docs.
You can see the demo of the React Tweet on how it renders on the page.
They are on the v3.2 release which shows that they are constantly improving and have more than 46k+ weekly downloads.
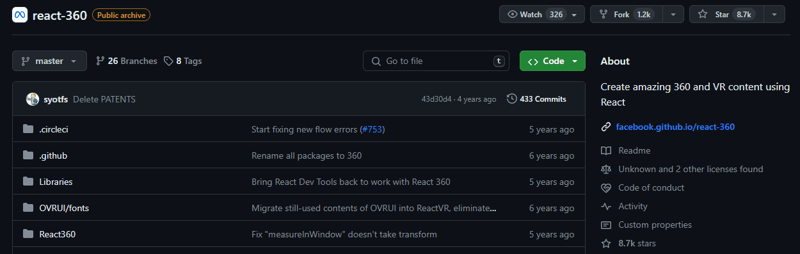
12. React 360 – Create amazing 360 and VR content using React.
Even though Facebook has archived it, many developers still find it useful enough to continue using.
React 360 is a library that utilizes a lot of React Native functionality to create virtual reality apps that run in your web browser.
It uses Three.js for rendering and comes as an npm package. By combining modern APIs such as WebGL and WebVR with the declarative power of React, React 360 helps simplify the process of creating cross-platform VR experiences.
Get started with the following npm command.
There are a lot of things involved but you can add a vital functionality for interaction to your React VR app by using the VrButton.
AppRegistry,
StyleSheet,
Text,
View,
VrButton
} from ‘react-360‘;
state = {
count: 0
};
_incrementCount = () => {
this.setState({
count: this.state.count + 1
})
}
<View style={styles.panel}>
<VrButton
onClick={this._incrementCount}
style={styles.greetingBox}>
<Text style={styles.greeting}>
{`You have visited Simmes ${this.state.count} times`}
</Text>
</VrButton>
</View>
You can add sounds other than lots of amazing things. See the examples on React Resources using React 360.
You can also read a blog by Log Rocket on Building a VR app with React 360.
This codesandbox represents a common example of what we can do with React 360.
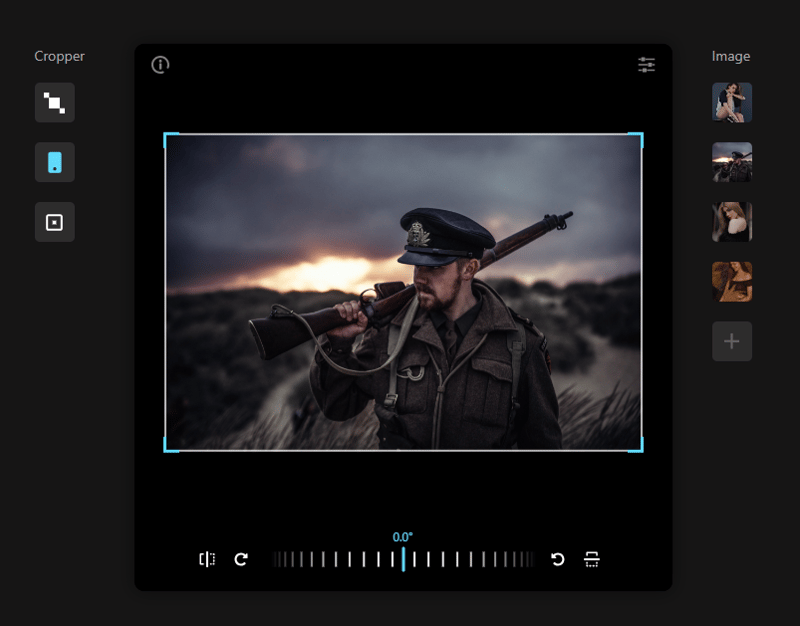
13. React Advanced Cropper – to create croppers that suit your website.
React Advanced Cropper is the advanced library that allows you to create croppers suited for any website design. It means that you can change not only the cropper’s appearance but also customize its behavior.
They are still in the beta version, meaning that the API could change in the future release.
The simple use case would be for designing software and cropping the image surface for further insights.
They have a lot of options so that makes it worth it.
Get started with the following npm command.
This is how you can use it.
import { CropperRef, Cropper } from ‘react-advanced-cropper‘;
import ‘react-advanced-cropper/dist/style.css‘
export const GettingStartedExample = () => {
const [image, setImage] = useState(
‘https://images.unsplash.com/photo-1599140849279-1014532882fe?ixlib=rb-1.2.1&ixid=eyJhcHBfaWQiOjEyMDd9&auto=format&fit=crop&w=1300&q=80‘,
);
const onChange = (cropper: CropperRef) => {
console.log(cropper.getCoordinates(), cropper.getCanvas());
};
return (
<Cropper
src={image}
onChange={onChange}
className={‘cropper‘}
/>
)
};
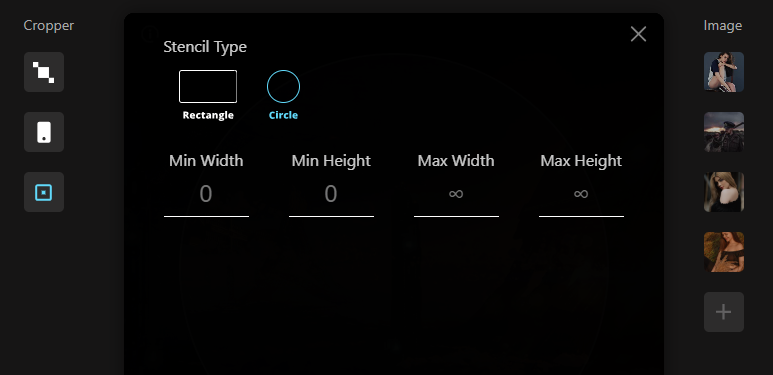
You can read the docs and they provide 20+ options to customize it.
They provide mainly three types of cropper options: Fixed, Classic, and Hybrid along with the examples and code.
You can use React Advanced Cropper to make something exciting to show the world 🙂
Star React Advanced Cropper ⭐️
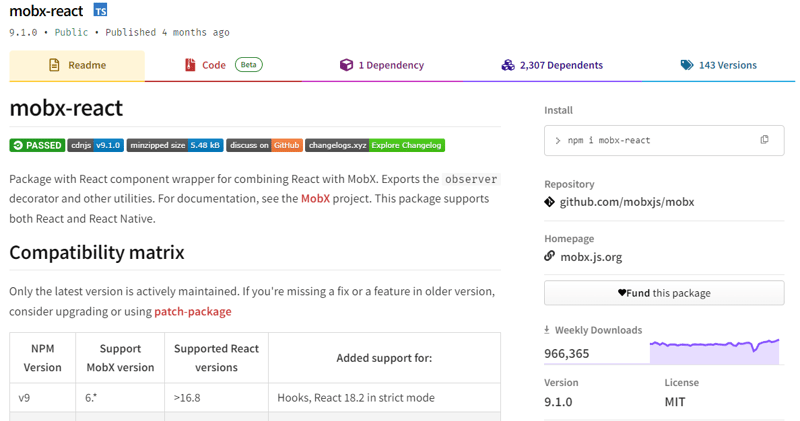
14. Mobx – Simple, scalable state management.
MobX is a proven library based on signals that simplifies and scales state management through functional reactive programming. It offers flexibility, enabling you to manage the application state independently of any UI framework.
This approach results in decoupled, portable, and easily testable code.
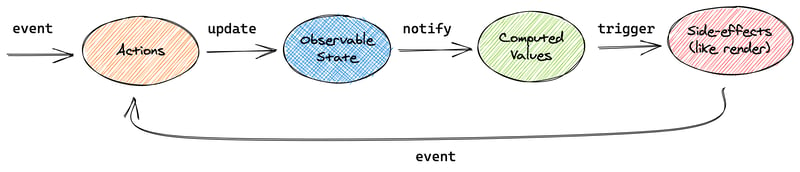
Here’s how events are handled in any app using MobX.
Image from the Docs
Get started with the following npm command.
// CDN is also available
This is what it would look like.
// —- ES6 syntax —-
const TodoView = observer(
class TodoView extends React.Component {
render() {
return <div>{this.props.todo.title}</div>
}
}
)
// —- ESNext syntax with decorator syntax enabled —-
@observer
class TodoView extends React.Component {
render() {
return <div>{this.props.todo.title}</div>
}
}
// —- or just use function components: —-
const TodoView = observer(({ todo }) => <div>{todo.title}</div>)
You can use external state in observer either using props, global variables, or using React Context.
You can read the docs about React Integration and npm docs.
You can also read 10-minute interactive introduction to MobX and React.
MobX has 27k+ Stars on GitHub and is used by 140K+ developers on GitHub.
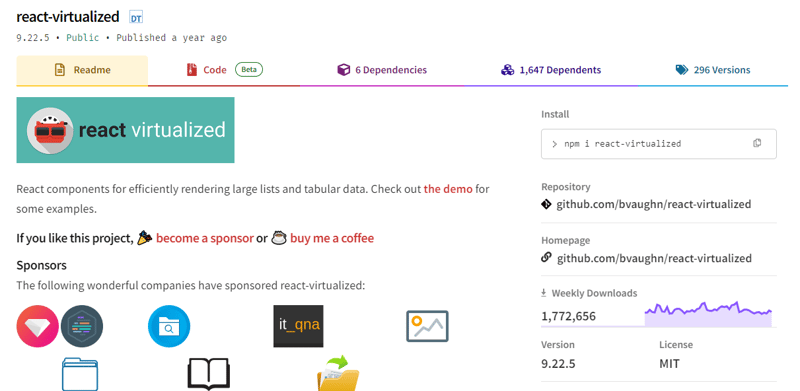
15. React Virtualized – render large lists and tabular data.
Get started with the following npm command.
Here’s how you can utilize the ColumnSizer component in the Grid. Explore the demo (docs) to learn about the available options in detail.
import ReactDOM from ‘react-dom‘;
import {ColumnSizer, Grid} from ‘react-virtualized‘;
import ‘react-virtualized/styles.css‘; // only needs to be imported once
// numColumns, numRows, someCalculatedHeight, and someCalculatedWidth determined here…
// Render your list
ReactDOM.render(
<ColumnSizer
columnMaxWidth={100}
columnMinWidth={50}
columnCount={numColumns}
width={someCalculatedWidth}>
{({adjustedWidth, getColumnWidth, registerChild}) => (
<Grid
ref={registerChild}
columnWidth={getColumnWidth}
columnCount={numColumns}
height={someCalculatedHeight}
cellRenderer={someCellRenderer}
rowHeight={50}
rowCount={numRows}
width={adjustedWidth}
/>
)}
</ColumnSizer>,
document.getElementById(‘example‘),
);
You can read the docs and the demo.
They have provided React-window as a lighter-weight alternative, but this one is more popular in terms of release and stars so I covered this option. You can read which option is better for you: How is react-window different from react-virtualized?.
It is utilized by 85k+ developers and has 25k+ stars on GitHub. It also has an impressive 1700k+ weekly downloads.
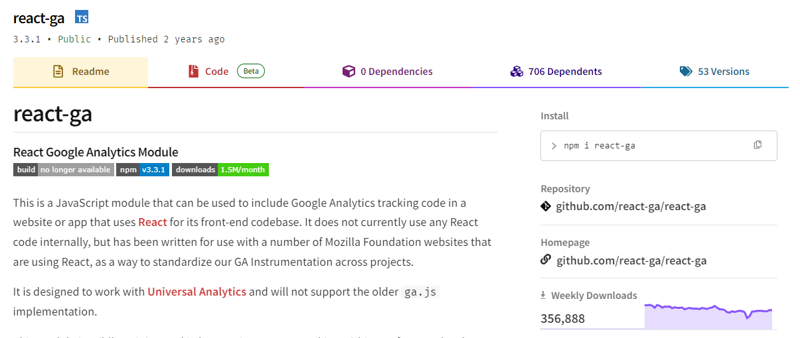
16. React Google Analytics – React Google Analytics Module.
This is a JavaScript module that can be used to include Google Analytics tracking code in a website or app that uses React for its front-end codebase.
This module is mildly opinionated on how we instrument tracking within our front-end code. Our API is slightly more verbose than the core Google Analytics library to make the code easier to read.
Get started with the following npm command.
This is how you can use it.
ReactGA.initialize(‘UA-000000-01‘);
ReactGA.pageview(window.location.pathname + window.location.search);
<!– The core React library –>
<script src=“https://unpkg.com/react@15.5.0/dist/react.min.js“></script>
<!– The ReactDOM Library –>
<script src=“https://unpkg.com/react-dom@15.5.0/dist/react-dom.min.js“></script>
<!– ReactGA library –>
<script src=“/path/to/bower_components/react-ga/dist/react-ga.min.js“></script>
<script>
ReactGA.initialize(‘UA-000000-01‘, { debug: true });
</script>
You can read the docs and see the demo after running npm install npm start and go to port 8000 on localhost.
It has 350k+ weekly downloads and has more than 5k stars on GitHub (archived).
Star React Google Analytics ⭐️
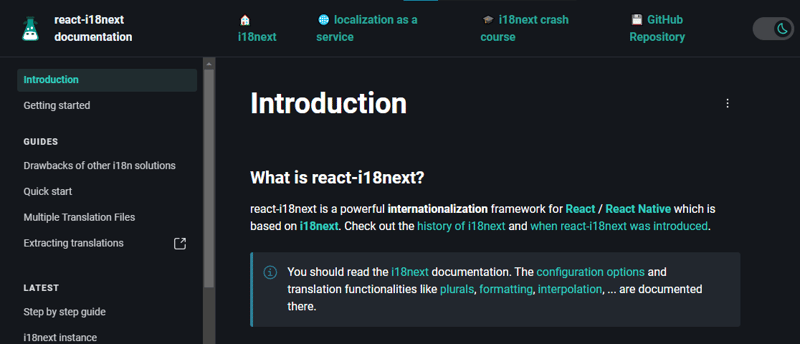
17. react-i18next – Internationalization for react done right.
There is no need to change your webpack configuration or add additional babel transpilers.
Get started with the following npm command.
Let’s compare how the code structure looks.
before using react-i18next.
<div>Just simple content</div>
<div>
Hello <strong title=“this is your name“>{name}</strong>, you have {count} unread message(s). <Link to=”/msgs“>Go to messages</Link>.
</div>
…
after using react-i18next.
<div>{t(‘simpleContent‘)}</div>
<Trans i18nKey=“userMessagesUnread“ count={count}>
Hello <strong title={t(‘nameTitle‘)}>{{name}}</strong>, you have {{count}} unread message. <Link to=”/msgs“>Go to messages</Link>.
</Trans>
…
You can read the docs and head over to interactive playground at Codesandbox.
This tool is used by over 182k+ developers and has more than 8k+ stars on GitHub. Its credibility is further solidified by an impressive download count of 3400k+ on the package, making it an excellent choice for your next React project.
You can also read a blog by Locize on React Localization – Internationalize with i18next.
Whew! Such a long list of useful projects.
I know you have more ideas, share them, and let’s build together 😀
That is all for now!
Developer experience is crucial when taking on a new project which is why some projects have huge communities while others do not.
React communities are damn huge, so be part of those communities and take your project to the next level using these open source projects.
Have a great day! Till next time.
Follow me on GitHub.
Follow CopilotKit for more content like this.

