
Scenario
Amazon RDS Proxy can help busy online stores manage sudden traffic surges during sales events by pooling and sharing database connections. This ensures a smooth shopping experience even during peak times and helps the store recover quickly from any database failures, minimizing downtime and maintaining customer satisfaction.
This blog will cover everything we need to know about Amazon RDS Proxy and how to configure it!
What is Amazon RDS?
How does it work?
Benefits of configuring Amazon RDS Proxy
Hands-on
Conclusion
What is Amazon RDS?
Amazon RDS stands for Amazon Relational Database Service. It is a web service that makes it easier to set up, operate, and scale a relational database in the cloud. Amazon RDS manages routine database tasks such as provisioning, patching, backup, recovery, and scaling, allowing developers to focus on their applications rather than the administrative aspects of managing a database.
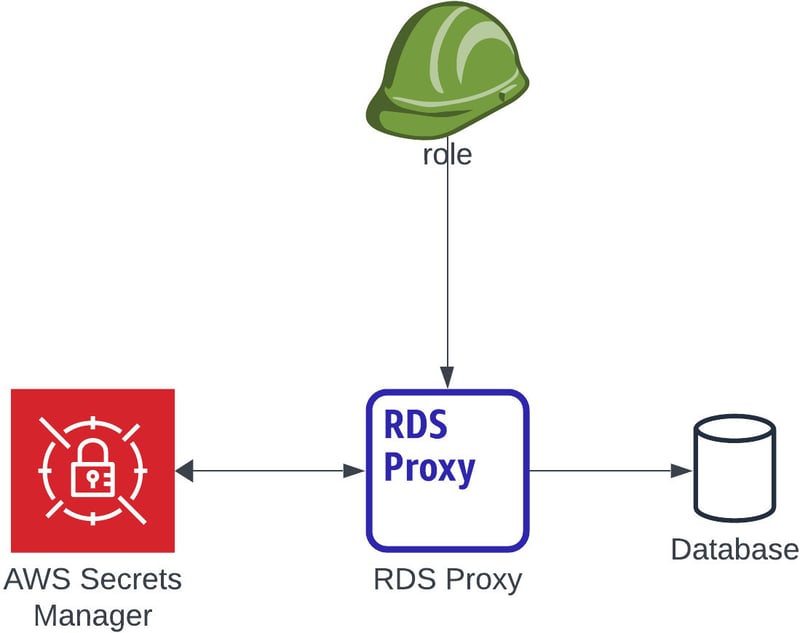
How does it work?
Amazon RDS Proxy simplifies connection management for Amazon RDS database instances by pooling and sharing database connections, actively handling network traffic between client applications and databases. It optimizes memory and CPU resources, reduces overhead on database servers, and improves application scalability and resilience to database failures
Benefits of Configuring RDS Proxy?
Improved Database Connection Management
Enhanced Scalability
Better Fault Tolerance
Security
Database Caching
Hands-on
Amazon RDS Database
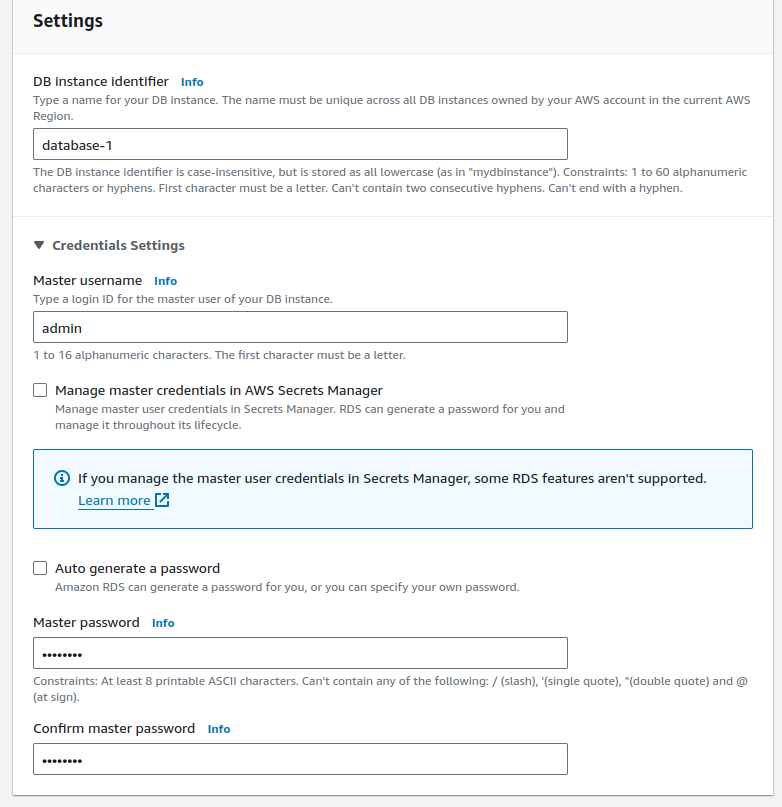
Open the Amazon RDS service in the AWS console, choose Standard Database, and then pick the engine type that you want to use. Additionally, choose free-tier templates.
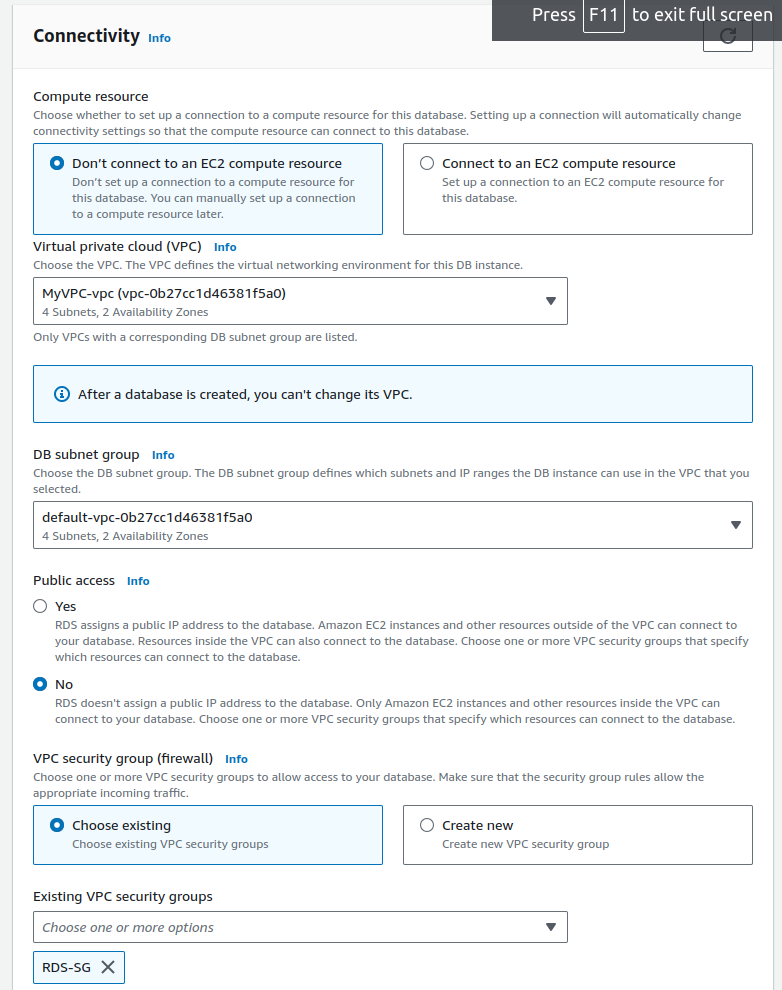
Enter your password in the settings section. Next, pick “Amazon VPC with No Public Access” under “Connectivity” and start a new security group.
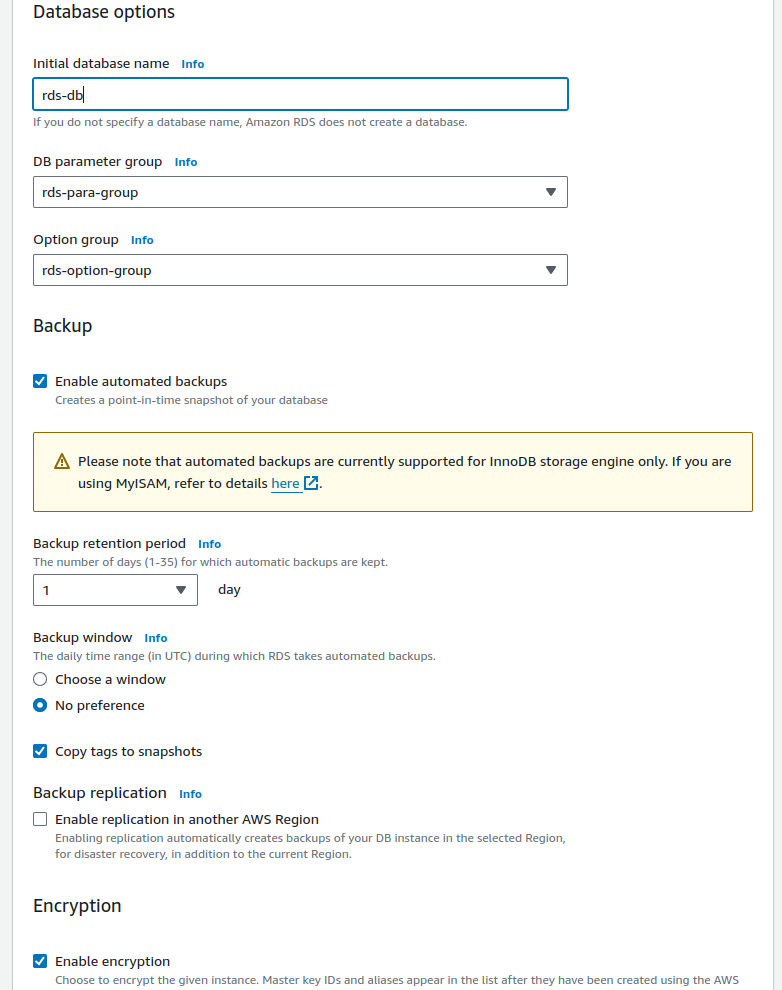
finally, in additional configuration, provide a database name, make all the settings as default and create the database
AWS Secrets Manager
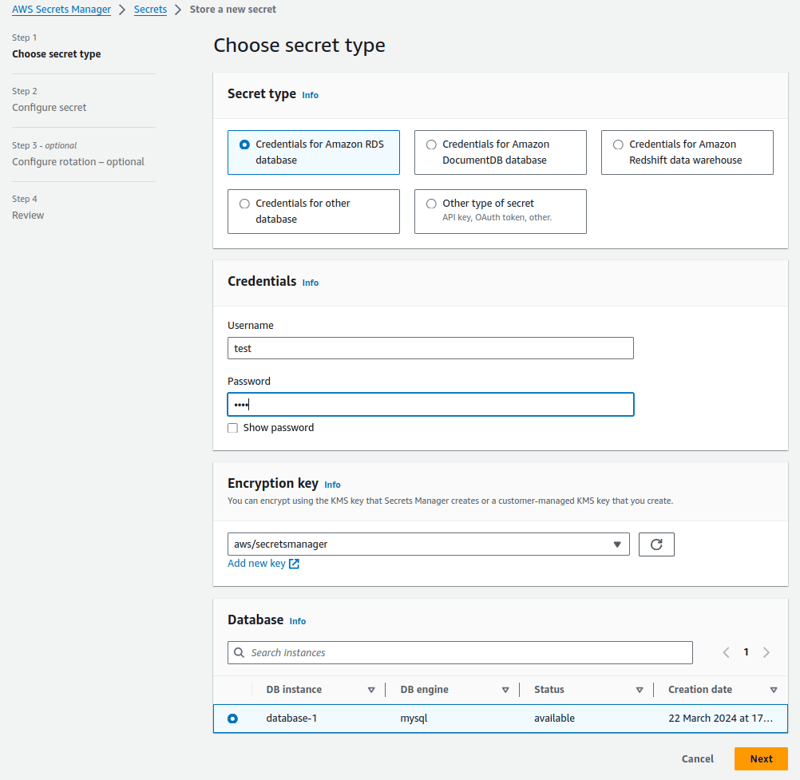
Enter your credentials (password and username), choose the “Credentials for Amazon RDS database” secret type, and then pick the recently created database and encryption key.
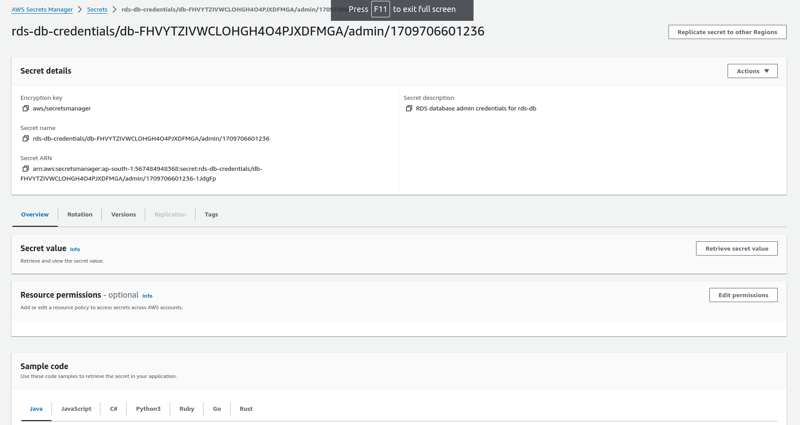
Click Next after entering your name in the Configure Secret field. once more and developed the secret manager. Please copy the Secret ARN and keep it somewhere secure.
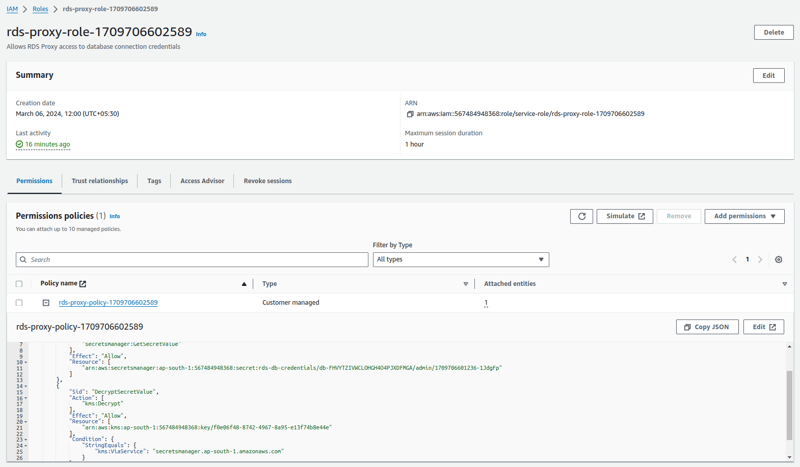
AWS IAM Role and Policy
Make a policy that permits the use of Amazon KMS and AWS Secret Manager. It should also be connected with an IAM role that permits the use of Amazon EC2 and RDS services.
Note that the policy is below. Setting up AWS KMS has an optional setting.
{
“Version”: “2012-10-17”,
“Statement”: [
{
“Sid”: “GetSecretValue”,
“Action”: [
“secretsmanager:GetSecretValue”
],
“Effect”: “Allow”,
“Resource”: [
“AWS-Secret-Manager-ARN”
]
},
{
“Sid”: “DecryptSecretValue”,
“Action”: [
“kms:Decrypt”
],
“Effect”: “Allow”,
“Resource”: [
“AWS-KMS-ARN”
],
“Condition”: {
“StringEquals”: {
“kms:ViaService”: “secretsmanager.ap-south-1.amazonaws.com”
}
}
}
]
}
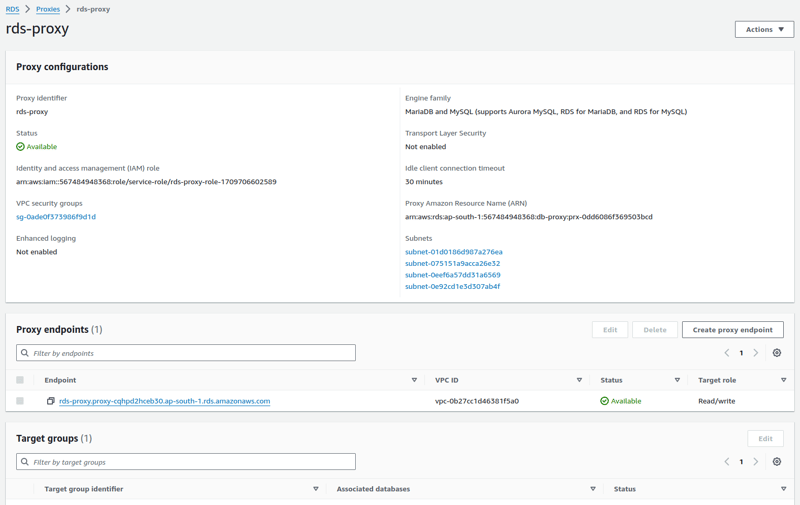
Amazon RDS Proxy
Enter the proxy address and select Database in the target group configuration. Select the newly established Secret Manager role in Connectivty. Then, under Additional Configuration, build a new Security Group and select build Proxy.
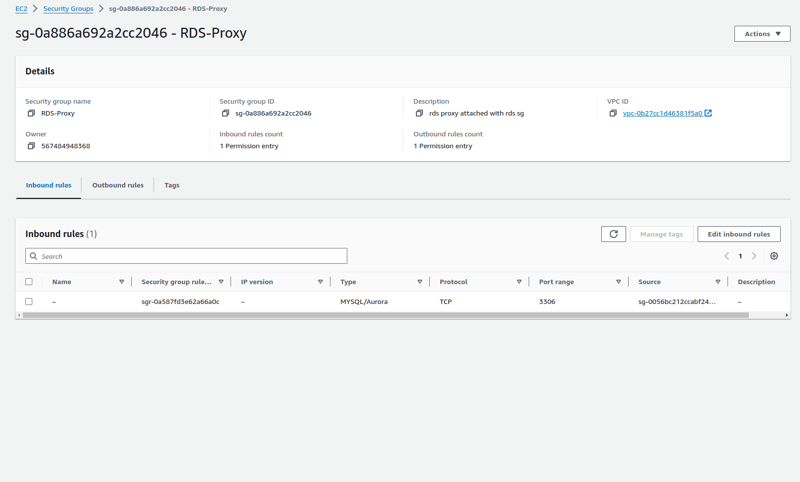
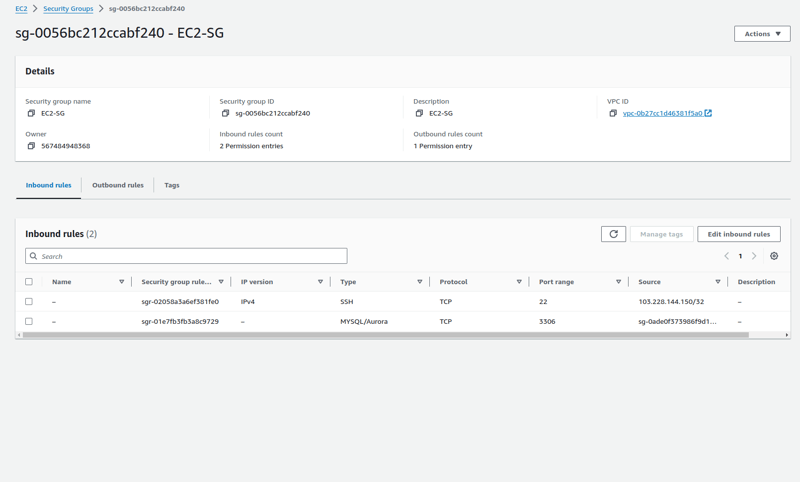
Amazon Security Groups
Note: It is crucial that this step be configured correctly.
Allow inbound traffic from port 3306 for the rds proxy security group, which is for mysql/aurora, with the ec2 instance security group as the source.
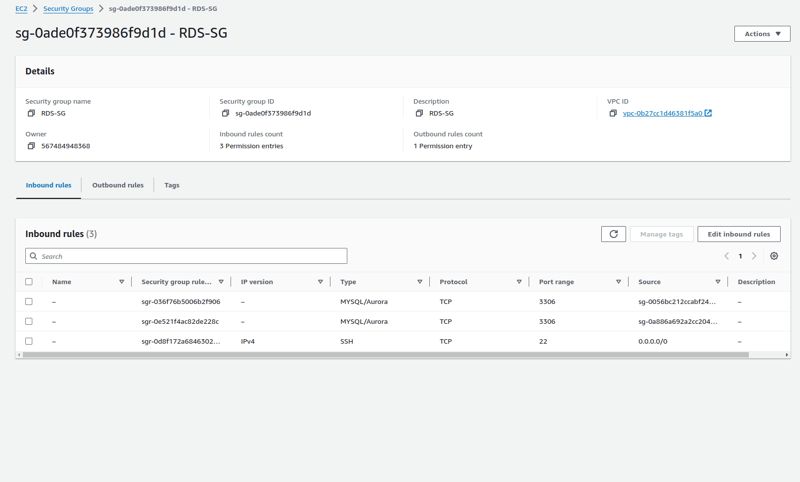
Allow incoming traffic from the rds proxy security group and the ec2 security group for the rds security group. The EC2 security group allows port 3306, which is used for MySQL and Aurora.
Permit the post-22, or SSH, for the EC2 security group.
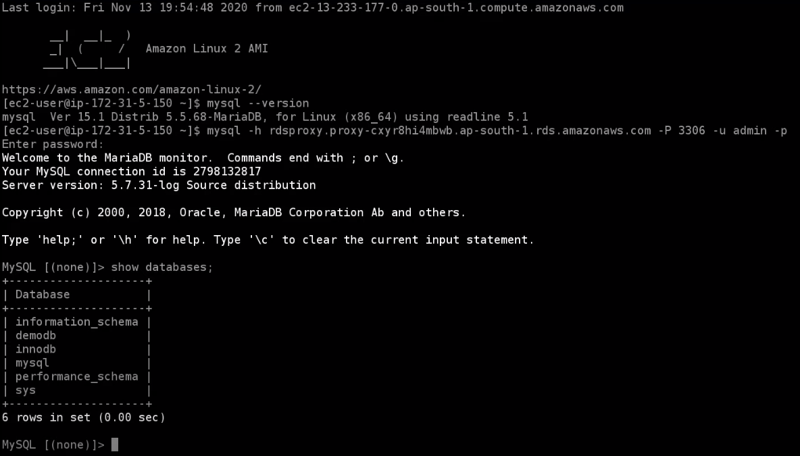
Amazon EC2 Instance
Launch your EC2 instance, install MySQL and execute the command
mysql -h -P 3306 -u admin -p
The connection to the Amazon RDS database is successful.
Conclusion
Finally, we have completed a hands-on exercise to gain an understanding of the Amazon RDS proxy, including its importance and the reasons to use it.
![[Self-Study] Microsoft Azure Fundamentals: Describe cloud concepts Module](https://media.dev.to/cdn-cgi/image/width=800%2Cheight=%2Cfit=scale-down%2Cgravity=auto%2Cformat=auto/https%3A%2F%2Fdev-to-uploads.s3.amazonaws.com%2Fuploads%2Farticles%2F3xokov3efaqljamhjpvb.jpg)
