
Home Assistant has a built-in NFC tag creator. But it also offers the means to create NFC tags through a different method: utilising webhooks.
Why might you want to do this?
You may (deliberately!) want to allow anyone in your home the ability to trigger automations (including guests who aren’t on your system).
Currently, the NFC Tags functionality doesn’t support creating tags on the desktop. Personally, I think that this is an unfortunate omission. Like most things, I find using destkop applications to create NFC tags much quicker than replicating the action on a smartphone (to do this, you’ll obviously need a USB NFC reader/writer).
You can keep a list of your webhook URLs. The trigger that makes this work is visible.
You might want to use this method as a chance to explore webhooks generally.
If you want to use scanable barcodes to create automations you might want to use a symbology other than QR (like DataMatrix or PDF417). We can create and design our own stickers this way.
You might just want to do things a little bit differently!
How To Create The NFC Tags (Or Barcodes)
Here’s how to set this up:
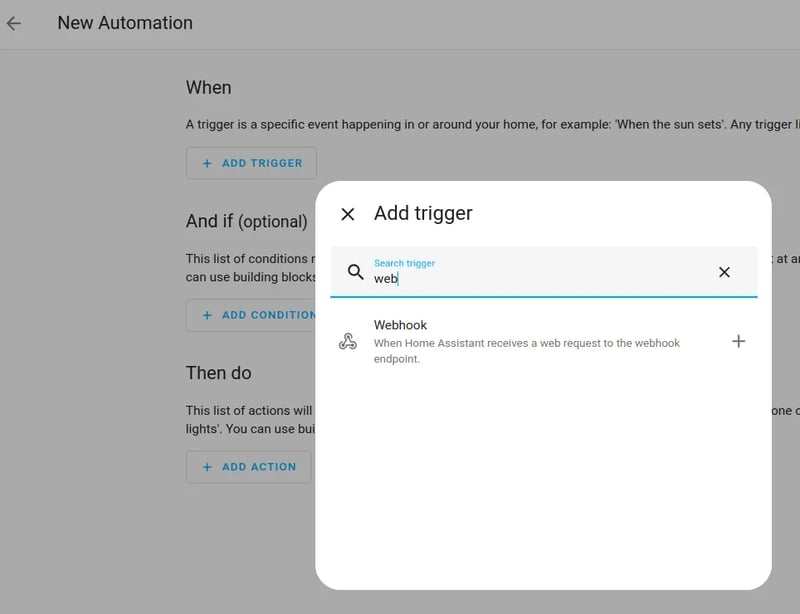
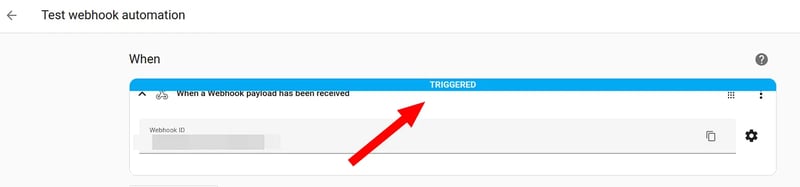
In ‘Automations’ set your trigger to be a webhook.
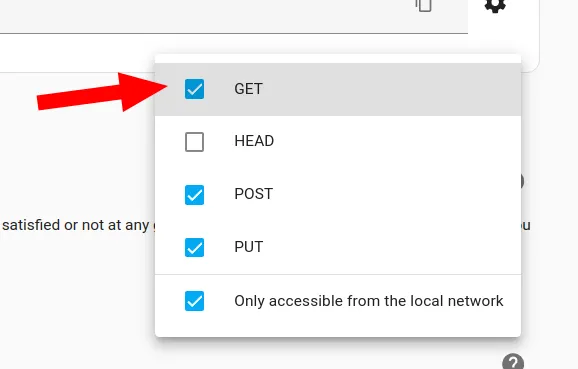
But don’t stick with the default settings.
Turn on ‘GET’ and (this is my recommendation) preserve “Only accessible from the local network” (GET is required for the webhook to be trigger-able from a browser request; otherwise the webhook is waiting for a POST request).
Under “Then Do” set up whatever you want to automate.
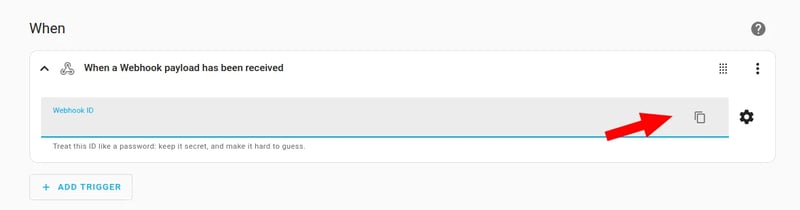
Creating The NFC Tags (Or Custom Barcodes)
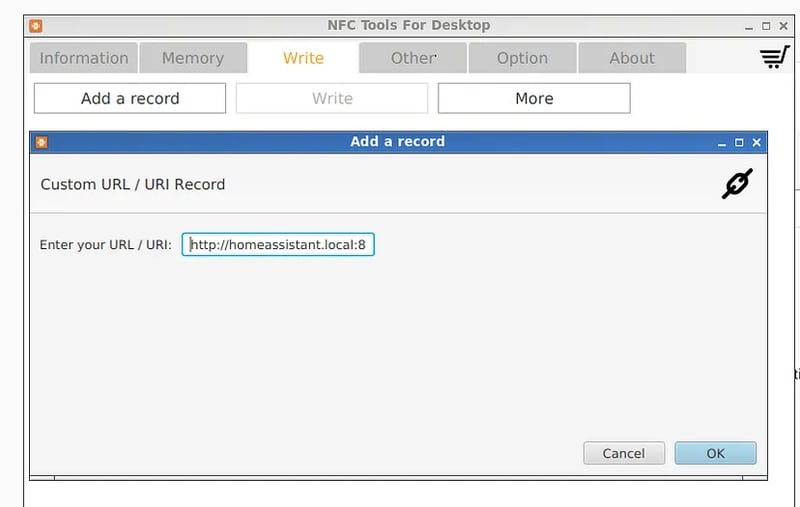
Copy the webhook URL once it’s been generated onto your clipboard:
We can now use any program we like to write the tag, whether on desktop or mobile.
I like NFC Tools (it has a nice Linux GUI) but there are plenty of tools:
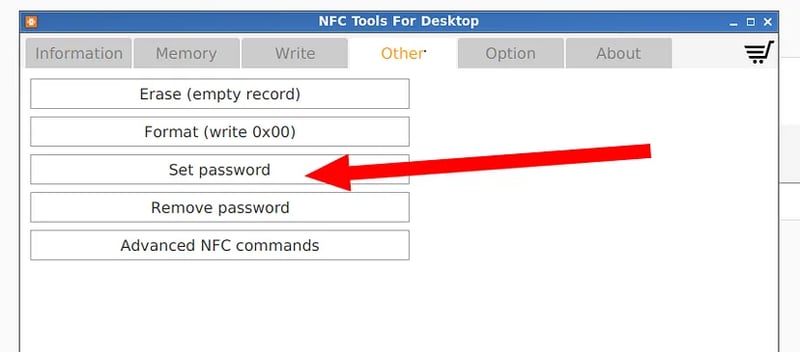
Another little security feature I like to add to all my tags is password protection.
This protects the tags against accidental deletion.
A stronger version of this is locking the tags (in NFC Tools this option is only available on the mobile version).
But this is an irreversible action which will prevent anyone (including you!) from ever being able to edit the tags.
If you like the idea of password-protecting your tags, in NFC Tools, jump into ‘Other’ after writing the payload and select ‘Set password’:
For barcodes it’s the same idea: we just need to create a barcode with the webhook URL. Here’s an idea for one that could trigger an automation that runs a home theatre lighting (and sound) setup. Give it to your friends the next time you’re hosting a movie night (and are feeling lazy!).
The nice thing about creating NFC tags (or barcodes) with webhooks is that (so long as the webhook URLs remain viable) you don’t need to edit the actual tags ever again.
If you decide that you want to switch up what the NFC tag does a bit, for example, you can simply make your changes under the Home Assistant automation you’ve already set up. The trigger is the same — you just need to change what it does.
You can validate that your NFC-to-webhook automation is running correctly by scanning it with your phone. You should see this pop up from the automation editor:
If we’re talking about automations that trigger lighting changes, it will probably be (visually) obvious that the webhook has succeeded and the automation has worked.
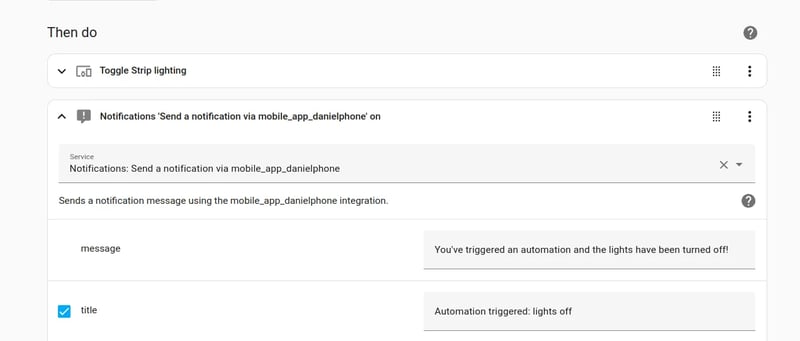
But in cases where there mightn’t be a physical indication (let’s say you triggered an automation to turn off the lights in one hour’s time) you might consider adding a little confirmation notification.
Just add this as an additional action under ‘Then Do’.
Here’s a little one:
LAN-Only Webhooks? Or WAN-Accessible Webhooks?
This method works reliably from within a LAN environment, but what if you wanted to create NFC tags that you could scan remotely?
I use Tailscale for remote authentication but it won’t resolve the webhook URLs which begin with “homeassistant.local” (or access homeassistant.local at all for that matter).
Exposing this URL as a subnet route might seem like a logical solution except that it doesn’t work that way — subnet routes need to be local IPs and the default Home Assistant installation path looks like a conventional internet address to the tool.
I’m certain there’s a smart way around this but given that I can’t envision needing to scan a home automation NFC tag remotely (for the moment) I’m happy to leave finding a solution to this networking quandary on the backburner (of note: the default method doesn’t run into this problem. I’m not sure whatever they’re doing but … it works).
Other Things You Might Want To Think About
For elegance, configure webhooks that redirect to a confirmation URL. Note: I have no idea if this is possible within the confines of HA’s current webhooks implementation.
Use external webhooks and map them onto internal ones. For this, look into webhook relays.
Some Goofy Use-Case Ideas
(LAN-only webhooks assumed. Some may consider this too insecure. To each their own)
Give your friends the ability to run some automations like setting up lighting for a home theatre or getting your apartment into a “party mode” (media center and speakers on, lighting adjusted, etc).
Set up your own internal automations
Micromanage your friendly neighbour who offered to check on your plants while you’re on vacation by demanding that they tap your NFC code when they’re done
(I can probably think of many more; the uniting idea is allowing non-authenticated users to change things or notify those in the authentication pool).


