
Bokeh
Bokeh is an open-source Python library for creating interactive, web-based visualizations and dashboards. It provides high-performance statistical and scientific computing capabilities, making it particularly useful for data analysis and exploration.
Interactive Plots: Bokeh allows you to create highly customizable and interactive plots, such as line plots, scatter plots, bar charts, and more.
Dashboard Applications: With Bokeh, you can build complex dashboard applications that combine multiple plots, widgets, and layouts in a single web application.
Data Visualization: Bokeh is widely used for data visualization tasks, enabling you to explore and present data in an interactive and visually appealing manner.
Scientific Computing: Bokeh integrates well with other Python libraries like NumPy, Pandas, and SciPy, making it a powerful tool for scientific computing and data analysis.
Web Applications: Bokeh’s ability to create web-based visualizations makes it suitable for building web applications that require interactive data exploration and presentation.
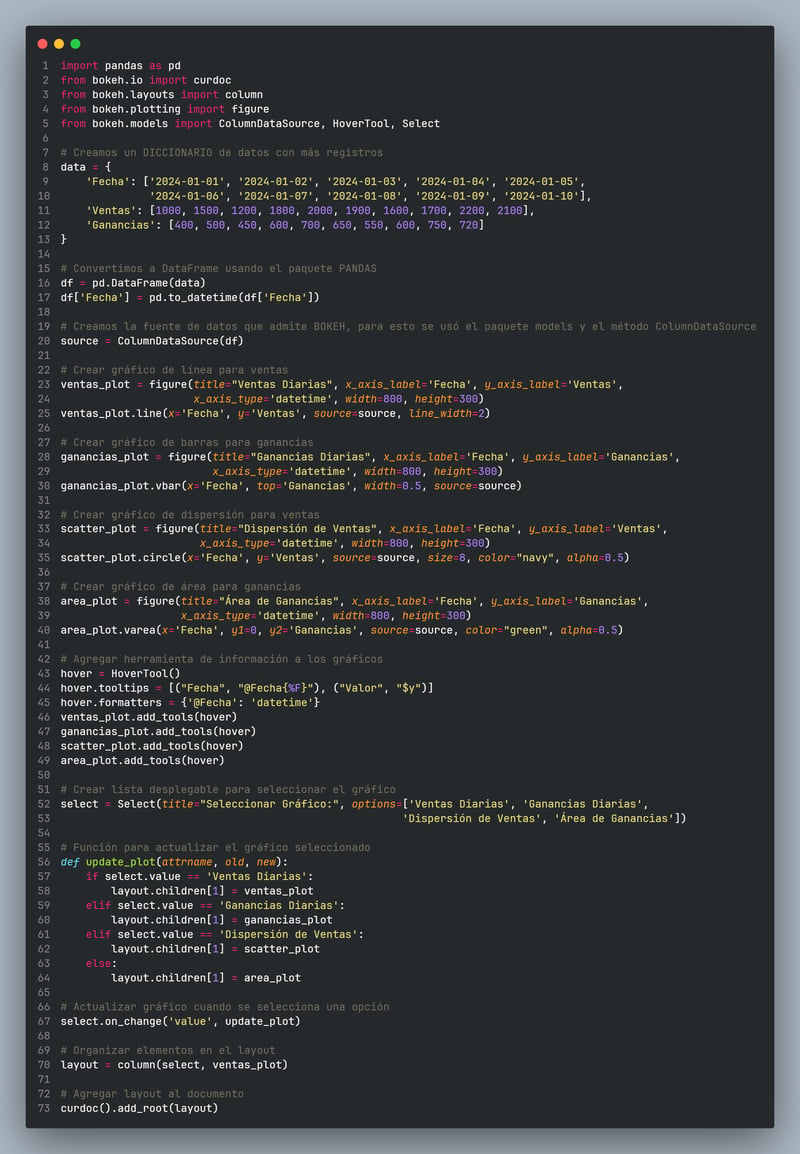
Code: A python code was developed for a dashboard with bokeh, using the panda and bokeh libraries.
Here we have the compiled code and the generated graphics.
Creating a dashboard with BOKEH in python
Requirements:
Python
Visual Studio Code
### First steps
Open visual studio code
We create a working environment and add a .py file
Important, to make this dashboard it is necessary to install the dependencies, for this we open a console in administrator mode and we execute
Once installed, run the sample code to generate graphics.
As we can see we have the panda and bokeh packages imported.
Last step
Run the project.
To run the project we will open the console and paste the following code:
this will show the dashboard on a local page.
Deploy the project in the cloud
To deploy the project it is necessary to have a cloud service provider, in this case I used a debian VPS.
to install python in linux
install the environment
mkdir my_project
cd my_project
python3 -m venv my_env
pip install bokeh
Make my_env permanent:
nano ~/.bashrc
copy and past at the end:
source /ruta/a/my_env/bin/activate
in my case it was:
ctrl+o ENTER ctrl+x
with “source” you’re activating bashrc
source ~/.bashrc
Permanent configuration of the project
finally we make the created websocket permanent, that is to say, it does not close when closing putty, now we create a nohup that will always be executed:

