
Gatsby is great for creating static websites, landing pages, and blogs. After building a static site with a headless CMS, it’s time to build Gatsby blog with advanced SEO features.
This tutorial will show you how you can optimize your blog for SEO using a simple config
What do you need to build a Gatsby blog
Building a blog in the modern web ecosystem can be a challenging task, especially when it comes to ensuring SEO-friendliness. However, with the right tools like Gatsby and BCMS, this task becomes significantly easier and more efficient.
In this tutorial, you will learn how to build an SEO-friendly blog using Gatsby, as a static site generator, and BCMS, a headless content management system.
Is Gatsby the best choice for blogging?
Gatsby is a static site generator that builds your website as static files that can be deployed easily on various hosting platforms. It leverages powerful pre-configuration to build a website that uses only static files for high-speed page loads, service workers, code splitting, server-side rendering, intelligent image loading, asset optimization, and data prefetching. Gatsby’s rich data plugin ecosystem lets you build sites with the data you want from various sources including BCMS.
Gatsby offers numerous advantages for blogging, including:
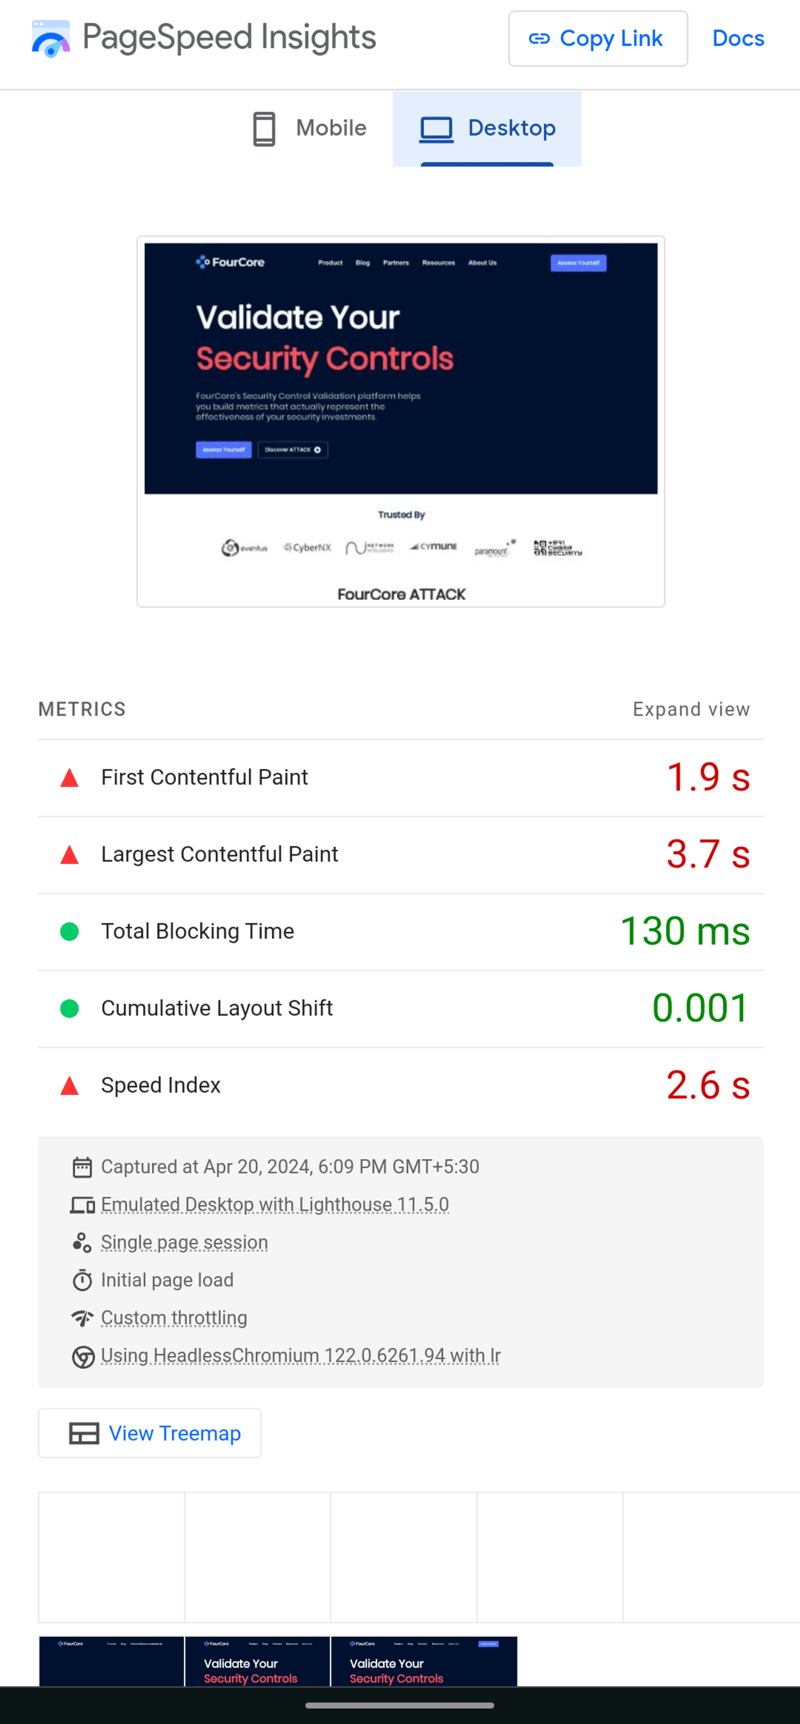
Performance: As Gatsby generates static HTML files, the site loads faster and performs better than traditional dynamic websites.
SEO: Gatsby sites are static, hence inherently more SEO-friendly, as search engines can easily crawl and index their content.
Security: Since Gatsby sites are static, they have a smaller attack surface and are less prone to security vulnerabilities.
Customization: Gatsby allows for extensive customization through its Gatsby plugin ecosystem and React-based architecture, enabling you to create a unique and tailored blogging experience.
Content management: Gatsby can be integrated with various headless CMS providing a flexible content management solution.
BCMS: A Headless CMS suited for the Gatsby projects
BCMS is a headless content management system. Unlike traditional CMS, a headless CMS provides developers with greater flexibility as it separates the content management from the presentation layer. This means you can manage your content on BCMS and present it on any platform or device using APIs or BCMS integration packages. BCMS is a perfect companion for Gatsby as it allows for easy content updates and changes without the need to rebuild or redeploy your Gatsby site.
Building an SEO-friendly Gatsby blog with a headless CMS
By combining Gatsby’s efficient page load and BCMS’s API key for easy content management, you can create a user-friendly and SEO-friendly blog. Gatsby’s static nature ensures your blog loads fast, a key factor in SEO ranking. Meanwhile, BCMS allows for easy meta tags and content adjustments, which are crucial for SEO. Furthermore, Gatsby’s React-based framework allows the implementation of advanced SEO concepts like structured data and AMP.
This tutorial leverages the BCMS Gatsby Blog starter. If you need to see how everything came together, feel free to head to the Gatsby blog GitHub repo. The article also leverages the BCMS instance so you can always clone to see it in action(More on the BCMS Instance later on).
Gatsby blog tutorial: Table of contents
Setting Up BCMS
Creating content structure in BCMS
Setting up Gatsby using BCMS CLI
Getting data from BCMS with Gatsby
Recap, Next steps and Deployment.
1. Setting up BCMS
To start with, you’ll need to create an account on the BCMS website. Once your account is created, you can either decide to use the cloud version of BCMS or the self-hosted version. Whichever you choose make sure to create an account because you will need it to login later.
If you choose the cloud version, create a BCMS instance. The instance is like the repository that stores the content for your application.
If you use the self-hosted version, the instance is what you automatically create using the bcms –cms create command.
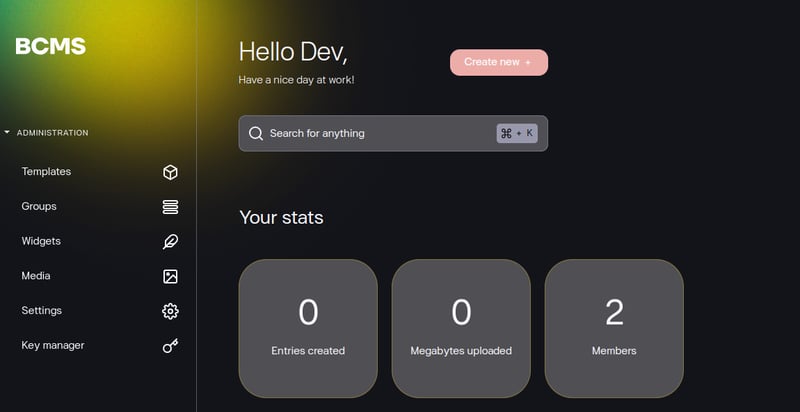
After the creation of your instance, you should see a dashboard that looks similar to the photo below:
2. Creating content structure in BCMS
Now that you have created your instance, the next thing to do is to create your content structure. In this section, you will learn how to create your content structure in BCMS.
What is Content structure?
Content structure also known as Content model refers to the organization and arrangement of information within your blog. This includes defining your posts, categories, authors, tags, and any other elements that make up your content. Having a well-defined structure is crucial for both SEO and user navigation.
In other words, your content structure is like creating the skeleton or the framework in which your content lives.
Creating your content structure in BCMS
BCMS provides the Template feature which you can use to define your content structure. It is located on the left side of the dashboard as seen in the preceding picture. Before creating a template, you need to identify the fields you’re creating the templates for and the properties that need to live on that template.
So now I will list the templates for the pages I will use in this tutorial. Bear in mind that this may differ from how you plan to do yours in other projects, which is very well welcomed. There is no 1 way as to how to approach this. But for this tutorial, these are the templates I’m going to use for the pages in the application:
About Page
Blog (This is the template that will contain the properties for each blog)
Blogs page
Contact Page
Home Page
Header
Footer
Creating Each Template
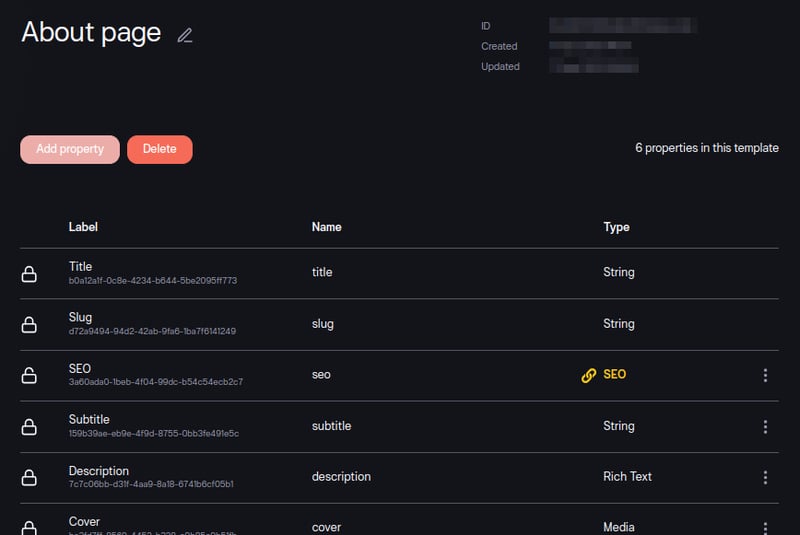
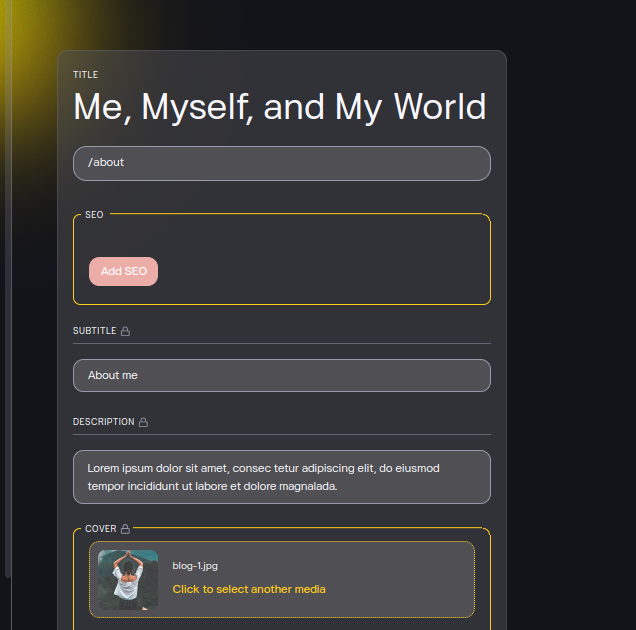
About Page
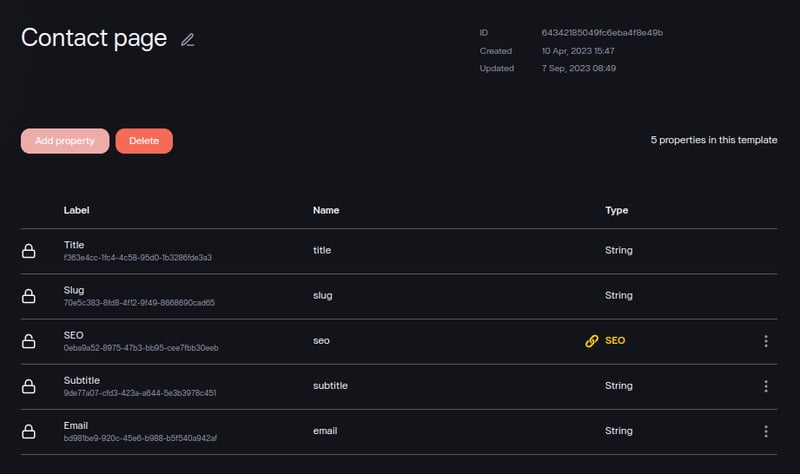
These are the properties that will live on the template as shown in the image above:
Title and slug (These are default)
SEO(This is a group that will contain basic SEO details for the page).
Subtitle
Description
Cover
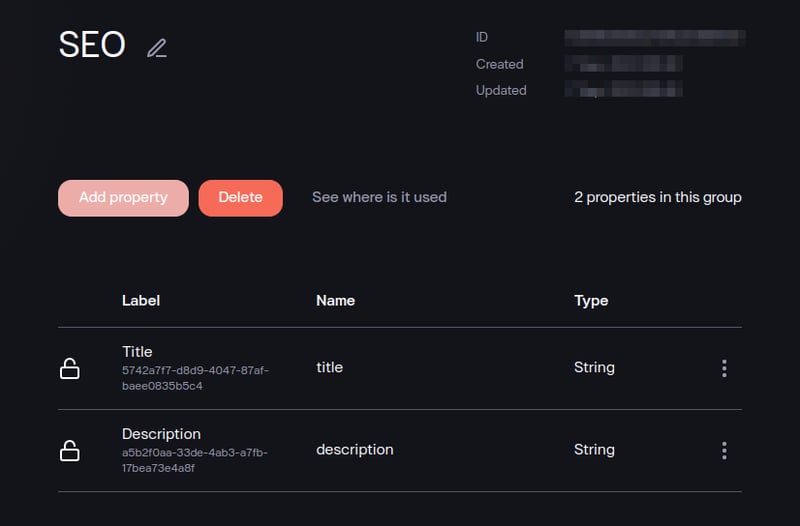
First, create a group called SEO and in there create two properties named title and description.
With that created, you can now create the About page template with the properties mentioned above.
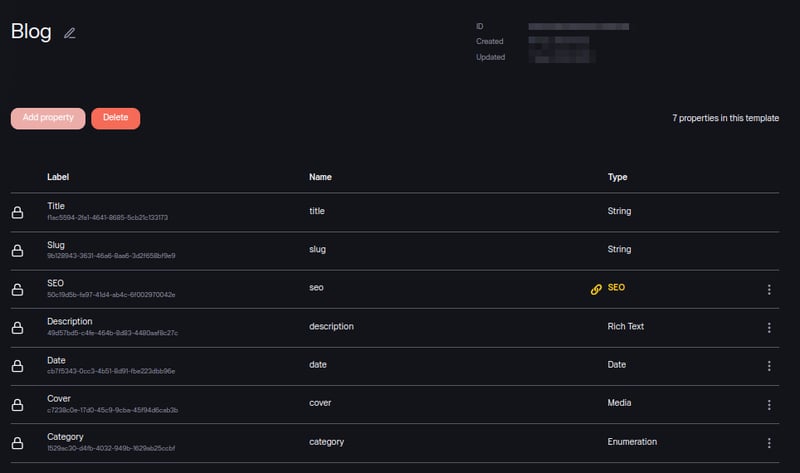
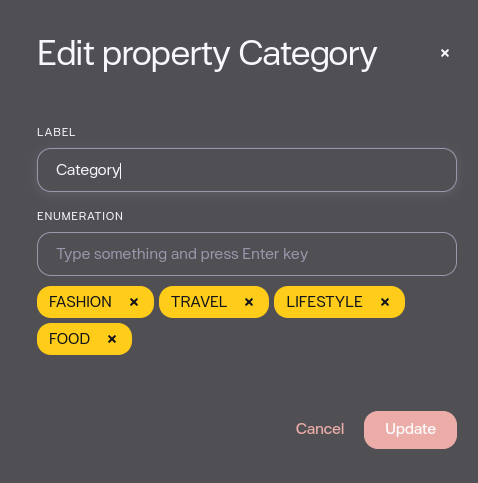
– Blog
For the category property, these are the values:
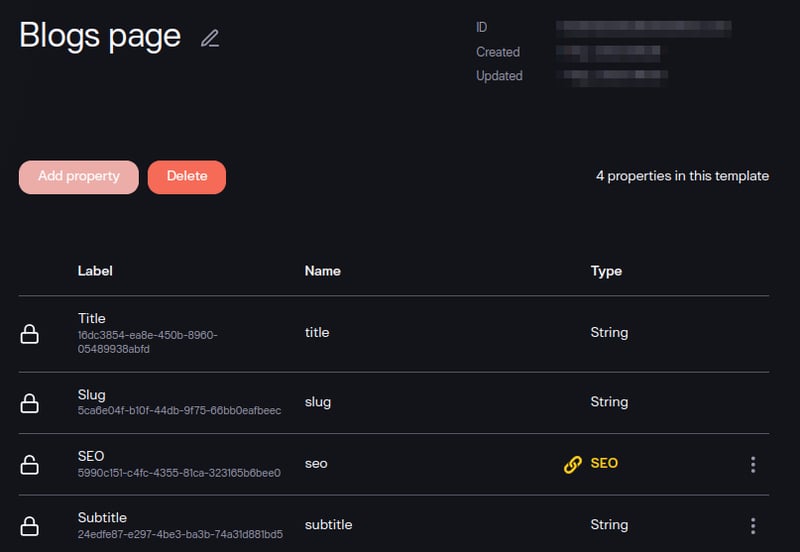
Blogs Page
-Contact Page
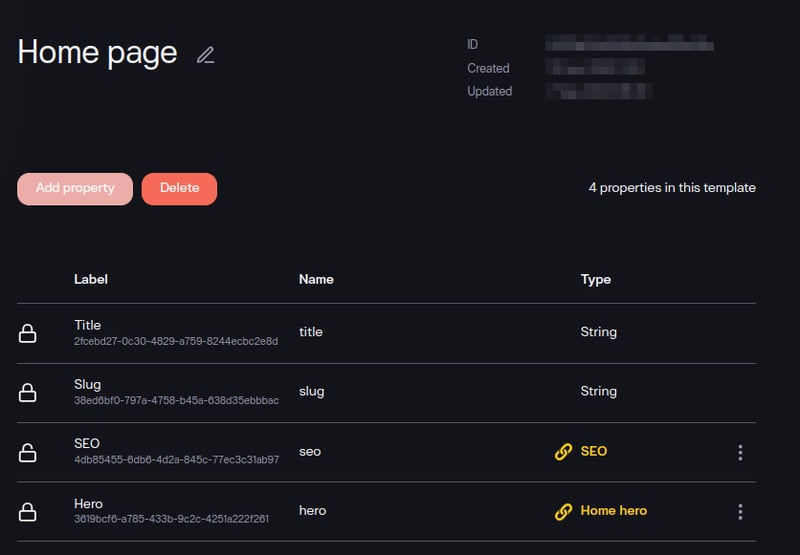
-Home Page
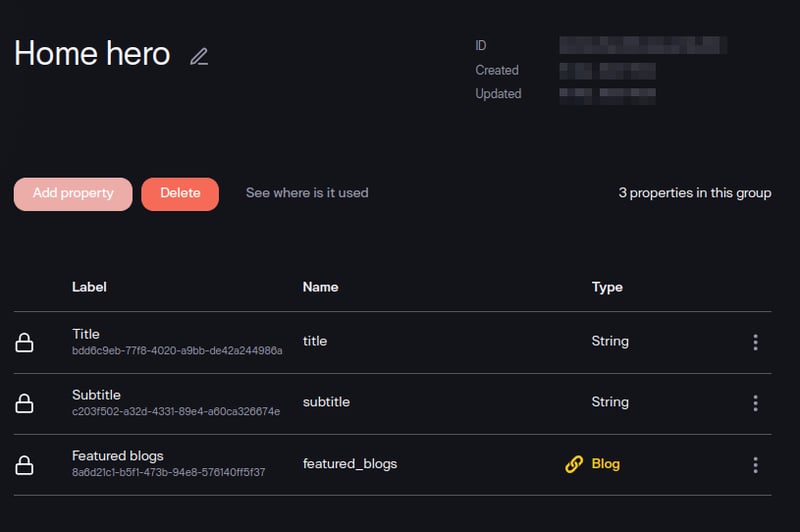
The Home Page needs a Hero section that will contain featured blogs, to do that I will create a new group called Home Hero which will contain a title, subtitle, and a Featured blogs entry pointer. So when you want to create the data for the homepage, you can link the blogs you want to feature to it.
So in addition to the default Title and slug properties, the properties that will be on the home page will be the SEO group and the home hero group.
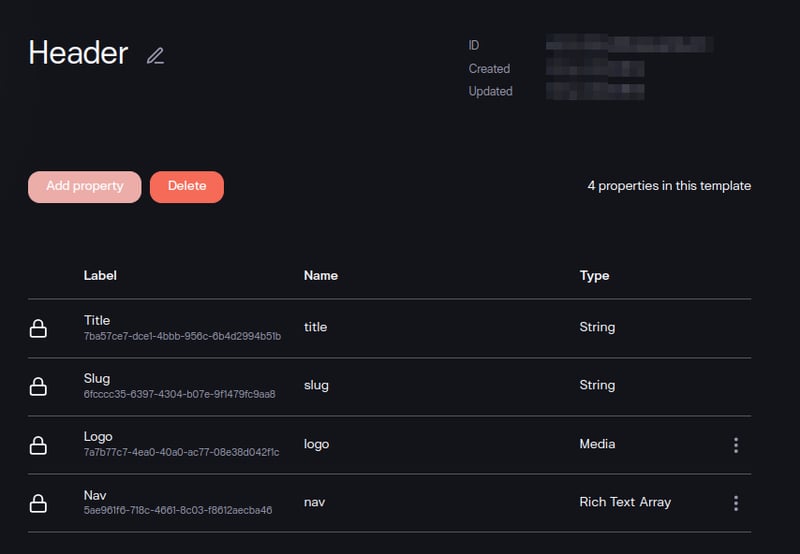
– Header
The Header needs a logo field that will hold the logo for the website and also a nav array property to hold the navigation values in the header.
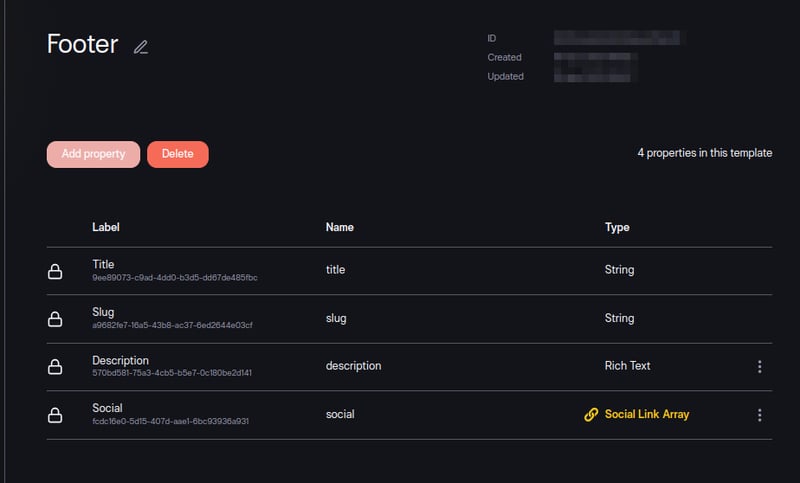
– Footer
In addition to default properties, the footer template will
have a group that holds the icon and the URL for the footer.
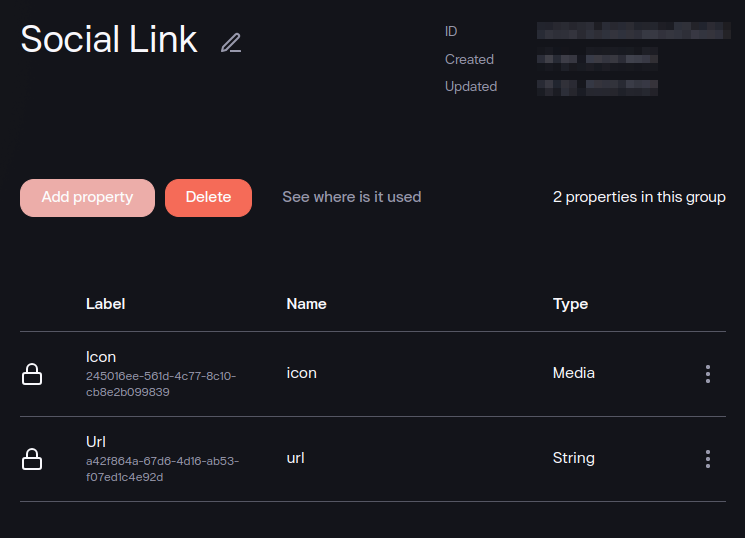
So first, create a new group called Social Link.
After that, you can now create the footer template and add this as a group which will be an array cause you will need more than one Icon and URL.
Creating Entries
After creating the content structure, the step that remains is to create the data based on these content structures. And in BCMS they’re called entries.
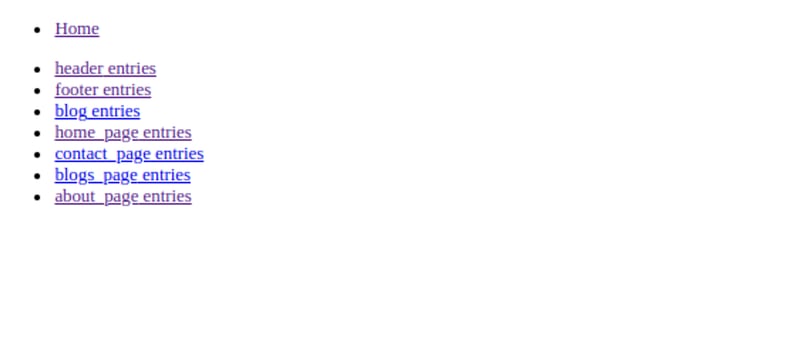
Under the entries tab on the left side of your dashboard, you will see the templates you just created, clicking on the templates leads you to where you can edit and create new entries.
Let’s create the About page entry to demonstrate this.
On the About page entry, fill in the details of the template.
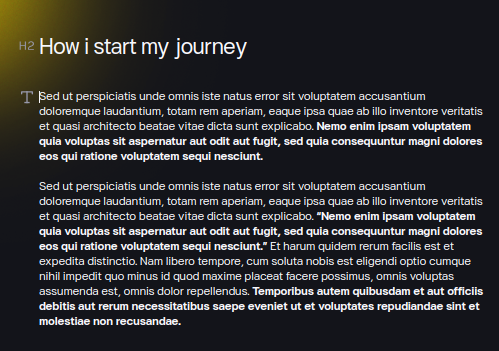
You can go further to type more information on the text field provided below.
For texts that utilize images that you can use and reuse in the content piece, use BCMS Widgets.
Widgets unlike groups are used in the entry and are not linked in the template. Please look into the deep dive about BCMS widgets tutorial to learn more about widgets and how to use them.
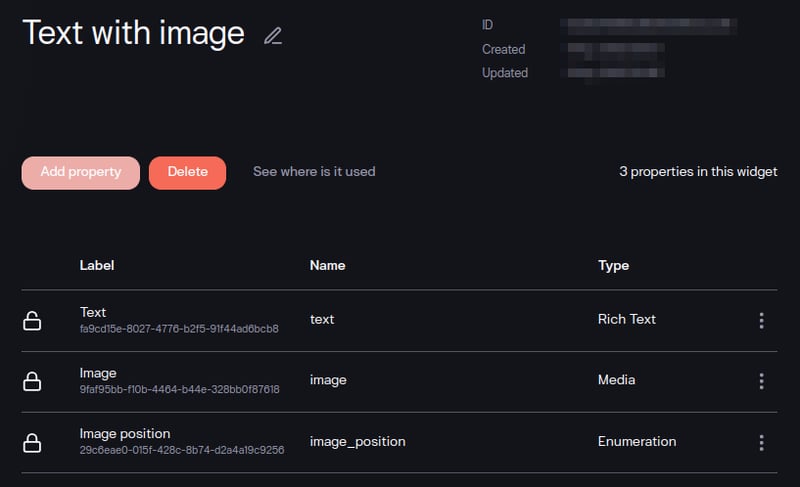
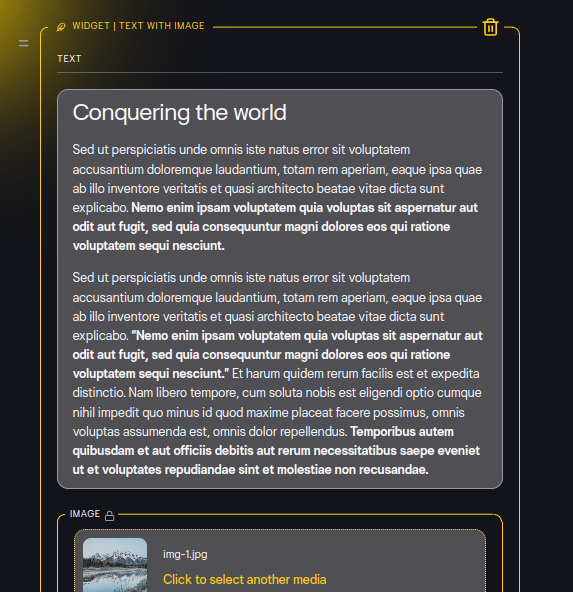
For this tutorial, I will create a widget named Text and Image that will hold text and an image along with the image position either right or left so it can be styled in my Gatsby code.
Now on your content, you can use this widget. You use a widget by entering the slash (/) symbol on a new line. You press the slash symbol and then you search for the widget and use it.
You’ve now learned how to create templates and use entries in BCMS. So go ahead and create all the entries for the templates. if you want to use the same data and images used in the starter, download the finished BCMS instance starter from GitHub and run it. Please do not forget to give us a star on GitHub.
Setting up Gatsby using BCMS CLI
It is time to create the Gatsby application. BCMS makes it easy for us to use the BCMS CLI.
To create a Gatsby application with BCMS, follow the guide in the documentation and you should get up and running in no time.
For this application I will use tailwind CSS to style the pages, so follow the official tailwind CSS installation guide for Gatsby.
If everything is successfully installed, your Gatsby website will be live on localhost:8000
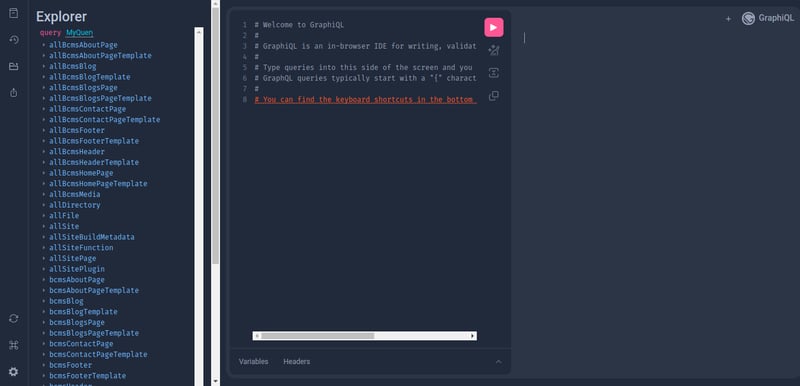
In addition to that the Graphql explorer will also be live at localhost:8000/___graphql
Please take note of the graphql explorer which contains all the BCMS data that I will query later. Play around with it as you would a graphql query and try to get the data, this will make more sense when I get the data later.
Getting data from BCMS with Gatsby
After creating the data, what is left is to use the data in the Gatsby Application. I will now show you how to use BCMS in a Gatsby project, using the Blog page, which will contain the SEO for that page, how to navigate to the different blogs in the application dynamically and how to style the content.
This section will demonstrate this using only the Blogs page and will not build out all the other pages as this will make the tutorial lengthy. With the knowledge you will get from this section, you will be well-equipped to build the other pages on your own.
Here is the link to the finished application on Github in the starters repository https://github.com/bcms/starters/tree/master/gatsby/blog. If you need to look at it at any point, you can always visit the Github, or you can clone and follow along directly.
Creating the Blogs Page
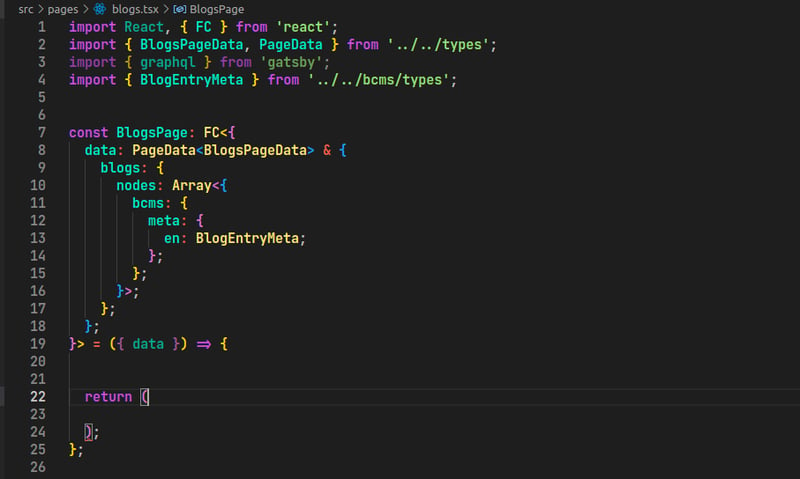
Under the pages folder, create a new folder named blogs and under there create a new index.tsx file. I will be using functional components syntax to build this component, so import the react package as well as the FC package together.
import React, { FC } from ‘react’;
You also need to import Graphql from Gatsby:
After it is time to initialize the component:
data: PageData<BlogsPageData> & {
blogs: {
nodes: Array<{
bcms: {
meta: {
en: BlogEntryMeta;
};
};
}>;
};
};
}> = ({ data }) => {
return (
);
};
With this component setup, you can see that there are missing quite a few things here. Which are the PageData, BlogsPageData BlogEntryMeta types.
On the main folder of your application create a new folder named types and in there create a pages folder which will hold all the types for your different pages. Since I’m creating the blogs page, I will create a new blogs.ts and input the types for blogs.ts there.
BCMSPropEnumData,
BCMSPropMediaDataParsed,
BCMSPropRichTextDataParsed,
} from ‘@becomes/cms-client/types’;
import { BlogEntryMeta, BlogsPageEntryMeta } from ‘../../bcms/types’;
export interface BlogLite { //BlogsPage
title: string;
slug: string;
cover: BCMSPropMediaDataParsed;
description: BCMSPropRichTextDataParsed;
date: number;
category: BCMSPropEnumData;
}
export interface BlogsPageData { //BlogsPage extending BlogLite
meta: {
en: BlogsPageEntryMeta;
};
blogs: BlogLite[];
}
export interface BlogPageData { //BlogPage
meta: {
en: BlogEntryMeta;
};
content: {
en: BCMSPropRichTextDataParsed;
};
}
At the top, you can see I imported BlogEntryMeta and BlogsPageEntryMeta. These are types automatically generated by the BCMS CLI, if you click on them, you can see it generated the exact types for the properties you created in your template.
After doing that I created 3 different types, one that holds the basic details of each of the blogs that will be shown on the blog page and then one for the blog itself, that is when you click on a blog and then it displays the full content for you.
Still, on the pages folder create an index.ts where you can import the pages:
// export * from ‘./contact’; (for the different data types you’re creating later
// export * from ‘./home’;
After doing that, go back to the main types folder and create a new file called page-props.ts. This file contains the typing for the different pages I will have in my application and as seen below they’re the location, page(main content), header, and footer.
import { FooterEntryMeta } from ‘../bcms/types/entry/footer’;
export interface PageData<Page = { meta: { en: { title: string } } }> {
location: string;
page: {
bcms: Page;
};
header: {
bcms: {
meta: {
en: HeaderEntryMeta;
};
};
};
footer: {
bcms: {
meta: {
en: FooterEntryMeta;
};
};
};
}
After doing that, create a new file named index.ts where you import all types you just created:
export * from ‘./page-props’;
You can now navigate back to your index.tsx file under blogs and import the types folder you just created along with the BlogEntryMeta:
import { BlogEntryMeta } from ‘../../bcms/types’;
At this point, your code should look similar to this:
But something is still missing. The data. on line 8 I’m referencing a data variable that hasn’t been declared yet. So how do you get data from BCMS, well you do that by using Graphql. So at the bottom of the page, I will query the data that I need for this page using GraphQL.
export const query = graphql`
{
page: bcmsBlogsPage {
bcms {
meta {
en {
seo {
description
title
}
slug
subtitle
title
}
}
}
}
blogs: allBcmsBlog {
nodes {
bcms {
meta {
en {
cover {
_id
alt_text
caption
height
name
src
svg
width
}
date
slug
title
category {
selected
items
}
description {
name
type
value
}
seo {
title
description
}
}
}
}
}
}
}
`;
Take note that these queries aren’t auto-generated, Do you remember the GraphQL explorer I showed you some pictures above? using that explorer shows you the possible data BCMS has made available for you which you can query.
So for this page, I queried the data that I needed which is the blogs page and then I went deep down into the query to get the exact fields I needed for the different blogs that are going to show up on the blogs page including detailed fields of the cover_image to be able to render them well. This is a powerful feature Graphql has, which I can utilize by using Gatsby.
Previewing Page Data
After getting the data needed on the page, now let’s preview the data. To do that I will add some HTML and tailwind CSS markup to the return statement on the about.tsx page:
<div className=”container”>
<div>
<div className=”flex flex-col-reverse items-center text-center mb-8 md:gap-4 md:mb-10 lg:mb-12″>
<h1 className=”leading-none font-medium tracking-[-0.41px] md:text-2xl md:leading-none lg:text-[56px] lg:leading-none”>
{data.page.bcms.meta.en.title}
</h1>
<h2 className=”text-sm leading-none tracking-[-0.41px] text-appGray-600 mb-2.5 md:text-base md:leading-none lg:text-xl lg:leading-none lg:mb-5″>
{data.page.bcms.meta.en.subtitle}
</h2>
</div>
</div>
</div>
</div>
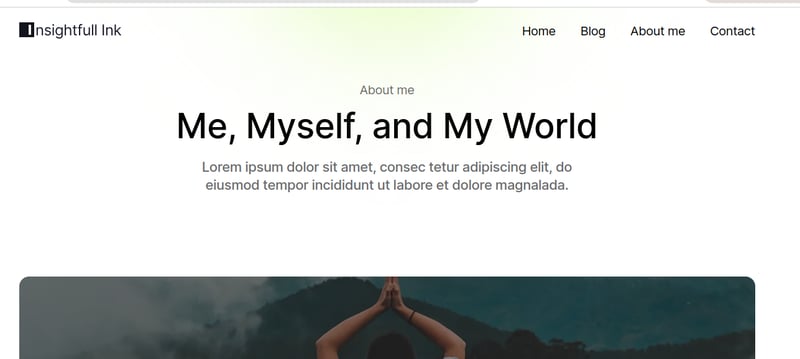
If you go over to localhost:8000/blogs now you’ll see the content showing up on the page like this.
Great, the blog page is coming to life. So far you’ve learned how to query data from BCMS using graphql and how you can use them in your component. So what remains is to finish the design for the blog page, and this is how I will do it
Create a search component
Create a Category and blog filtering utilities.
Create the TopGradient component to give the page a good feel
Create a card component for displaying the blogs
Creating A search component
Under the src folder, I will create a new folder called components that will hold all I need.
Then I will create a search.tsx file for the search component
import SearchIcon from ‘../assets/icons/search.svg’;
import classNames from ‘classnames’;
import React, { FC } from ‘react’;
interface Props {
value: string;
onEnter: () => void;
onChange: (value: string) => void;
className?: string;
}
export const Search: FC<Props> = ({ value, onEnter, onChange, className }) => {
const handleInput = (e: React.ChangeEvent<HTMLInputElement>) => {
onChange(e.target.value);
};
const handleSubmit = (e: React.FormEvent<HTMLFormElement>) => {
e.preventDefault();
onEnter();
};
return (
<form
onSubmit={handleSubmit}
className={classNames(
‘flex items-center border border-appGray-100 rounded-[48px] px-4 max-w-[848px] mx-auto md:px-6 lg:px-8’,
className,
)}
>
<img
src={SearchIcon}
alt=”Search”
className=”w-[14px] h-[14px] mr-1.5 md:w-6 md:h-6 md:mr-2.5 lg:w-8 lg:h-6 lg:mr-[14px]”
/>
<label className=”w-full”>
<input
value={value}
type=”search”
placeholder=”Search”
className=”placeholder:text-appText bg-transparent py-[11px] text-sm leading-none tracking-[-0.41px] w-full focus:outline-none md:text-lg md:leading-none md:py-4 lg:text-2xl lg:leading-none lg:py-[21px]”
onInput={handleInput}
/>
</label>
</form>
);
};
The component needs the classname dependency and a search icon which I referenced to work. So install the classname package and download the search icon below.
Back to your index.tsx page, you can now import the component for later use:
Creating utilities to manage categories and enabling filtering
Back to index.tsx file on the blogs page, I will now write a function before the return statement that handles filtering and sorting, but I won’t use it in the template just yet. This component will make use of the useEffect, useState, and useMemo hooks from react. Import them at the top of your code:
After importing the necessary packages I need, I will go into the return statement of the component and write the Searching, filtering, and categories function.
const [selectedCategory, setSelectedCategory] = useState(”);
useEffect(() => {
const searchParams = new URLSearchParams(location.search);
const sParam = searchParams.get(‘s’);
if (sParam) {
setSearchVal(sParam);
}
}, []);
const categories = useMemo(() => {
return (
data.blogs.nodes.reduce((acc, e) => {
if (
e.bcms.meta.en.category.selected &&
!acc.includes(e.bcms.meta.en.category.selected)
) {
acc.push(e.bcms.meta.en.category.selected);
}
return acc;
}, [] as string[]) || []
);
}, [data.blogs]);
const filteredBlogs = useMemo(() => {
return (
data.blogs.nodes.filter((blog) => {
let show = true;
if (searchVal) {
show =
show &&
blog.bcms.meta.en.title
.toLowerCase()
.includes(searchVal.toLowerCase());
}
if (selectedCategory) {
show =
show && blog.bcms.meta.en.category.selected === selectedCategory;
}
return show;
}) || []
);
}, [data.blogs, searchVal, selectedCategory]);
const inputFocusHandler = (): void => {
return;
};
Creating the Page Top Gradient
On the components folder, create a new file named top-gradient.tsx and then copy the code below to create the beautiful top gradient design:
import React, { FC } from ‘react’;
interface Props {
className?: string;
}
export const TopGradient: FC<Props> = (props) => {
return (
<div
className={classNames(
‘absolute -top-9 left-1/2 -translate-x-1/2 -translate-y-full bg-[#D9FAA1] blur-[110px] w-[428px] h-[428px] rounded-full’,
props.className,
)}
/>
);
};
And after that, on your index.tsx you can then import this component for later use:
Creating Blogs Card component
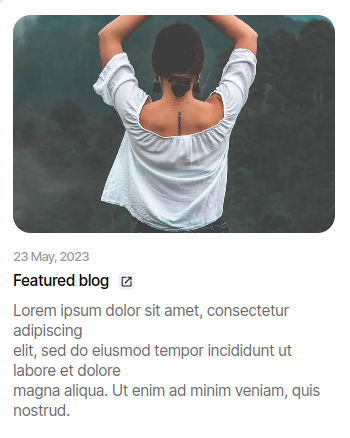
This component will handle the card that appears on the blog page.
From the card above, you can see I need an image, a date, the title, and the descriptions.
BCMS returns dates as numbers, these numbers are milliseconds so I’ll have to format it to be able to use the date.
To do that, I will create a new folder under src named utils and then create a new file under it named date.ts
export const dateUtil = {
format(val: number) {
const date = new Date(val);
return `${date.getDate()} ${date.toLocaleString(‘default’, {
month: ‘short’,
})}, ${date.getFullYear()}`;
},
};
Now, you can create the card component. Under components, create a new folder named blogs then under it, create a file named card.tsx and import the necessary dependencies:
import { BlogLite } from ‘../../../types’;
import { Link, graphql } from ‘gatsby’;
import { BCMSImage } from ‘gatsby-source-bcms/components’;
import OpenIcon from ‘../../assets/icons/open.svg’;
//Link to download Icon below
import { dateUtil } from ‘../../utils/date’;
interface BlogsCardProps {
blog: BlogLite;
}
The next thing to do is to create the component and the design for the card design.
export const BlogsCard: FC<BlogsCardProps> = ({ blog }) => {
return (
<article>
<Link to={`/blog/${blog.slug}`}>
<BCMSImage
media={blog.cover}
options={{
sizes: {
exec: [
{
width: 800,
height: 800,
},
],
},
}}
className=”w-full cover aspect-[1.48] rounded-2xl overflow-hidden mb-4 xl:aspect-[1.04] xl:mb-6″
/>
<div className=”text-xs leading-none font-medium tracking-[-0.82px] text-appGray-400 mb-2 xl:text-base xl:leading-none xl:mb-4″>
{dateUtil.format(blog.date)}
</div>
<div className=”flex items-center mb-2.5 xl:mb-4″>
<div className=”text-sm leading-none font-medium tracking-[-0.41px] mr-2 xl:text-2xl xl:leading-none”>
{blog.title}
</div>
<div className=”flex items-center justify-center p-0.5 rounded bg-[#F2F2F2] xl:p-1″>
<img src={OpenIcon} alt=”Icon” className=”w-3 h-3 xl:w-4 xl:h-4″ />
</div>
</div>
//Space for Description
</Link>
</article>
);
};
Please take note that I left a space for the description.
And then at the bottom of the page, you input the graphql data you need for that card:
export const query = graphql`
fragment Blog on BlogEntry {
bcms {
meta {
en {
cover {
_id
alt_text
caption
height
name
src
svg
width
}
slug
title
date
description {
name
type
value
}
seo {
title
description
}
}
}
}
}
`;
This GraphQL data expands the fragments that I will be passing on to it in the next step where I add everything together on the blogs/index.tsx page.
On the index.tsx page now, import the Blog Component
Hello
<div className=”relative pt-10 pb-8 md:py-[72px] lg:pb-[100px] xl:pb-[128px]”>
<div className=”container”>
<div>
<div className=”flex flex-col-reverse items-center text-center mb-8 md:gap-4 md:mb-10 lg:mb-12″>
<h1 className=”leading-none font-medium tracking-[-0.41px] md:text-2xl md:leading-none lg:text-[56px] lg:leading-none”>
{data.page.bcms.meta.en.title}
</h1>
<h2 className=”text-sm leading-none tracking-[-0.41px] text-[#5B5B5E] mb-2.5 md:text-base md:leading-none lg:text-xl lg:leading-none lg:mb-5″>
{data.page.bcms.meta.en.subtitle}
</h2>
</div>
<div className=”max-w-[848px] mx-auto”>
<Search
onChange={(value) => setSearchVal(value)}
onEnter={inputFocusHandler}
value={searchVal}
className=”mb-3 lg:mb-6″
/>
<div className=”grid grid-cols-2 gap-2.5 md:grid-cols-3 lg:grid-cols-5 lg:gap-[18px]”>
{categories.map((category, index) => (
<button
key={index}
className={`flex items-center justify-center w-full px-6 py-2.5 rounded-[32px] border transition-colors duration-300 text-xs leading-none tracking-[-0.41px] capitalize md:text-lg md:leading-none md:py-3 lg:text-2xl lg:leading-none lg:px-6 lg:py-[14px] ${
category === selectedCategory
? ‘border-[#181A2C] bg-[#181A2C] text-white’
: ‘border-[#E0E0E0]’
}`}
onClick={() => setSelectedCategory(category)}
>
{category.toLowerCase()}
</button>
))}
<button
onClick={() => setSelectedCategory(”)}
className={`col-span-2 flex items-center justify-center w-full px-6 py-2.5 rounded-[32px] border transition-colors duration-300 text-xs leading-none tracking-[-0.41px] md:col-span-1 md:col-start-1 md:row-start-1 md:text-lg md:leading-none md:py-3 lg:text-2xl lg:leading-none lg:px-6 lg:py-[14px] ${
selectedCategory === ”
? ‘border-[#181A2C] bg-[#181A2C] text-white’
: ‘border-[#E0E0E0]’
}`}
>
All
</button>
</div>
</div>
</div>
</div>
<TopGradient />
</div>
<div className=”container mb-8 md:mb-20 lg:mb-[104px]”>
{filteredBlogs.length > 0 ? (
<div className=”grid grid-cols-1 gap-6 mb-8 md:grid-cols-2 md:mb-20 lg:grid-cols-3 xl:gap-10 lg:mb-[128px]”>
{filteredBlogs.map((blog) => (
<BlogsCard
key={blog.bcms.meta.en.slug}
blog={blog.bcms.meta.en}
/>
))}
</div>
) : (
<div className=”leading-none tracking-[-0.41px] text-center mb-8 md:mb-20 lg:text-lg lg:mb-[128px]”>
There are no blogs for the applied filter in “{searchVal}”
</div>
)}
<div>
<h2 className=”leading-none font-medium tracking-[-0.41px] mb-7 md:text-2xl md:leading-none md:mb-10 lg:text-[32px] lg:leading-none lg:mb-12″>
All posts
</h2>
<div className=”grid grid-cols-1 auto-rows-fr gap-6 p-4 border border-appGray-[#D1D1D1] rounded-2xl md:grid-cols-2 lg:grid-cols-3 xl:gap-10 xl:p-8″>
{data.blogs.nodes.map((blog, index) => (
<BlogsCard key={index} blog={blog.bcms.meta.en} />
))}
</div>
</div>
</div>
</body>
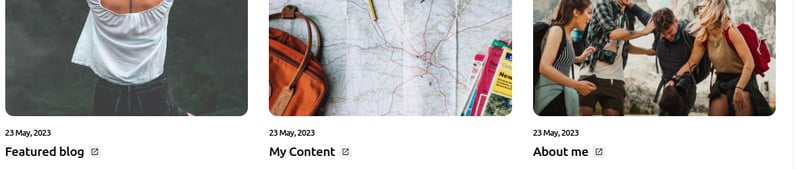
If you check your browser on the blogs tab, localhosT:8000/blogs you should see that the page is displaying the cards nicely along with the filtering and searching functionality.
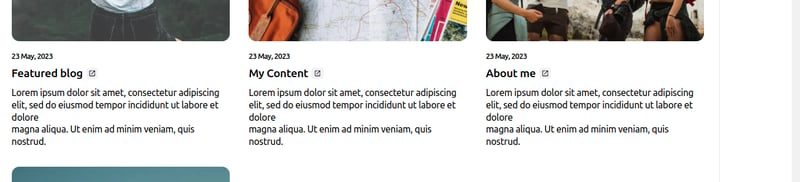
But there’s one more thing that needs to be done. If you check the bottom of the blog cards on the live URL, you’ll see a description attached, but this one I am building is without descriptions.
The reason for this is that I’m missing a ContentManager component. If you can recall, when creating the template for the blogs, the description is a Rich_Text property and not a normal string. So a common string interpolation like this below won’t work.
{blog.description}
</p>
So to get this to work, I need to use the ContentManger component.
Creating A content manager component
On the components folder, create a new file named content-manager.tsx. This component is responsible for handling the content that BCMS does not return as a straightforward string. So content BCMS returns in blocks or arrays or content returned with images and texts combined. Two of such contents are the RichText field and widgets.
Since this component is also responsible for handling the widgets, then it is the best time to create the design for the text_with_image widget which I created earlier. To create the widget, create a new folder under the components folder named widgets and then create a new file named text-with-image.tsx.
Below is how I decided to style my widget in line with what is in the starter.
import React, { FC, useMemo } from ‘react’;
import { ContentManager } from ‘../content-manager’;
import { TextWithImageWidget as TextWithImageWidgetType } from ‘../../../bcms/types’;
import { BCMSEntryContentParsedItem } from ‘@becomes/cms-client/types’;
interface Props {
data: string;
}
export const TextWithImageWidget: FC<Props> = ({ data }) => {
const parsedData: TextWithImageWidgetType = JSON.parse(data);
const hasText = useMemo(() => {
const text = parsedData.text as BCMSEntryContentParsedItem[];
return text && text[0].value;
}, []);
return (
<div
className={`flex flex-col gap-6 mb-6 md:mb-8 lg:gap-8 lg:items-start lg:mb-12 ${
parsedData?.image_position?.selected === ‘LEFT’
? ‘lg:flex-row-reverse’
: ‘lg:flex-row’
}`}
>
<ContentManager items={parsedData.text || []} className=”prose” />
<BCMSImage
media={parsedData.image}
className={`aspect-[2.07] rounded-lg overflow-hidden w-full cover flex-shrink-0 lg:rounded-2xl ${
hasText
? ‘lg:aspect-[1.14] lg:w-[500px] lg:mb-0 xl:w-[728px]’
: ‘lg:aspect-[2.43]’
}`}
/>
</div>
);
};
export default TextWithImageWidget;
This widget expects a data prop to be passed in and it queries the data, gets the images along with the data and renders them with a nice design while taking into account the image position as defined in the CMS.
On the widgets folder create a new file named index.ts where you import this widget along with other widgets you might create in the future.
Now back to the content-manager.tsx file. This component will now receive Rich text and widget data, parse them and display them accordingly.
import { BCMSPropRichTextDataParsed } from ‘@becomes/cms-client/types’;
import { BCMSContentManager } from ‘gatsby-source-bcms/components’;
import { navigate } from ‘gatsby’;
import { BCMSWidgetComponents } from ‘gatsby-source-bcms/components/content-manager’;
import { TextWithImageWidget } from ‘./widgets’;
interface ContentManagerProps {
items: BCMSPropRichTextDataParsed;
widgetComponents?: BCMSWidgetComponents;
className?: string;
}
export const ContentManager: FC<ContentManagerProps> = ({
items,
widgetComponents,
className,
}) => {
const managerDOM = useRef<HTMLDivElement>(null);
useEffect(() => {
const parseInternalLinks = (): void => {
if (managerDOM.current) {
const links = managerDOM.current.querySelectorAll(‘a’);
links.forEach((link) => {
const href = link.getAttribute(‘href’);
if (href && href.startsWith(‘/’)) {
link.target = ‘_self’;
const clickHandler = (event: Event): void => {
event.preventDefault();
void navigate(href);
};
link.addEventListener(‘click’, clickHandler);
return () => {
link.removeEventListener(‘click’, clickHandler);
};
}
});
}
};
parseInternalLinks();
}, []);
return (
<div ref={managerDOM} className={className}>
<BCMSContentManager
items={items}
widgetComponents={
widgetComponents || {
text_with_image: TextWithImageWidget,
}
}
/>
</div>
);
};
Now go to the blogs under components and then the card.tsx file to utilize the ContentManager component. Import it at the top of the component:
After doing that, go into the card and then replace the comment that leaves space for description with the code below:
items={blog.description}
className=”text-sm leading-[1.3] tracking-[-0.41px] text-appGray-500 xl:text-xl xl:leading-[1.3]”
/>
Go back to your browser now and you should see the description beautifully displayed.
Recap
In this article, you’ve learned how to add data to BCMS, how to retrieve data from BCMS using the power of Graphql and Gatsby, and how to beautifully render them on your code.
Next Steps
The Knowledge, you’ve gained so far, is sufficient for you to be able to build applications with BCMS and Gatsby comfortably. But this application can still be improved further, dive into the starter codebase and study how it is made, learn, and model the way the project is structured.
This tutorial project didn’t use the SEO details I input when creating the templates and entries, but the starter codebase used a PageWrapper component that uses react-helmet to send those SEO details to the browser. So in essence, the starter uses the recommended structure for creating Gatsby applications and also shows how to perfectly retrieve and render BCMS Content.
Clone the starter codebase if you haven’t cloned before, complete this project using the structure you see or do it in another way and get all pages running, from the homepage to the header and footer and the contact pages. Build another different application entirely, there are application ideas in the BCMS starters website and by doing that, you’ve gotten comfortable building applications with Gatsby and BCMS
Deploying Gatsby Websites
If you used a self-hosted BCMS instance, You will first need to host in on a live server. You need to do this because it is currently only stored on your machine. However, with a BCMS Cloud Version, you won’t have to worry about deployment because it will be handled for you, allowing you to continue using the same server from development into production.
To Deploy your local BCMS instance, follow the steps in this tutorial on the BCMS documentation. For now, DigitalOcean is the only server BCMS provides deployment steps for, but it will be updated for other services in the near future
After deploying the instance, it’s now time to deploy the Frontend.
But first, keep in mind that your instance URL has been changed to a production URL, which means that instead of localhost:8080, you will be using a new URL provided by DigitalOcean or one that you have created on DigitalOcean. So before pushing your Frontend to production, I will advise you test the new URL in your codebase locally first before pushing it live
To do that, go to all the places in your codebase where BCMS_API_ORIGIN is declared and change the value to your new URL. After doing that test your app to see if it is functioning as before, if all is successful it should be running as usual and you can now move on to deploy the Frontend.
You can now deploy the Gatsby Frontend to Netlify easily by following the official guide on the Gatsby Website.

