
Bourne Again Shell, often known as Bash, is a versatile and widely used Unix shell and scripting language. Known for its simplicity and powerful scripting capabilities, Bash has become a core player in the cloud computing and DevOps landscape, making it the go-to tool for developers to automate tasks, provision infrastructure, and manage deployments.
This article discusses creating a custom cloud uploader Command Line Interface (CLI) using Bash scripting. It explores leveraging Bash’s superpower to automate file uploads to your AWS S3 bucket.
Github URL
This project was completed and uploaded to this Github repository.
Prerequisites
To get started with this tutorial, you must have the following:
An AWS account: if you do not have one, create a free account
AWS CLI is installed on your system. Run aws –version to verify if you have the AWS CLI installed; if not, check out how to install the CLI from the AWS documentation
Creating an S3 bucket
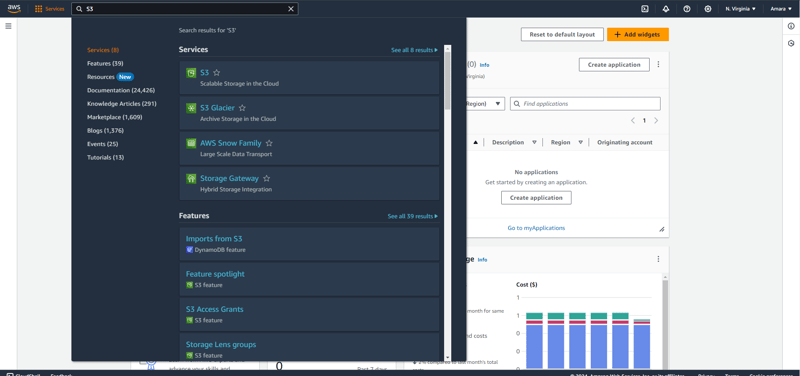
To create your S3 bucket, search for S3 in the search bar and then click on the S3 service in the modal.
Clicking on the S3 service redirects you to the Amazon S3 page. To create a new S3 bucket, click this page’s Create bucket button.
The Create bucket button leads you to the General configuration page of the S3 bucket you’re about to create. Enter your desired Bucket Name, then click the Create bucket button to complete the creation process.
You should see your newly created bucket on your Amazon S3 page when you are done.
Configuring your AWS in your application
For security reasons, AWS does not, by default, allow third-party services or applications to access resources stored by the AWS services. So, to tell AWS that the application you are about to build has the right to access and update the resources in your AWS services, you need to provide the AWS access and secret access key that is only available to you.
Copy your AWS access and secret key
To retrieve these keys, you’ll need to create a user and specify which artifacts the user can access.
To create a user, search for and click on the IAM service. Then, open the Users page by clicking the Users tab in the sidebar.
On this page, click the Create User button. This action will open the Specify user details page. Input the user name you want to create, then click Next to proceed to the Set Permissions page.
Choose the Attach Policies Direct option on this page, then search for the AmazonS3FullAccess permission policy and click on it.
Click the Next and Create User buttons to create your new user. You will then see your newly created user on your User page.
To find your AWS access and secret access key, open your newly created user page by selecting the user from the sidebar, then click the Security Credentials tab.
Scroll down to the Access keys section, and click the Create access key button.
This action leads you to the Access key best practices and alternatives page. Choose the Third-party Service option on this page since you’ll manage the data in your S3 bucket with Boomi.
After that, check the box, “I understand the above recommendation and want to proceed to create an access key,” and click the Next button.
You can input a description tag for the access key if you’d like, but it’s not required. Then, click the Create access key button.
After this step, you will be directed to the Retrieve access keys page. Make sure to copy both the Access and Secret access keys. These keys are necessary for connecting your Boomi process to the AWS S3 bucket.
Click the Done button to return to your user page.
Adding your AWS credentials in your application
Before configuring your application, you need to create a new project directory. To do this, open your command prompt and run this command.
cd <project directory>
In this directory, run these commands in your command prompt:
This command opens up a prompt that asks you a couple of questions; answer these questions as follows:
AWS Secret Access Key: <your secret key>
Default region name: <S3_BUCKET_REGION>
Default output format: json
With that, you have successfully configured your project with the access it needs to call scripts that manage resources present in your S3 bucket.
Creating the cloud uploader CLI
To begin your cloud uploader CLI project, create a file named cloudUploader.sh in the root directory of your project. Then, copy and paste the following code into your cloudUploader.sh file.
# check if the positional parameters exists
if [ $# -ne 2 ]; then
echo “Please pass two parameters.”
exit 1
fi FILEPATH=“$1“
DESTINATION_PATH=“$2“
# get the filename from the positional argument
file_name=$(basename — “$FILEPATH“ )
In the code block above, you:
Check if the user includes two positional arguments when calling the function. If they don’t, echo “Please pass two parameters” and exit the function. For more on positional arguments, check out Writing Shell Scripts- Lesson 12: Positional Parameters.
Assign variables to the positional arguments. These variables are:
FILEPATH: This variable holds the first positional argument: the path to the file you want to upload to AWS.
DESTINATION_PATH: This variable holds the second positional argument, representing the path to the AWS S3 bucket where you will upload your file. The DESTINATION_PATH is typically in the format s3://<bucketname>.
Collect the filename from the FILEPATH variable passed to the function. This filename will allow you to determine the name under which your file will be uploaded.
Creating the cloudUploader() function
After verifying the positional arguments, you’ll create a cloudUploader() function. This function is responsible for using these positional arguments to upload the files. The function will:
Verify if the file already exists in your S3 bucket.
If the file exists, it will prompt the user for input. Depending on the user’s choice, it will carry out one of three actions:
Overwrite the existing file
Skip the existing file
Rename the file
If the file does not exist, it will proceed to upload.
To check if this file exists in your S3 bucket, copy and paste this code into your cloudUploader.sh file.
cloudUploader() {
if [ -f “$FILEPATH“ ]; then
if aws s3 ls “$DESTINATION_PATH“/“$file_name“; then # Check if file exists on cloud
#Perform these actions if the files exist
else
# File doesn’t exist on cloud; proceed with upload
if aws s3 cp “$FILEPATH“ “$DESTINATION_PATH“; then
echo “Upload successful.”
else
echo “Upload failed.”
fi
fi
else
echo “File does not exist.”
fi
}
cloudUploader
In the code block above:
if [-f “$FILEPATH”] checks if the file path the user passed in to be uploaded exists.
if aws s3 ls “$DESTINATION_PATH/$file_name”; collects the filename from the file path in the positional argument and checks if a file exists with this name on a bucket.
if aws s3 cp “$FILEPATH” “$DESTINATION_PATH”; then: This line uploads the file to the AWS S3 bucket if the file does not already exist in the S3 bucket.
If this upload is successful, the script echoes “Upload successful,” otherwise “File does not exist.”
Finally, call the function cloudUploader.
Handling actions if the file exists
Next, if the file exists, you want to prompt the reader with an option and run a specific action based on the input option.
To create this logic, copy and paste the updated code for the cloudUploader() function below.
https://gist.github.com/Iheanacho-ai/2b7965f7e4fc393fb52678f586c90083
In the updated cloudUploader() function, the following steps are taken:
It runs a perpetual while loop that continues until the user inputs valid options
Using the echo command prompts the user to select an action from three options: o for overwrite, s for skip, or r for rename.
The user’s input is read and saved in an action variable
A case command is used to execute specific actions based on the user’s choice:
If the user selects the o option (overwrite), the function overwrites the existing file, and the new version is uploaded.
If the file is successfully overwritten, it echoes “File overwritten successfully.” Otherwise, it echoes “Upload failed.” After overwriting the file, the break command is used to exit the while loop.
If the user selects the s option (skip), the function skips the file upload and echoes “File skipped.” After skipping the file, the break command is used to exit the while loop.
If the user selects the r option (rename), the function prompts the user to input a new name for their chosen file. The input is then saved in a new_name variable. After renaming the file, the break command is used to exit the while loop.
If the user selects any other option, the function echoes “Invalid action” and reruns the while loop.
When you are done, your cloudUploader.sh file should look like this:
https://gist.github.com/Iheanacho-ai/541ec64684cbccdfc4b4b278feb5f8a4
Verifying if the Bash script works
To verify if your code runs, use this command:
./cloudUploader.sh <the document file path> <the AWS S3 bucket path>
In the code block above, the:
chmod u+v cloudUploader.sh command gives the creator the permission to execute the file
./cloudUploader.sh command runs the bash script in the cloudUploader.sh file
You should see your file in your S3 bucket if your upload is successful.
Additionally, you can test what will happen when a user tries to upload a file with a name that already exists in the bucket.
That’s a Wrap!
This guide has shown you how to create a cloud uploader CLI to upload files to your AWS S3 bucket. You can also build on this tutorial to add features like upload progress tracking and file sharing.
However, as interesting as this exercise is, this is only just a starting point for exploring the full capabilities of Bash. To learn more about what Bash can get you, refer to this Bash reference manual.

