
Have you ever found yourself in the situation of wanting to start a new React project and, for whatever reason, you can’t determine how you should structure it from the beginning to avoid having to think about it throughout the project and focus directly on the quality of your code? Let me tell you, this is quite common in software development. However, as you continue developing projects of different sizes, you will realize that over time you will do it automatically, without thinking about it as much, because you will already have some notion of how your project will grow.
In this guide, you will find simple examples from real projects and, finally, a recommendation that I would like you to pay attention to in order to determine if it is useful to you, along with an explanation of how to divide each folder and what each one should contain.
Understanding the Importance of Folder Structure
Before going into the details, it’s important to understand why a well-planned folder structure is necessary in React development. For this, I like to divide it into four central points:
Modularity: 🚀
Modularity is the cornerstone of a robust folder structure. By dividing your application into smaller, reusable modules, you not only enhance code reusability but also facilitate maintenance and updates. Each module should encapsulate a specific functionality or feature, allowing for clear separation of concerns. In short, let’s follow best practices by dividing each thing in its place.
Separation of Concerns: 🧠
Separating different aspects of your application’s functionality into distinct directories promotes clarity and reduces complexity. For instance, separating UI components from business logic, stylesheets, and utility functions allows developers to focus on specific areas of the application without becoming overwhelmed. This separation fosters better code organization and facilitates collaboration among team members.
Scalability: 📈
A well-designed folder structure should be scalable and capable of adapting to growth and expansion as your project evolves. As new features are added and requirements change, your folder structure should remain flexible enough to adapt without requiring a major reorganization. By anticipating future changes and designing with scalability in mind, you can ensure that your project’s structure remains agile and responsive. This greatly depends on the developer’s experience in being able to anticipate the project’s needs.
Folder Structure I use
For recent projects, I’ve been using almost the same folder structure. Some minor modifications have been made, but as I mentioned earlier, this will largely depend on the project you’re developing.
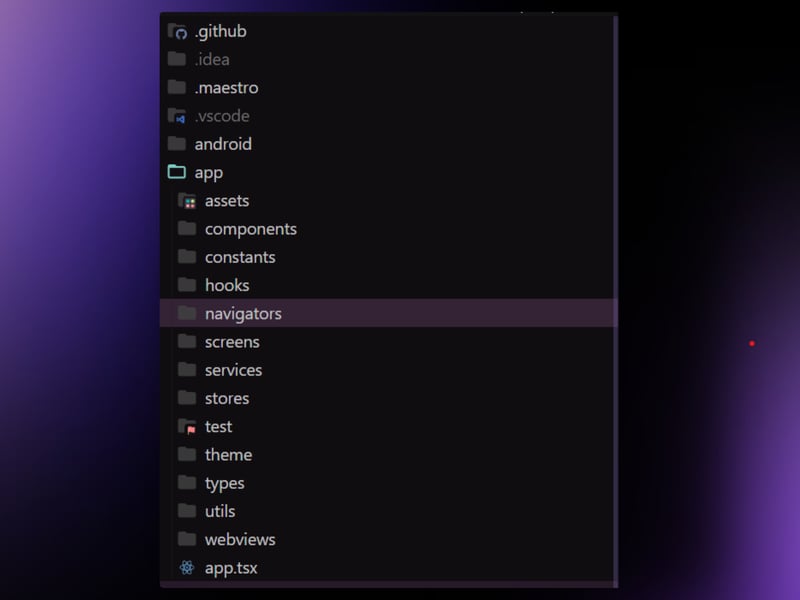
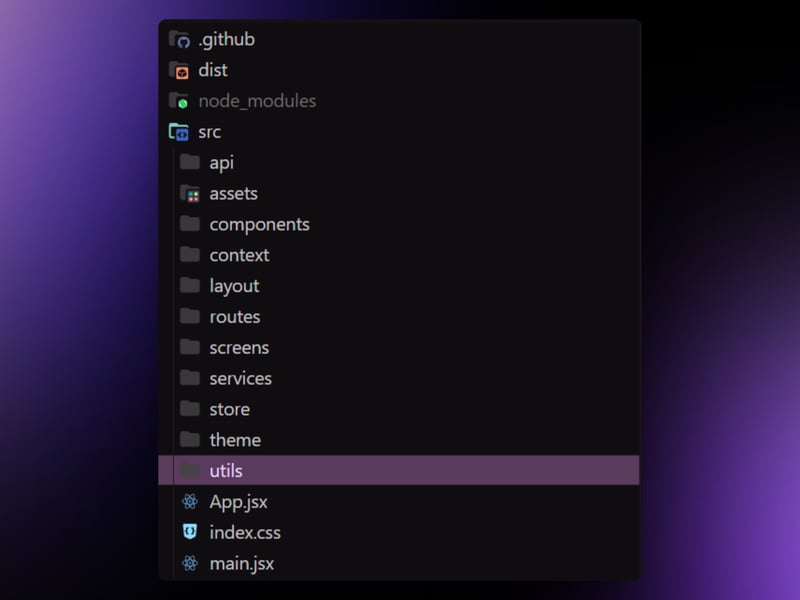
Project #1
Project #2
So, as you can see, some of them have some folders, and others don’t have any. What should I do, and where should I choose?
First of all, remember that your project structure will always be evolving, so I recommend starting with something.
Here is the initial extended folder structure that I typically consider:
├── tests
| └── e2e/
|
└── src/
├── api
├── assets/
├── components/
├── hooks/
├── layout/
├── pages/
├── routes/
├── store/
├── styles/
└── utils/
A more detailed description of what each of them should contain to ensure you have a clear idea of how to organize your project:
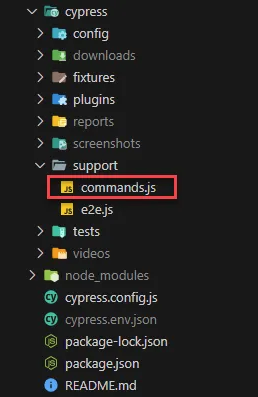
e2e/: This directory contains end-to-end tests (E2E), which simulate user interactions with your application from start to finish. With tools like Cypress or Playwright, you can write tests that mimic the real user behavior and verify that your application works correctly in a production-like environment.
api/: This directory contains modules responsible for handling API requests and interactions. Separating API-related logic into its own directory helps maintain a clear separation of concerns and facilitates code management with server calls.
assets/: Here, aim to store static assets such as images, fonts, and other resources used in your application.
components/: This is where you’ll store reusable user interface components. These components can range from simple buttons and input fields to more complex elements such as navigation bars and cards.
hooks/: It’s very common to have a dedicated directory to store custom hooks, such as useFetch() or useWindowSize(), along with other custom hooks you may need in your application.
layout/: In a Front-End application, it’s crucial to consider the layouts or designs that define the overall structure of your application. These layouts are often highly reusable, so I recommend storing any styles that repeat in your application here. Design components encompass elements such as headers, footers, sidebars, and other structural elements shared across multiple pages or views of your application.
pages/: The pages/ directory is where you’ll store top-level page components representing different routes or views in your application. Each page component corresponds to a specific URL route and typically encapsulates the layout and content of that route.
routes/: This directory contains route configuration files that define the mapping between URL routes and corresponding page components. Route configuration files often use libraries like React Router to set up client-side routing in your application.
store/: This directory contains modules related to state management using libraries such as Redux or MobX. State management modules define actions, reducers, and selectors to manage application state predictably and centrally.
styles/: Here, global style sheets, theme files, and other style-related resources used in your application are managed.
utils/: This directory contains utility modules that encapsulate common functionalities and helper functions used throughout your application. Utility modules provide reusable logic for tasks such as formatting, validation, and data manipulation.
Conclusion:
To conclude, I’d like to emphasize that creating an effective folder structure for your React projects is an ongoing process. As you dive into practice and encounter different types of projects, you’ll gain experience and refine your skills in this aspect.
A reflection I’d like to share is that, in the world of software development, the best way to learn is by facing challenges head-on. If you come across something you’re unsure about, I encourage you to try tackling it on your own first. If you find yourself stuck, don’t hesitate to turn to blogs, videos, or repositories for guidance and learn from the experience of other developers.
Personally, early in my career, I found a lot of inspiration by observing how others coded. Exploring repositories from other developers or organizations provided me with ideas on how to structure my own projects. Over time, I’ve adopted and adapted different approaches based on my needs and preferences, enriching my skill set and development style.
I sincerely hope this guide has been helpful in your development journey. Remember, the best way to learn is always through experimentation and embracing mistakes. Don’t be afraid to try new things and be willing to learn from your mistakes along the way.
Your ability to grow and improve as a developer depends on your willingness to face new challenges and learn from them!


