

This blog post guides you on how to rapidly develop a Slack app using Slack CLI and sandbox organizatins/workspaces.
Slack’s Developer Program
At TrailblazerDX held in San Francisco on March 6th, new developer support features for Slack were announced.
https://slack.com/blog/developers/developer-program-launch
In addition to topics such as custom functions with Bolt for Python/JavaScript, this article will introduce a much easier method for creating Enterprise Grid’s sandbox environment for local development than ever before.
What’s exciting about this?
Prior to the Developer Program, developing Slack apps required the following steps:
Accessing https://api.slack.com/apps to configure the app
Installing the app being developed into the Slack workspace
Specifying the obtained access token as an environment variable
Finally launching the app
However, with the combination of the newly available Slack CLI and sandboxes by Developer Program, the process has become extremely simple. In fact, all you need to do are creating a sandbox, connecting the CLI to it, and then slack run to start your app.
“… Wait, isn’t Slack CLI only usable for the Deno thing?”
Yes, indeed, previously it was necessary to connect to workspaces with paid plans, and initially it was provided as a tool exclusively for Deno apps. However, from now on, it will also be available for Bolt app development too!
So, let me introduce the minimal steps required to use it.
Create your first sandbox
First, access the developer portal.
https://api.slack.com/developer-program
If you haven’t registered yet, please create an account first.
Provisioning a sandbox requires a workspace with a paid plan or registering a credit card, but there is no cost for creating a sandbox or testing the functionality of an app.
However, for executing custom workflow functions, excess usage beyond a certain free quota will be billed based on the number of workflow executions, in the same manner with the production environment. For more details, please refer to this help page.
Once you’ve set up your account, go ahead and create a sandbox. If everything goes well, you should see a screen similar to the one below.
What’s Enterprise Grid?
Many people may not be familiar with Enterprise Grid, so let me provide a brief explanation about the “Org” within a sandbox.
In plans other than Enterprise Grid, which most people are familiar with, you can only use one workspace. However, Enterprise Grid has the concept of an “organization” above workspaces, allowing you to create multiple workspaces under it.
Since the sandbox environment provided by the Developer Program is for Grid, the process involves creating an Org first and then creating workspaces. As the first step, it’d be enough if you understand this as “that’s how it works.”
For general information about Enterprise Grid, please refer to the following help page and official guides:
https://slack.com/help/articles/115005481226-Enterprise-Grid-launch-guide
Set up Slack CLI
Once you have provisioned the sandbox environment, the next step is to install Slack CLI. Please refer to the following page for installation instructions for each platform. You only need to complete the steps before running slack login.
https://api.slack.com/automation/quickstart
After installing the slack command, execute slack login in your terminal. You should see a screen like this:
📋 Run the following slash command in any Slack channel or DM
This will open a modal with user permissions for you to approve
Once approved, a challege code will be generated in Slack
/slackauthticket MGIwNTczNzktYWQ5Y***********************************
? Enter challenge code
Copy the part /slackauthticket MGIwN…., and execute it in the text input area of the Slack workspace you created earlier for the sandbox environment.
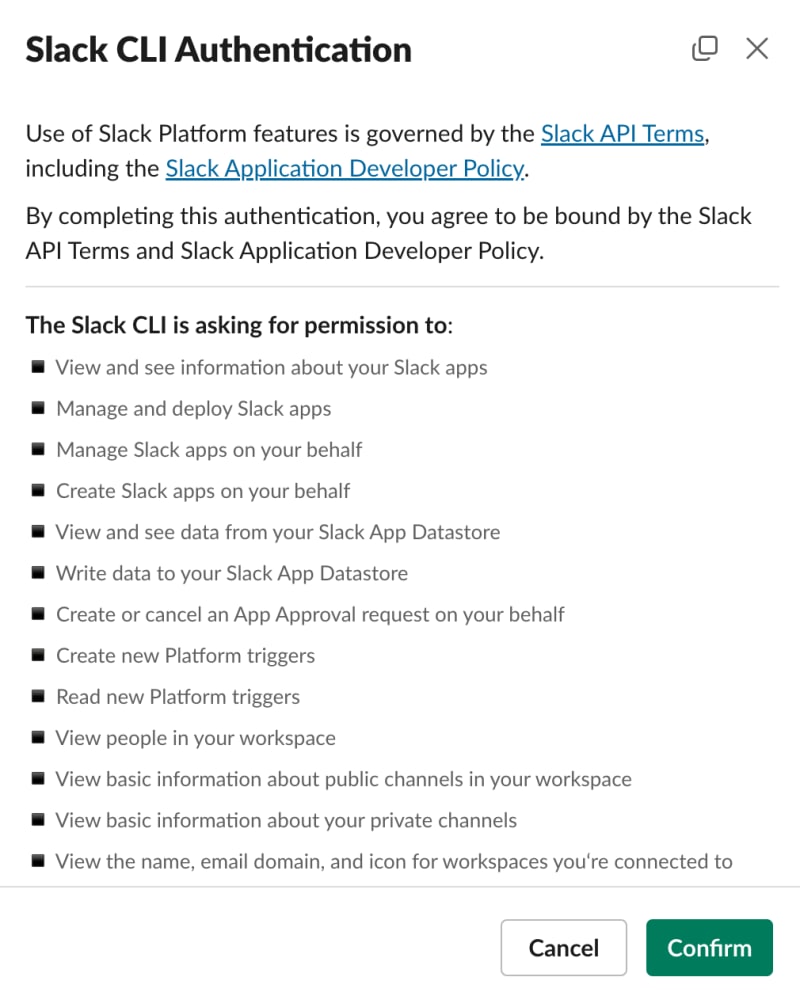
A modal dialog like the following will appear:
Press the “Confirm” button, and you will see the Challenge Code displayed as follows:
Copy that string and paste it into your terminal to complete the setup.
The result of this integration is saved in a file called $HOME/.slack/credentials.json. If you want to revoke the authentication, you can run slack logout comamnd.
OK, now you’re all set. Let’s get started!
Create a Python app
Let’s start by connecting the simplest Python app to your sandbox org.
Set up Python venv and libraries
You can use Poetry or any other method you prefer, but set up your Python environment and install the necessary dependencies (just two!) as follows:
python3 -m venv .venv
source .venv/bin/activate
# Install the necessary dependencies, just these two for now
pip install slack-bolt slack-cli-hooks
Place required files for CLI
For Slack CLI to work with Python, it expects at least the following files:
File name
Description
slack.json
Configuration required for CLI to run locally
manifest.json
App settings (automatically synchronized with Slack when running slack run)
app.py
Code to execute the app (file name can be changed)
For slack.json, save the following content as it is:
“hooks”: {
“get-hooks”: “python3 -m slack_cli_hooks.hooks.get_hooks”
}
}
Next is manifest.json, which is a file that you can modify as needed. For this demo, please copy and paste it as is.
“display_information”: {
“name”: “Hello”,
“description”: “You can update this later”,
“background_color”: “#4361ba”,
“long_description”: “”
},
“features”: {
“app_home”: {
“home_tab_enabled”: false,
“messages_tab_enabled”: false,
“messages_tab_read_only_enabled”: true
},
“bot_user”: {
“display_name”: “Hello Bot”,
“always_online”: true
},
“slash_commands”: [
{
“command”: “/hello-sandbox”,
“description”: “Say hello to sandbox”,
“usage_hint”: “”,
“should_escape”: true
}
]
},
“oauth_config”: {
“scopes”: {
“bot”: [“commands”]
}
},
“settings”: {
“interactivity”: { “is_enabled”: true },
“org_deploy_enabled”: true,
“socket_mode_enabled”: true
},
“outgoing_domains”: []
}
Finally, place app.py with the following content:
import logging
from slack_bolt import App
from slack_bolt.adapter.socket_mode import SocketModeHandler
logging.basicConfig(level=logging.DEBUG)
app = App(token=os.environ[“SLACK_BOT_TOKEN“])
# Add your code here
if __name__ == “__main__“:
SocketModeHandler(app, os.environ[“SLACK_APP_TOKEN“]).start()
Start your app
Now that the preparation is complete, please try launching the app with slack run. If there are no apparent errors, then everything should be fine.
At this stage, the slash command /hello-sandbox should already be available in your workspace. Please try executing it.
While you may encounter an error on the UI, in the terminal, you should see warnings similar to the following. These are suggestions provided by Bolt for Python to guide your implementation.
—
[Suggestion] You can handle this type of event with the following listener function:
@app.command(“/hello-sandbox”)
def handle_some_command(ack, body, logger):
ack()
logger.info(body)
Let’s add code to pass “Hello!” to ack() method call. Please add this before the line if __name__ == “__main__”:.
def handle_some_command(ack, body, logger):
ack(“Hello!“)
logger.info(body)
At the time of posting this article, Python CLI support does not have automatic code reloading. Please relaunch slack run whenever you make changes to the code.
To avoid selecting the workspace every time, you might find it convenient to specify the displayed App ID like slack run -a A06P0E7LY48.
With the updated code, you should not encounter execution errors on the UI, and the bot should respond with ‘Hello!’ 🎉
Create a Node.js app
Let’s do the same thing with Node.js. There’s no need to change manifest.json. Modify slack.json as follows:
“hooks”: {
“get-hooks”: “npx -q –no-install -p @slack/cli-hooks slack-cli-get-hooks”,
“start”: “npm start”
}
}
Let’s add package.json and app.js as well.
npm i @slack/bolt
npm i –save-dev @slack/cli-hooks nodemon
Next, update the “scripts” in package.json as follows. If you want a name other than npm start, please name it in line with slack.json.
“start”: “nodemon –watch ‘*.js’ –exec node app.js”
},
Finally, save app.js with the following content:
const app = new App({
socketMode: true,
token: process.env.SLACK_BOT_TOKEN,
appToken: process.env.SLACK_APP_TOKEN,
logLevel: LogLevel.DEBUG,
});
app.command(“/hello-sandbox“, async ({ ack }) => {
await ack(“Hello!“);
});
;(async () => {
await app.start();
console.log(“⚡️ Bolt app is running!“);
})();
Try launching it with slack run. Is it working properly?
In this example, nodemon automatically detects file changes. Thus, you’ll be able to smoothly develop without restarting the server each time.
Create a TypeScript + Node.js app
Lastly, let’s set up the Node.js app in TypeScript.
First, add a tsconfig.json file. The following is just an example, so feel free to adjust the details according to your preferences.
“compilerOptions”: {
“target”: “es2022”,
“module”: “commonjs”,
“lib”: [“es2022”, “dom”],
“outDir”: “lib”,
“strict”: true,
“esModuleInterop”: true,
“resolveJsonModule”: true
}
}
Next, install additional dependencies:
Then, update the command in package.json to “start”: “nodemon –watch ‘src/**/*.ts’ –exec “ts-node” src/app.ts”.
Finally, save src/app.ts with the following content:
const app = new App({
socketMode: true,
token: process.env.SLACK_BOT_TOKEN,
appToken: process.env.SLACK_APP_TOKEN,
logLevel: LogLevel.DEBUG,
});
app.command(“/hello-sandbox“, async ({ ack }) => {
await ack(“Hello!“);
});
;(async () => {
await app.start();
console.log(“⚡️ Bolt app is running!“);
})();
If configured correctly, it should work similarly. Also, try changing the code and verifying that it gets reflected.
Benefits of using CLI + sandboxes
The real joy of using Slack CLI begins here.
No longer do you need to access https://api.slack.com/apps, make app configuration changes, reinstall, and go through that hassle.
Let’s rewrite and save manifest.json with the following content:
“display_information”: {
“name”: “Hello”,
“description”: “You can update this later”,
“background_color”: “#4361ba”,
“long_description”: “”
},
“features”: {
“app_home”: {
“home_tab_enabled”: false,
“messages_tab_enabled”: false,
“messages_tab_read_only_enabled”: true
},
“bot_user”: {
“display_name”: “Hello Bot”,
“always_online”: true
}
},
“oauth_config”: {
“scopes”: {
“bot”: [“commands”, “chat:write”, “app_mentions:read”]
}
},
“settings”: {
“interactivity”: { “is_enabled”: true },
“event_subscriptions”: {
“bot_events”: [“app_mention”]
},
“org_deploy_enabled”: true,
“socket_mode_enabled”: true
},
“outgoing_domains”: []
}
When you save the file, Slack CLI will automatically reflect these changes in the metadata managed by Slack’s servers.
The slash command you were using earlier will disappear from the workspace, and instead, this app will be able to receive events, which can be delivered when a user mentions your app’s bot.
Please add the following code to the src/app.ts file that you added earlier. This change should also be automatically reflected by nodemon.
await say(“Hi!“);
});
For testing, invite @Hello Bot (local) to a channel and mention it. If you receive a response saying “Hi!”, then it’s successful! 🎉
Wrap up
You should now understand how easy it is to get started and develop smoothly.
For production, if you’re using Socket Mode, it’s a good idea to prepare a Dockerfile for deployment (you won’t need nodemon in that case).
For setting up manifest.json, please refer to the following page. Note that if it’s in YAML format, it won’t be loaded with CLI integration, so be sure to specify it in JSON format.
https://api.slack.com/reference/manifests
You might wonder, “Can I use this with runtimes/languages other than Node.js or Python?” Technically, it’s possible, but it might require a bit more effort to get it up and running. I hope to cover this in another article someday.
That’s all for now!

