
This article covers creating a Riot Snackbar component, using the Material Design CSS BeerCSS, and executing an action on input and select events.
Before starting, make sure you have a base application running, or read my previous article Setup Riot + BeerCSS + Vite.
These articles form a series focusing on RiotJS paired with BeerCSS, designed to guide you through creating components and mastering best practices for building production-ready applications. I assume you have a foundational understanding of Riot; however, feel free to refer to the documentation if needed: https://riot.js.org/documentation/
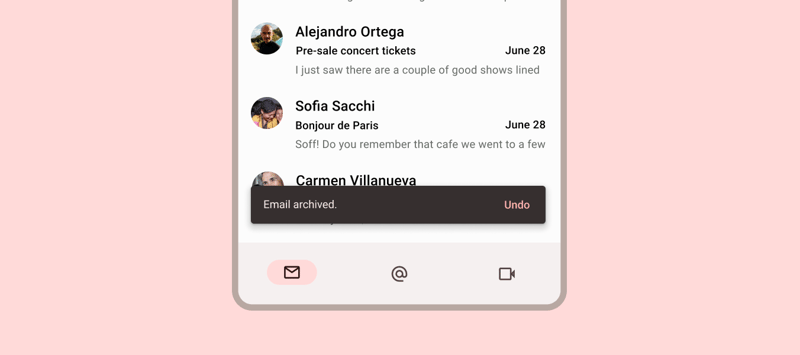
Snackbars communicate messages at the bottom of the screen, that are minimally interruptive and don’t require user action. They can contain a single action, such as “Undo”, “Open”, or “Learn more”.
Snackbar Component Base
The goal is to create a Riot app with a Snackbar appearing when a button is clicked, and dismissing it automatically when the action is clicked.
First, create a new file named c-snackbar.riot under the components folder. The c- stands for “component”, a helpful naming convention and a good practice.
Write the following code in ./components/c-snackbar.riot. The HTML comes from the BeerCSS documentation and I added RiotJS syntax for the logic:
<div class=“
snackbar
{ props?.active ? ‘active ‘ : null }
{ props?.top ? ‘top ‘ : null }
{ props?.bottom ? ‘bottom ‘ : null }
{ props?.error ? ‘error ‘ : null }
{ props?.primary ? ‘primary ‘ : null }
{ props?.secondary ? ‘secondary ‘ : null }
{ props?.tertiary ? ‘tertiary ‘ : null }
“>
<i if={ props?.icon }>{props.icon}</i>
<span class=“max”><slot></slot></span>
<a if={ props?.action } onclick={ clicked } class=“inverse-link”>{ props?.action }</a>
</div>
<script>
export default {
clicked (e) {
e.preventDefault();
e.stopPropagation();
this.root.dispatchEvent(new Event(“action“));
}
}
</script>
</c-snackbar>
Source Code: https://github.com/steevepay/riot-beercss/blob/main/components/c-snackbar.riot
Let’s break down the code:
The <c-snackbar> and </c-snackbar> define a custom root tag, with the same name as the file. You must write it; otherwise, it may create unexpected results. Using the <div></div> as a root tag or redefining native HTML tags is a bad practice, starting with c- is a good convention.
The message is passed as Slot tag <slot></slot>, a Riot.js core feature to inject custom HTML templates in a child component from its parent. In our case, only a String is injected, without HTML.
Snackbars can display a single text button that lets users take action on a process performed by the app: If the attribute props.action exists, the message as String is printed inside the action button.
When the action button is clicked: The event click is caught and executes the function clicked to emit a custom event named action.
For displaying the snackbar, it must contain the active class: when the attribute props.active, it adds the class active thanks to the expression: { props?.active ? ‘active ‘ : null }.
Different styles are available for the component, for instance, primary is applied if the props?.primary exists and is true.
Finally, load and instantiate the c-snackbar.riot in a front page named index.riot:
<div style=“width:600px;padding:20px;”>
<c-button onclick={ () => openSnack(“default”) } inverse={ true }>Default</c-button>
<c-button onclick={ () => openSnack(“error”) } error={ true }>Error</c-button>
<c-button onclick={ () => openSnack(“primary”) } primary={ true }>Primary</c-button>
<c-snackbar
active={ state.active }
onaction={ close }
error={ state.error }
icon={ state.icon }
action={ state.action }
primary={ state.primary }
>
{ state.message }
</c-snackbar>
</div>
<script>
import cButton from “../components/c-button.riot“
import cSnackbar from “../components/c-snackbar.riot“
export default {
components: {
cSnackbar,
cButton
},
state: {
active: false,
icon: null,
message: null,
error: null,
timeout: null
},
openSnack(type) {
if (this.state.active === true) {
return;
}
this.update({
active: true,
message: type === ‘error‘ ? “Something went wrong.“ : “Email Archived.“,
action: type === ‘error‘ ? “Contact Support“ : “Undo“,
icon: type === ‘error‘ ? ‘error‘ : ‘check‘,
error: type === ‘error‘,
primary: type === ‘primary‘
})
clearTimeout(this.state.timeout)
this.state.timeout = setTimeout(() => {
this.update({ active: false })
}, 3000)
this.update();
},
close () {
this.update({ active: false })
}
}
</script>
</index-riot>
Source Code: https://github.com/steevepay/riot-beercss/blob/main/examples/index.snackbar.riot
Code details:
The component is imported with import cSnackbar from “./components/c-snackbar.riot”; then loaded in the components:{} Riot object. A custom Button Riot component is also loaded into the page: when a click happen, it will show the toaster with a custom message!
The snackbar component is instantiated with <c-snackbar /> on the HTML.
The component’s state, such as active, is stored in the state:{} Riot object under the state.active Boolean property. The property is passed as an attribute, such as: <c-snackbar active={ state.active } />. To make the toaster fully interactive, further states are stored: the message, the icon and the action label.
When a Button is clicked, the function openSnack is executed thanks to onclick={ () => openSnack(“default”) }. A type is passed as first argument to select the type of snackbar, the message, the icon and the action. At the end, the toaster is displayed by updating state.active to true.
To make the toaster disappear automatically, a timeout is created to hide the Snackbar by updating state.active to false after 2s.
The custom Event action is watched with onaction: if a click fires the Snackbar’ action, the function close updates state.active to dismiss it.
Snackbar Component Testing
It exists two methods for testing the Snackbar component, and it is covered in two different articles:
Test with Vitest and Riot-SSR in a Node Environment
Test with Vitest in a JsDom Environment
Conclusion
Voilà 🎉 We made a Snackbar Riot Component using Material Design elements with BeerCSS.
The source code of the Snackbar bar is available on Github:
https://github.com/steevepay/riot-beercss/blob/main/components/c-snackbar.riot
Have a great day! Cheers 🍻


