
In this blog we will be exploring some aspects of the Microsoft Azure service Virtual Machine Scale Set, (VMSS) and it role in the scaling virtual machines.
The basic information we will be going through in this post on Virtual Machine Scale Set:
What are Virtual Machine Scale Set (VMSS)?
Orchestration Modes
Scaling Modes highlighting their differences.
Scale-in policy configuration.
Load balancer is and at what point do we need to enable a load balancer.
Create a basic Virtual Machine Scale Set.
What are Virtual Machine Scale Set (VMSS)?
Azure Virtual Machine Scale Set is a service they offer that allows you to create and manage a group of load balanced Virtual Machines (VMs). The number of Virtual Machines can automatically increase and decrease in response to demand or based on a defined schedule. It is a great choice for applications that are required to run across many VMs while maintaining consistent configurations and high availability.
The Benefits of VMSS are as highlighted below:
Easy Management: You can maintain a consistent configuration across your environment for reliable performance of your application, using the same base Operating System (OS) image and configuration.
High Availability: It distributes your Virtual Machines (VMs) across fault domains within an Azure region or Availability Zone
Automatic Scaling: you can scale your application as the demand of your resources change.
Large-Scale Support: Supports up to 1000 Virtual Machines
To get more information on VMSS you can check these links below:
VMSS, VMSS Management, VMSS Zonal Expansion, VMSS Design
Orchestration Modes
Cloud orchestration is the process of automating the tasks needed to manage connection and operations of workloads. In Microsoft Azure provides two orchestration modes for Virtual Machine Scale Set (VMSS) as listed below.
Uniform Orchestration Mode which is the traditional way of managing Virtual Machines in a scale set. It has the following characteristics:
It manages and deploys Virtual Machines (VMs) that are identical in configurations.
It does not support standard Azure Infrastructure as a Services (IaaS) Virtual Machine (VM) API commands.
It provides fault domain high availability guarantees when configured with fewer than 100 Virtual Machines (VMs) instances.
Flexible Orchestration Mode in contrast offers a more diverse Virtual Machines (VMs) that is identical or multiple configuration setup within the same scale set. This is useful for more complex applications that require different VM sizes. Some more characteristics:
Virtual Machines (VMs) can be of different types.
It supports standard Azure Infrastructure as a Services (IaaS) Virtual Machine (VM) API commands.
It also supports a mix and match Virtual Machines with varying configurations, size and roles.
provides fault domain high availability guarantees when configured with up to 1000 Virtual Machines (VMs) instances.
Scaling Modes
Before we get to the scaling modes lets get to know what scaling means in Azure. Scaling is the adjusting capacity of your resources to meet changes in demands. There are two primary scaling modes.
Vertical Scaling: adjusting the capacity of a single resource such as VM size and
Horizontal Scaling: adding or removing instances of a resource to handle varying workloads.
Scaling can be done automatically it is a mechanism called Autoscaling.
Autoscaling In Virtual Machine Scale Sets
Autoscaling is a mechanism for Horizontal Scaling making it easier to manage resource allocation. Autoscaling mechanism in VMSS that automatically adjusts the number of Virtual Machine (VM) instances that is, dynamically increase or decrease the number of VMs to handle varying workloads without manual intervention, based on demand or predefined rules.
The benefit of Autoscaling is it ensures that your applications handle varying loads efficiently while maintaining high availability and optimizing the cost.
There two autoscaling options which are and
Scheduled Autoscale allow you to scale the number of virtual machine (VM) instances at specific times that you schedule and
Metrics Autoscale allow you to scale the number of virtual machine instances based on available metrics.
There are policies that are used to guide how they perform these actions. They are the
Scale-out is the process of adding extra resources, such as virtual machines (VMs), to a Microsoft Azure Virtual Machine Scale Set (VMSS) to manage an increase in demand for your application.
Scale-in refers to the process of reducing the number of virtual machines (VMs) in the scale set. Scale-in is often triggered when resource demand falls, and the system no longer requires the same level of capacity.
Kindly take note of Flexible orchestration does not explicitly define a default Scale-In Policy like the Uniform Orchestration mode. However, you can still manage individual VM instances using standard Azure IaaS VM APIs instead of relying solely on the scale set interface. This flexibility allows you to customize scale-in behaviour based on your workload requirements.
Load Balancer
A load balancer in a cloud service such as Azure is a practice of evenly distributing traffic, workloads, and client requests across multiple servers or resources. It is a feature in Virtual Machine Scale Sets (VMSS) that can be setup to work on the backend of server and client devices. As requests are received, the load balancer distributes them to available servers based on an algorithm. It has a lot of benefits such as improved performance, greater reliability, reduced cost, reduced latency, improved flexibility and much more.
This a feature that you should configure right from the setup of your Virtual Machine Scale Set (VMSS) under the network tab.
Here are some more resources to learn more Cloud Orchestration, Cloud Orchestration 1, Cloud Orchestration 2, VMSS Orchestration modes,
Now that we have a basic understanding of Virtual Machine Scale Set (VMSS) lets go ahead to create one. Follow the steps below.
Prerequisite
First thing login to your Microsoft Azure Portal by going to https://portal.azure.com.
If you do not have an azure account sign up and create an account for free with this link https://azure.microsoft.com/en-us/free/. Registration will require a phone number and a debit or credit card details to validate your account even for the free account. You have a choice between the free or pay as you go account.
Once you are logged in let’s begin!
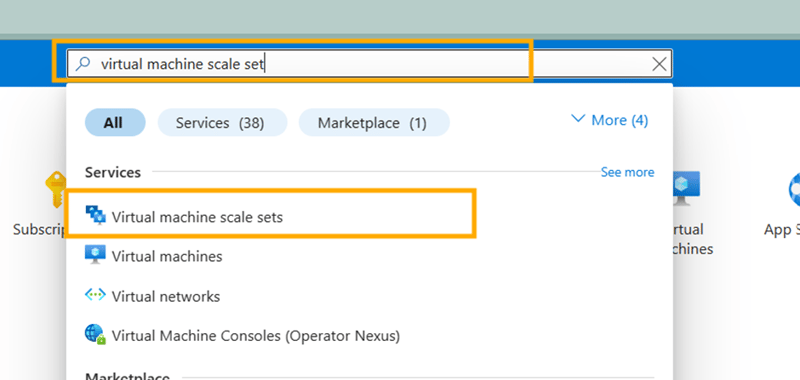
Step 1: Search for Virtual Machine Scale Set (VMSS) in the search bar at the top of your portal page and Select Virtual Machines Scale Set.
Step 2: Select Create **and select **Virtual Machines Scale Set. (There is a create button at the centre of your portal and another towards the top left side of your screen both function similarly)
You are now in the Create Virtual Machines Scale Set page. We will be working primarily under the Basics **tab and starting with **Project details.
Step 3: Project details
Subscription: Choose your subscription. Here we will be using the default Azure subscription, if you have others, you can select another.
Resource group: Select Create new and type a name or if you have one already select it and click OK.
Step 4: Instance details
Virtual Machines Scale Set name: Give your VMSS a name and it should be unique throughout the Azure network.
Region: Select a location you want your VMSS, from the dropdown menu. [ A region is the geographical location with data centres that host services and infrastructures, with each operating independently and self-contained]
Availability zone: Select the zone or zones you would like your VMSS to be located from the drop-down menu. [Each Region in Azure can consist of more than one Availability zone. Each zone are kilometres apart and independent of each other to minimize the impact of failures and disruptions. Multiple zones can be selected each having their own Virtual machine]
Step 5: Orchestration
Orchestration mode: for this exercise I will be selecting Flexible.
Step 6: Scaling
Scaling mode: select Autoscaling, once this is selected Scaling configuration options appears, click on Configure.
2 Scaling configuration
i. Scaling conditions: Click on the pen icon towards the right of the screen, which is the edit button. This is to add a scaling condition, there is a default created by Azure already which you can adjust to suit your needs.
ii. Add a scaling condition: you can go ahead to customise your scaling conditions.
Condition Name: Give it a name or leave as default.
Initial instance count: this determines the number of instances your VMSS starts with
Instance limit: you determine Minimum Number of instances you can scale down to and Maximum Number of instances you can scale up to
Scale out: this is where you determine the conditions when your number of instances increases, based on CPU threshold and by how much your instance increases by.
Scale in this is where you determine the conditions when your number of instances should be decrease, based on CPU threshold and by how much your instance decrease by.
We will be leaving all configuration at their default as seen below and click save below.
You are back to Scaling conditions and click Save on the bottom left of your screen.
Step 7: Instance details
Image: Select an image from the drop-down menu, in this exercise we will be using ubuntu Server 22.04 LTS
Size: Select the size from the drop-down menu
Step 8: Administrator account
Authentication type: There are two options to choose from SSH public key or Password. In this blog post we will be selecting Password.
Username: Name your administrator account
Password: type your password and confirm the password
Click Next: Spot when done
Leave the Spot *tab in default and click next to get to the **Disk * tab you can make changes to the OS disk by changing the **OS disk size and OS disk type but I will be leaving it on default and clicking next to get to the **Networking **tab.
Step 9: Networking
In this tab we will be going to the Load balancing section and from the options in Load balancing options we will select Azure load balancer. Once selected a new section pops up called Select a load balancer click Create a load balancer.
A new menu comes up enter a name for your load balancer and live the rest on their default setting and click **Create **below.
Once you have done click on Next: Management below to get to the Management tab. For this exercise we will leave Management, Health, Advanced and Tags tabs on their default configurations. Then click Review + Create.
Step 10: Review + Create
Once you get the Validation Passed message click on Create below.
You get a Deployment is in progress massage this will take a few minutes, once this is done you can now click on the go to resource option.
This is now a newly deployed a basic Virtual Machine Scale Set (VMSS) is ready and available with two instances already running which was the default scaling condition we left it as all the way in Step 6: 2.
Click on the Instance menu on the left-hand side of the screen to see the details of the two instances.
Hope this blog helped you understand the basics of Virtual Machine Scale Set (VMSS) and how to deploy a very simple VMSS in Microsoft Azure. Lets keep learning together, thank you for reading.


