
Abstract
In this short article, we’ll see how to create vector embeddings using R and OpenAI. We’ll also store the embeddings in SingleStore. R is not officially supported by OpenAI, but a community library provides access to the API.
The notebook file used in this article is available on GitHub.
Create a SingleStore Cloud account
A previous article showed the steps to create a free SingleStore Cloud account. We’ll use the following settings:
Workspace Group Name: R Demo Group
Cloud Provider: AWS
Region: US East 1 (N. Virginia)
Workspace Name: r-demo
Size: S-00
Create a new notebook
From the left navigation pane in the cloud portal, we’ll select Develop > Notebooks.
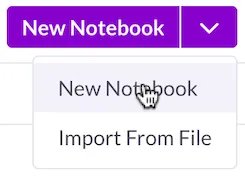
In the top right of the web page, we’ll select New Notebook > New Notebook, as shown in Figure 1.
Figure 1. New Notebook.
We’ll call the notebook r_openai_demo, select a Blank notebook template from the available options, and save it in the Personal location.
Create a database and table
In our SingleStore Cloud account, let’s use the SQL Editor to create a new database and table. We’ll call these r_demo and articles, respectively, as follows:
CREATE DATABASE IF NOT EXISTS r_demo;
USE r_demo;
CREATE TABLE IF NOT EXISTS articles (
id SMALLINT,
text TEXT,
vector VECTOR(1536) NOT NULL
);
Fill out the notebook
First, let’s install the R kernel and some other packages we need for this article:
Next, we need to change the kernel. Refreshing the page will help the notebook detect any changes, including the installation of a new kernel.
In the top right, we can see that Python is currently selected, as shown in Figure 2.
Figure 2. Python 3 (ipykernel).
Selecting Python 3 will present a box with a pull-down as shown in Figure 3.
Figure 3. Select Kernel.
Clicking the pull-down will show some options and R should be one of the options. We’ll choose R, as shown in Figure 4.
Figure 4. Select Kernel.
Next, we’ll click the Select button.
To connect to SingleStore, we’ll use JDBC, as follows:
This will also load DBI and rJava:
Loading required package: rJava
Next, we’ll download the SingleStore JDBC Client and save it in a jars directory:
driver_url <- “https://repo1.maven.org/maven2/com/singlestore/singlestore-jdbc-client/1.2.1/singlestore-jdbc-client-1.2.1.jar” # Set the JDBC driver class name
driver <- “com.singlestore.jdbc.Driver” # Local directory to save the driver file
local_dir <- “jars”
dir.create(local_dir, showWarnings = FALSE, recursive = TRUE) # Check if the driver file already exists
driver_file <- file.path(
local_dir,
“singlestore-jdbc-client-1.2.1.jar”
) if (!file.exists(driver_file)) {
# Download the JDBC driver file if it doesn’t exist
download.file(
driver_url,
destfile = driver_file,
mode = “wb”,
quiet = TRUE
)
} # Check if the driver file has been downloaded successfully
if (file.exists(driver_file)) {
print(“Driver file downloaded successfully”)
} else {
print(“Failed to download the driver file”)
}
Now we’ll create the connection details to SingleStore:
port <- 3306
database <- “r_demo”
user <- “admin”
password <- “<PASSWORD>” url <- paste0(“jdbc:singlestore://”, host, “:”, port, “/”, database)
Replace <HOST> and <PASSWORD> with the values for your environment. These values can be obtained from the workspace using Connect > SQL IDE.
We’ll now prepare the connection to SingleStore.
conn <- dbConnect(
drv = JDBC(driver, driver_file),
url = url,
user = user,
password = password
)
Next, we’ll install rgpt3:
and import some libraries:
library(rgpt3)
We’ll now enter and save our OpenAI Key:
openai_key <- readline(prompt = “OpenAI Key:”) # Specify the file path
file_path <- “access_key.txt” # Write the string to the file with a newline
writeLines(openai_key, file_path)
and check that it was saved correctly:
Next, we’ll load a built-in dataset:
We’ll select some text from the dataset and create OpenAI embeddings:
input = my_text,
model = “text-embedding-3-small”
)
Next, we’ll create a new DataFrame:
article <- data.frame(
id = travel_blog_data$n[1],
text = my_text,
vector = as.character(toJSON(my_embeddings))
)
and then write the DataFrame to SingleStore:
dbWriteTable(conn, “articles”, article, append = TRUE)
We’ll read the data back and check it, as follows:
article_from_db <- dbReadTable(conn, “articles”) # Print the summary of the DataFrame
str(article_from_db)
Example output:
$ id : num 1
$ text : chr “Title: Paws Across the UK: A Tail-Wagging Journey Through BritainnnAs someone who firmly believes that advent”| __truncated__
$ vector: chr “[0.0215000007,0.0126999998,0.0524000004,0.0340999998,-0.0328000002,-0.0188999996,-0.0214000009,0.0250000004,-0.”| __truncated__
We can also create embeddings for multiple rows, as follows:
input_var = travel_blog_data$gpt_content,
id_var = travel_blog_data$n,
param_model = “text-embedding-3-small”
)
Next, we’ll create a new DataFrame:
embeddings_json <- apply(multiple_embeddings[, 1:1536], 1, function(row) {
toJSON((row))
}) # Create the DataFrame with id and vector columns
articles <- data.frame(
id = multiple_embeddings$id,
vector = embeddings_json
) # Merge articles with travel_blog_data based on id and n columns
merged_data <- merge(articles, travel_blog_data[, c(“n”, “gpt_content”)], by.x = “id”, by.y = “n”, all.x = TRUE) # Update the articles DataFrame with the merged gpt_content
articles$text <- merged_data$gpt_content # Reorder the columns to match the database schema
articles <- articles[, c(“id”, “text”, “vector”)]
and then write the DataFrame to SingleStore:
dbWriteTable(conn, “articles”, articles, append = TRUE)
We’ll read the data back and check it, as follows:
articles_from_db <- dbReadTable(conn, “articles”) # Print the summary of the DataFrame
str(articles_from_db)
Example output:
$ id : num 10 7 4 6 2 1 9 8 3 5 …
$ text : chr “# A Tail-Wagging Tour: Roaming the UK on Four PawsnnAs a devoted dog parent, planning a trip that’s both exci”| __truncated__ “### Paws Across the UK: A Tail-Wagging Adventurenn#### IntroductionnHello fellow adventurers and animal love”| __truncated__ “**Paws Across the Pond: A Dog’s Journey Through the UK**nnEmbarking on an adventure across the United Kingdom”| __truncated__ “# A Tail-Wagging Tour: A Dog’s Journey Through the UKnn### Day 1: London CallingnnMy journey began in the b”| __truncated__ …
$ vector: chr “[0.0399999991,0.0186000001,0.0647,0.0353000015,-0.0469999984,-0.0313999988,-0.0147000002,0.0162000004,-0.012299″| __truncated__ “[0.0282000005,0.0137,0.0423999988,0.0421000011,-0.0549000017,-0.00639999984,-0.0324000008,0.0272000004,-0.00680″| __truncated__ “[0.0339000002,0.00939999986,0.0269000009,0.0445999987,-0.0397000015,-0.00779999979,-0.0337000005,0.0299999993,-“| __truncated__ “[0.0245999992,0.00980000012,0.0460000001,0.0223999992,-0.0593000017,-0.0110999998,-0.0113000004,-0.00400000019,”| __truncated__ …
There are 11 rows. One row was added earlier and 10 rows were added later.
Finally, we’ll close the JDBC connection:
dbDisconnect(conn)
Summary
In this short article, we’ve seen how to create vector embeddings using R and OpenAI. We’ve also seen how we can store and retrieve the vector embeddings using SingleStore.


