

Introduction to Auth0
Auth0 is a versatile plug-and-play solution for adding authentication and authorization services to your application. Your company may save the cost, effort, and risk associated with developing your own authentication and authorization solution.
When you build an application and you want to incorporate user authentication and authorization so that your users will be able to log in either with a username/password or with their social accounts (such as Microsoft Account).
Integrating the Auth0 with Azure Active Directory might be challenging, so I will cover the procedures to be followed when implementing the integration. There are numerous steps that are broken down below:
Configure App In Azure AD
Create The Client Secret In Azure AD
Configure API Permissions
Create Enterprise Connection In Auth0
Enable Enterprise Connection For Application
Testing
Configure App In Azure AD
By now you must have had an account registered in the Azure portal, navigate to Azure AD in the Azure Portal.
Click the “App Registrations” button in the side menu.
In Azure AD App Registrations, create a new App Registration.
You should now see the App Registration screen.
Enter the name for your application (you can change this later if you get it wrong).
Select “Accounts in this organizational directory only” (multi-tenant is beyond the scope of this article).
Configure redirect URI selecting “Web” and entering the callback URL https://{your-auth0-tenant}.auth0.com/login/callback (obviously, replace {your-auth0-tenant} with your Auth0 tenant name)
Click “Register”.
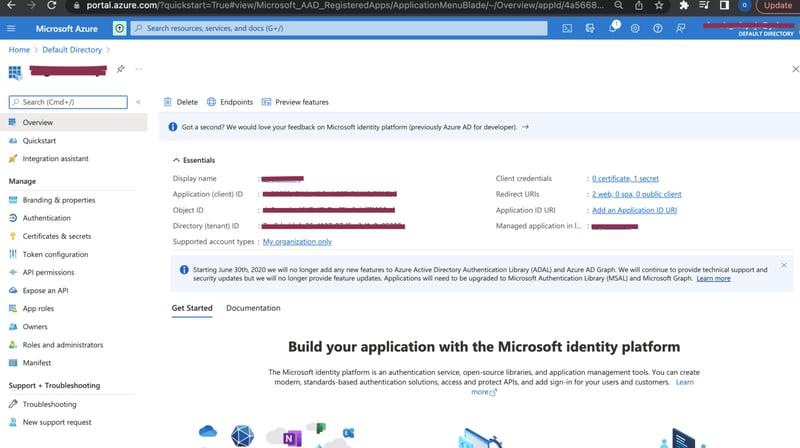
You should now see the newly created app Overview screen.
NOTE !! Copy the Application (client) ID from the overview screen of your newly created app registration, we’ll need this later.
Create The Client Secret In Azure AD
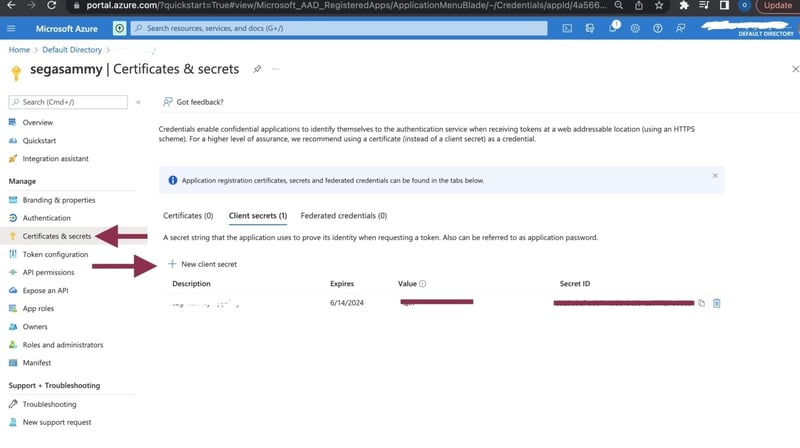
Select the “Certificates & Secrets” area from the App registration side menu
Click the “New client secret” button in the “Client secrets” section.
You should now see the Client Secret creation dialog
Enter the name for the description.
Select expiry “Custom” depending on preference.
Click the “Add” button.
You should now see the new client secret listed in the “Client secrets” section.
Configure API Permissions
We need to configure access to the MS Graph API for retrieving basic user profile and directory info. This will be done with delegated permissions which give access to the “User.Read” and directory.Read.All’ permissions.
On your App registration overview screen, click on the API permission
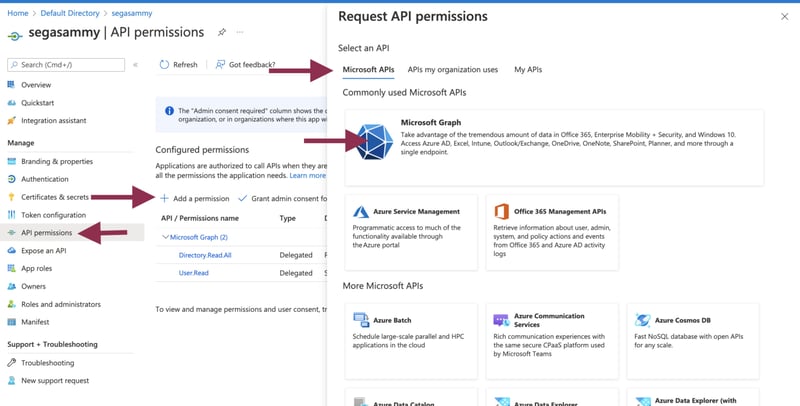
You should now see the API permissions screen, click on add permission.
On the Microsoft APIs, click on the Microsoft graph.
You should see that “Delegated” permission for “User.Read” is already configured by default. Also, follow the steps below to replace Directory.Read.All
In the search text field under the “Select Permissions” heading enter the text “Directory.Read.All’. Tick the checkbox next to the “Directory.Read.All” permission.
Click the “Add Permissions” button.
Create Enterprise Connection in Auth0
Here you have to be logged in to your Auth0 tenant control panel, and it is assumed you have an application running in the Auth0. We establish an enterprise connection in Auth0, to connect the Azure AD to the application in the Auth0 tenant.
Click on Authentication> Enterprise
Click the + button next to Azure AD
You should see the New Azure AD connection screen
Enter the connection name (Needs to be unique).
Enter the domain in the Microsoft Azure AD Domain field.
Enter your Azure AD app registration Application (client) ID and Client Secret (which is the value in the client secret). You should have saved these while creating your Azure App registration.
Leave everything else as a default
Click the “create” button
Enable Enterprise Connection For Application
Having created the Enterprise Connection you should be looking at the connection already. If not navigate to Connections> Enterprise> Microsoft Azure AD> Your-Enterprise-Connection.
Click the “Applications” tab in the main heading, click on your application and enable the toggle next to it.
Testing
Open Authentication> Enterprise> Microsoft Azure AD, click on the try button
You should be redirected to the Azure AD login screen
After Login, accept the permissions request (may not be shown depending on Azure AD config for granting permissions).
If successful you should see the “It Works!” Message.

