

It’s well-established that Discord is a great platform for Developer communities. What’s less established are clear, best practices on how to configure a server from scratch to best serve a community of devs. If you are a community manager or Discord moderator, this blog post aims to give you the definitive guide to getting a working server that will feel welcoming, resourceful, and intuitive for all your community members.
Configuring a top-tier server is not difficult at all, the Glasskube server is an example of a “less is more” approach. Having said that, we will explore some additional intermediate and advanced practices that might make sense for some use cases. Let’s not waste any more time and jump straight in.
Oh, By The Way
Glasskube officially launched in February and we aim to be the no-brainer, default solution for Kubernetes package management. Under no circumstances do we think this will be an easy undertaking but with your support, we can make it happen.
The best way to show your support is by starring us on GitHub ⭐
1. Don’t Reinvent the Wheel 🛞
As developers we spend a large amount of time working on challenging tasks and solving hard problems, Discord can be complex and a bit daunting as a beginner to the platform, but if you take away anything from this blog post it should be that you do not need to over-engineer your server for it to be highly effective.
Any community platform should have the following ingredients:
Clear lines of communication
Clearly document known or past bugs
Easy to navigate
Relevant and customizable to each community member
Safe from Bot attacks or raids
And if it’s fun, even better
Discord as a product has evolved immensely in the last few years allowing community managers to easily adapt the platform to the needs of their ecosystem.
Focus on applying some of the tips in this blog post to build an MVS (minimum viable server), there will always be time to pivot and add fancy features down the road. Let’s take each point one by one.
2. Establish Clear Lines of Communication 🗣️
Before creating your first channel, think to yourself, what brings a user to your server? Whether it’s product updates, open-source development, or job searching. Make sure those as the main channel lanes.
It’s always good to have a #general, catch-all channel and then a handful of other channels that might guide server members to more targeted conversations around troubleshooting bugs, asking for help, or even having off-topic conversations. If you see the need, consider dividing your channels into categories to give further context.
When a new member joins an overly complicated and cluttered server, it can be daunting to engage and integrate into the community. “Where do I even start?” – Me on most servers.
Simplifying the structure by focusing solely on essential channels, categories, roles, and resources is crucial. This approach creates a welcoming environment where newcomers can easily navigate and become active participants in the community.
3. Are you Into Role-Play? 📛
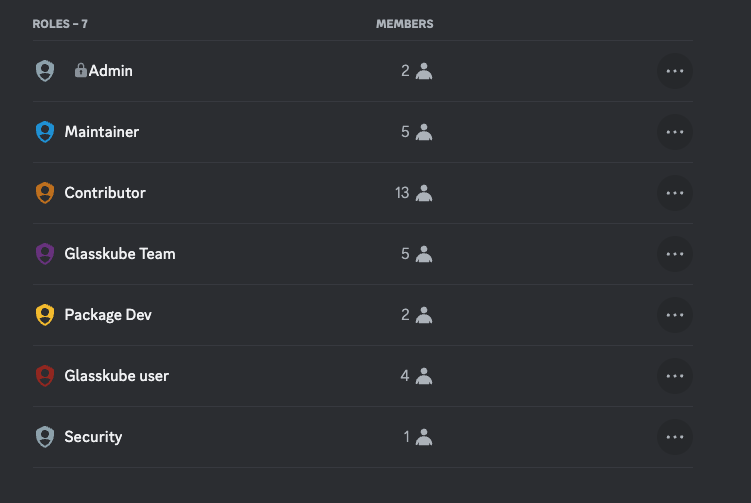
Nah, me neither, but they are useful on Discord. Roles are a great way to understand the different user profiles that make up your community and to assign custom permissions.
Most new members are shy and you might not want to force them to introduce themselves when they join. A good way around this is by assigning roles by asking onboarding questions. We will see how to do that in a bit.
Also, not every community member might have the same interests, roles can be used as a filtering system to direct the right people to the appropriate channels.
On the Glasskube Discord server, all members have access to all channels but in the intermediate steps, I’ll show you how to unlock channels based on different roles.
💡 Each Discord server has the default @everyone role. Use the principle of least privilege when configuring this role. Allow @everyone to view and interact in text channels and voice channels, but make sure no actions can be taken upon other members nor any management permission given either.
To add permissions to users, create roles and attach the roles to the user directly.
4. Enable the Community Feature ✅
If you’ve set up Discord servers in the past you more than likely used bots like “carl” bot for onboarding, role assignments, and moderation. No need for that now, let the Community feature take care of that for you.
This feature does 80% of the heavy lifting for you as a Discord Community Manager by combining security, member verification, and onboarding all in one. Just follow the instructions to set up:
1️⃣ Onboarding questions
2️⃣ Server guide
3️⃣ Safety guidelines
💡 To enable the community server feature, click on your Server name at the top right > Server settings > Community Overview > Activate.
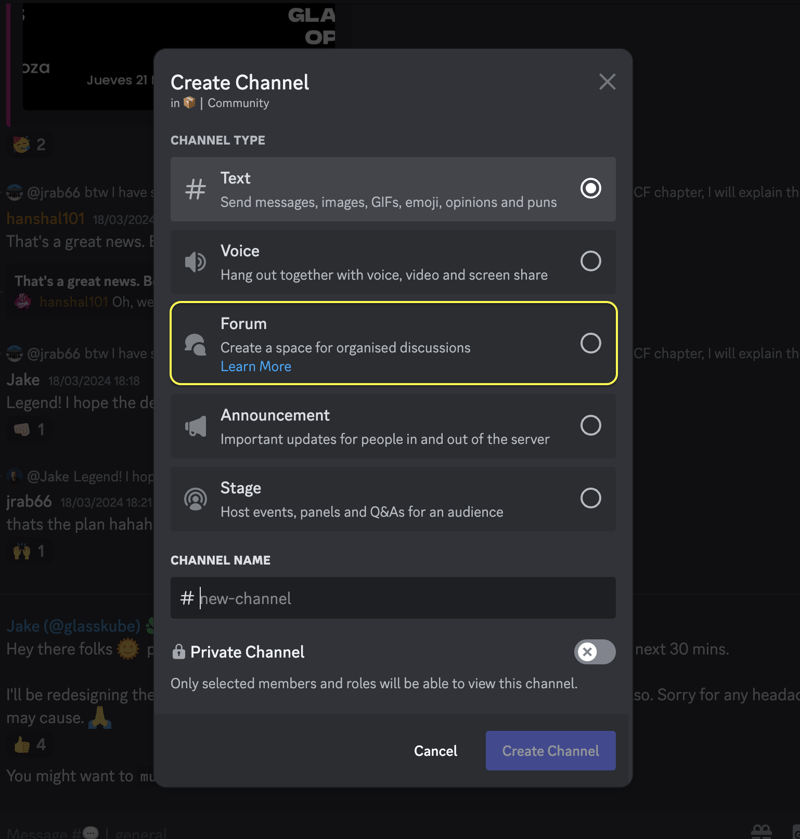
By enabling the Community feature you unblock additional channel types such as forums, stages, and announcements.
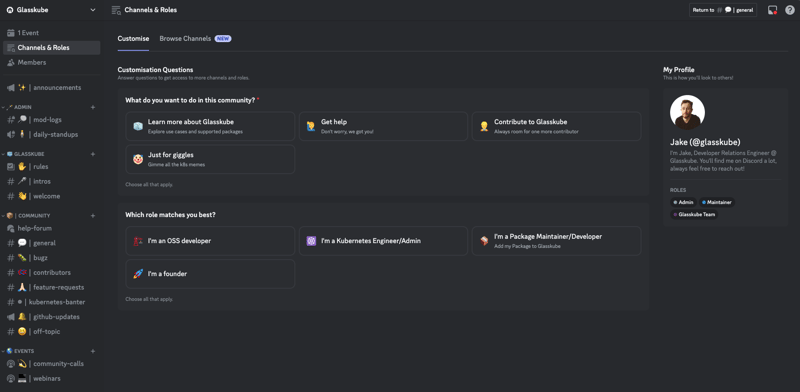
5. Have a Short but Effective Onboarding Process 👋
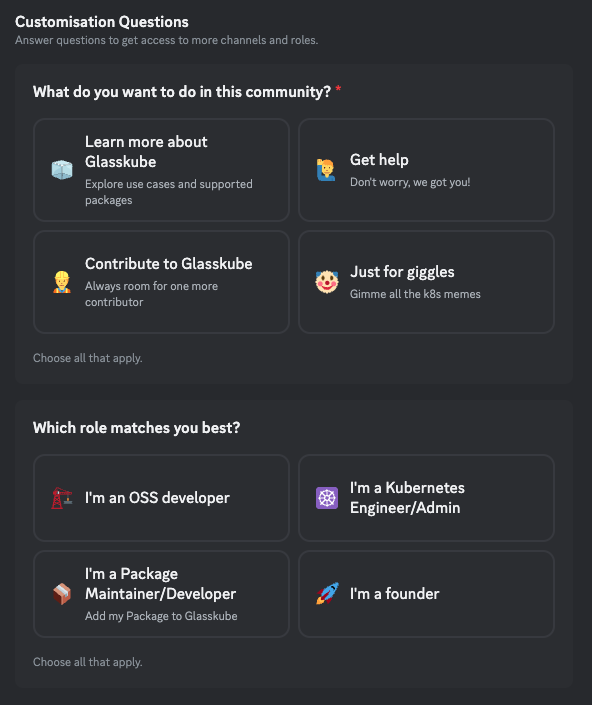
An onboarding process should serve two major functions, first of all, to get to know new members better, and second to let members know what they can find on your server.
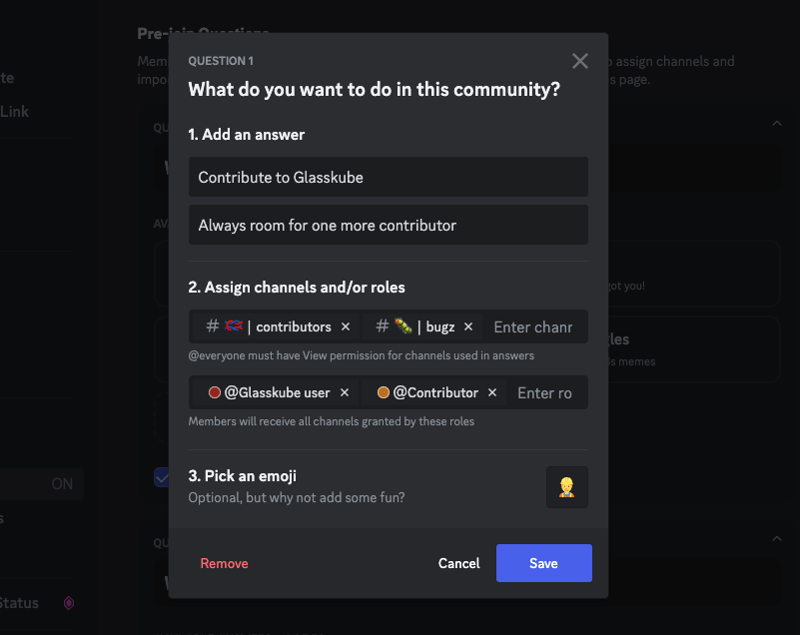
Customize the onboarding questions and answers to your liking, and assign roles or even channels to the user depending on the answer given.
Here are the two questions we ask new Glasskube community members.
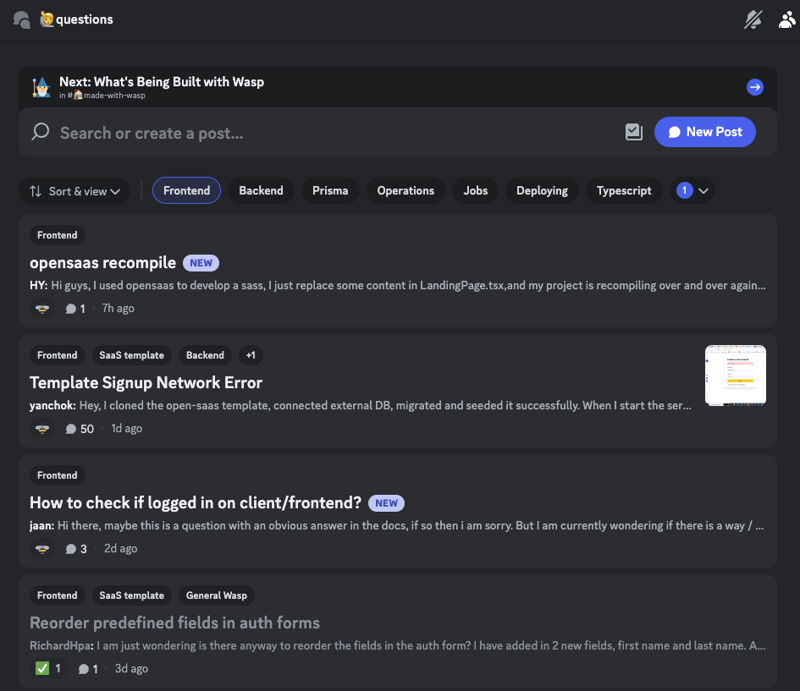
6. Structured Help and Support Forums 🆘
Don’t let questions asked in your community go to waste. Persist them in a centralized place so newcomers can learn from others’ past questions. The best way to do so is by using channel Forums.
They act as a useful supplement to the official project documentation. Many OSS software projects struggle to keep their documentation up to date and here is where the forums can lend a hand, by documenting and persisting conversations revolving around troubleshooting efforts. If new members pose questions that have already been answered in a forum, send the forum thread instead of resolving the same issue twice.
Check out the questions forum on the Wasp discord server, they are a great example of neatly, well-tagged questions that are a huge help to community members old and new.
💡 When setting up your forum section create useful and relevant tags and enforce their usage on each question so they can be easily filtered and contextualized when needed.
7. Keep the Announcements Coming 🎉
As a vibrant OSS project, you are probably releasing as much as possible and sharing community-relevant topics regularly. Make sure to have at least one Announcement channel and keep it up to date.
💡 Announcement channels, different from other channels can be subscribed to and viewed from outside your server. If you want to push updates to your channel followers make sure to click the “Share with followers! Publish” button once an announcement is shared.
Announcement channels accept webhook integrations making YouTube videos, live Twitch streams or Canny roadmap updates appear automatically.
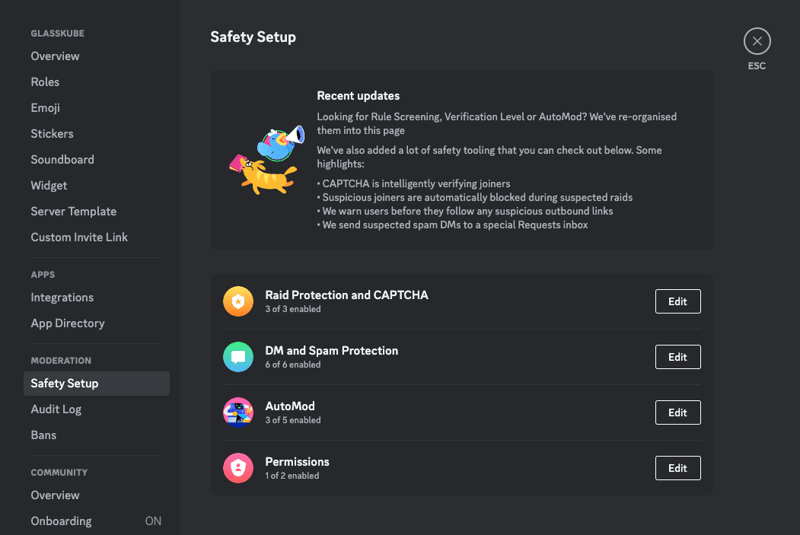
8. How to Avoid Raiding, Spam, and Nukes ⚠️
We have all seen spam and sometimes inappropriate messages and links to crypto scams on Discord servers before. Hopefully none of you will ever have to see a fully wiped server that suffered from a nuke attack.
In the past, you would lean on the healthy ecosystem of Discord bots which many of them had a generous free tier that would secure your server to a pretty high level.
Now, those third-party safety bots are just not needed, since Discord add many layers of Raid and Spam protection as well as some AutoModerator functions and easy to congure setting which you can set once and forget.
Once configured, Discord in the background with scan and vet each message, attachment, and new member as they join.
💡 In DM and Spam protection, you can choose the verification level. I like to set it to Medium which will only verify a member once they are part of the server for over 5 minutes. Therefore, weeding out potential bot traffic.
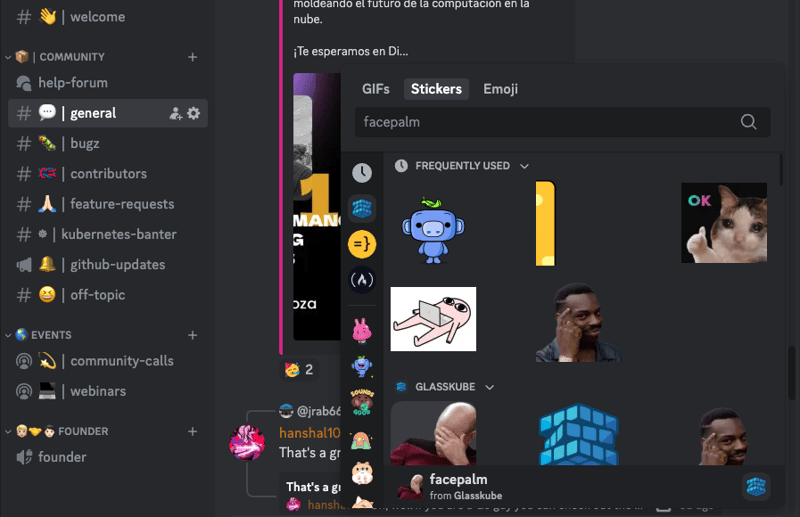
9. Adding Fun with Emojis and Stickers 🤣
It’s important to not be so serious and enjoy yourself too. Make sure to provide some inbuilt stickers and emojis that your community can relate to and use to express themselves.
Find some cool stickers here: https://stickers.gg/
Download enojis here: https://emoji.gg/
You can find the emoji and sticker settings in the Server settings section also.
What the Glasskube server looks like now, join us! 🧊
Having put all the tips mentioned above in practice this is what our Discord server looks like. If you feel like checking it out or becoming part of the community join us here.
10. Let’s Talk Intermediate and Advanced features 🤓
All of that seemed pretty straightforward, right? In case you are looking to get fancy, let’s explore a couple of intermediate and advanced features.
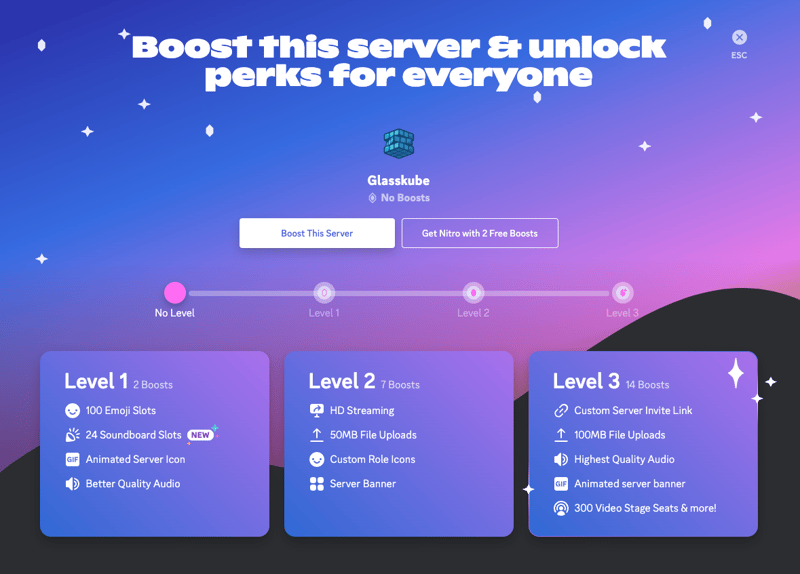
💡 Discord has a subscription plan which uses Nitro as currency, Nitro can be bought with fiat currency. By buying boosts you can unlock many features and add-ons, mainly cosmetic and image quality-related, but feel free to check them out.
Intermediate
It might be the case that over time your server grows and so do the number of channels. Since a large number of available channels can be disorientating for new members you can allow members to opt-in through additional onboarding questions.
💡 Note that even if you don’t answer the questions during onboarding you can always click on Channels and Roles in the top left-hand corner of the server to answer any onboarding questions to gain access to any locked channels.
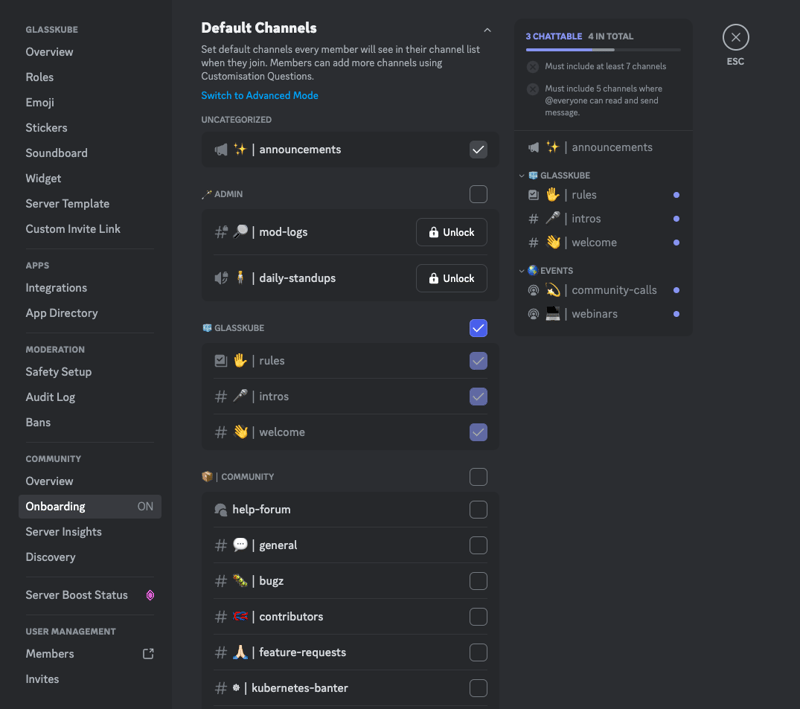
To get started, navigate to Server Settings> Community Onboarding > Default channels, and only select the channels you want all members to see.
Then edit the onboarding questions and unlock channels depending on the answer by adding the channel to part 2 Assign channels and/or roles
Advanced
Similarly, if you have a growing server with multiple announcement channels that you want to give granular access to. For example, if a user with the @contributor role only wants Glasskubee updates and not general Kubernetes updates you can gain this level of granularity by switching to Advanced mode in the Onboarding section of the Server settings page.
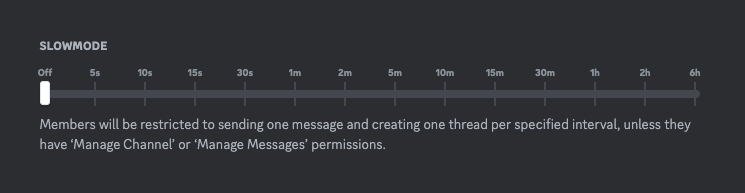
You can also be granular about the amount of time is needed for a new member to send a message in a particular channel by editing the Slowmode setting, under channel settings.
Let’s Wrap It Up
A community platform is a place that should be conducive to creativity, comradery, and collaboration. Of course, some rules and guidelines should be in place to keep the place welcoming and inclusive to all, but all in all the key takeaway is to not overthink or over-engineer your server.
Decide on some key roles, and key channels and resolve people’s issues in a centralized way with answers to questions easy to find and hopefully don’t always depend on your input.
A community is made up of individual connections to try to focus more on initiatives that will lead to open conversation and always try to acknowledge key community members when they deserve it.
If you like this sort of content and would like to see more of it, please consider supporting us by giving us a Star on GitHub 🙏
